Overview of the main new features in version 2.0.25 of the kitchen display and RESTOMAX cash register:
- KITCHENMAX EVOLUTION: New look, new design, new features!
- New ecosystem feature: Production units added to the cash register, kiosk, click & collect, and kitchen display
- New matrix layout: optimised button size
- Customised print layout: Create your own layouts for preparation tickets and bills.
- Some additional features:
Added a sound signal when an item is added to the basket from the matrix check-in.
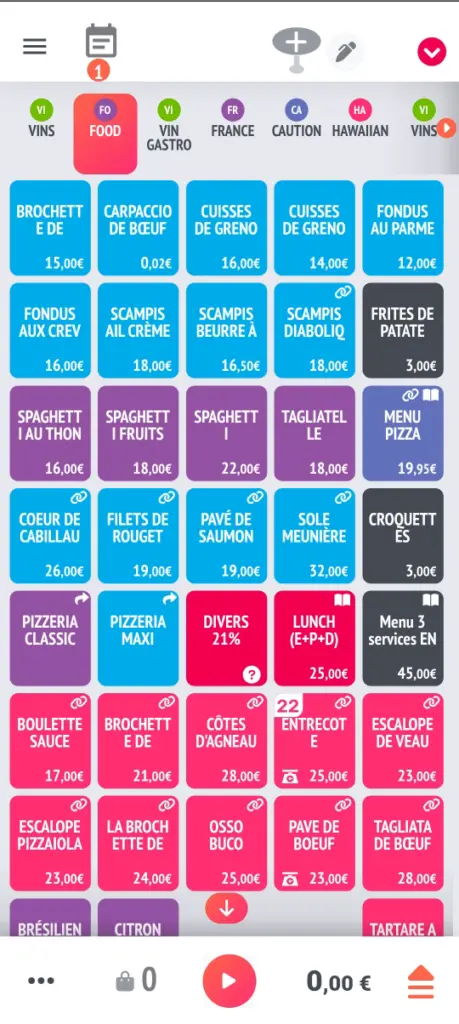
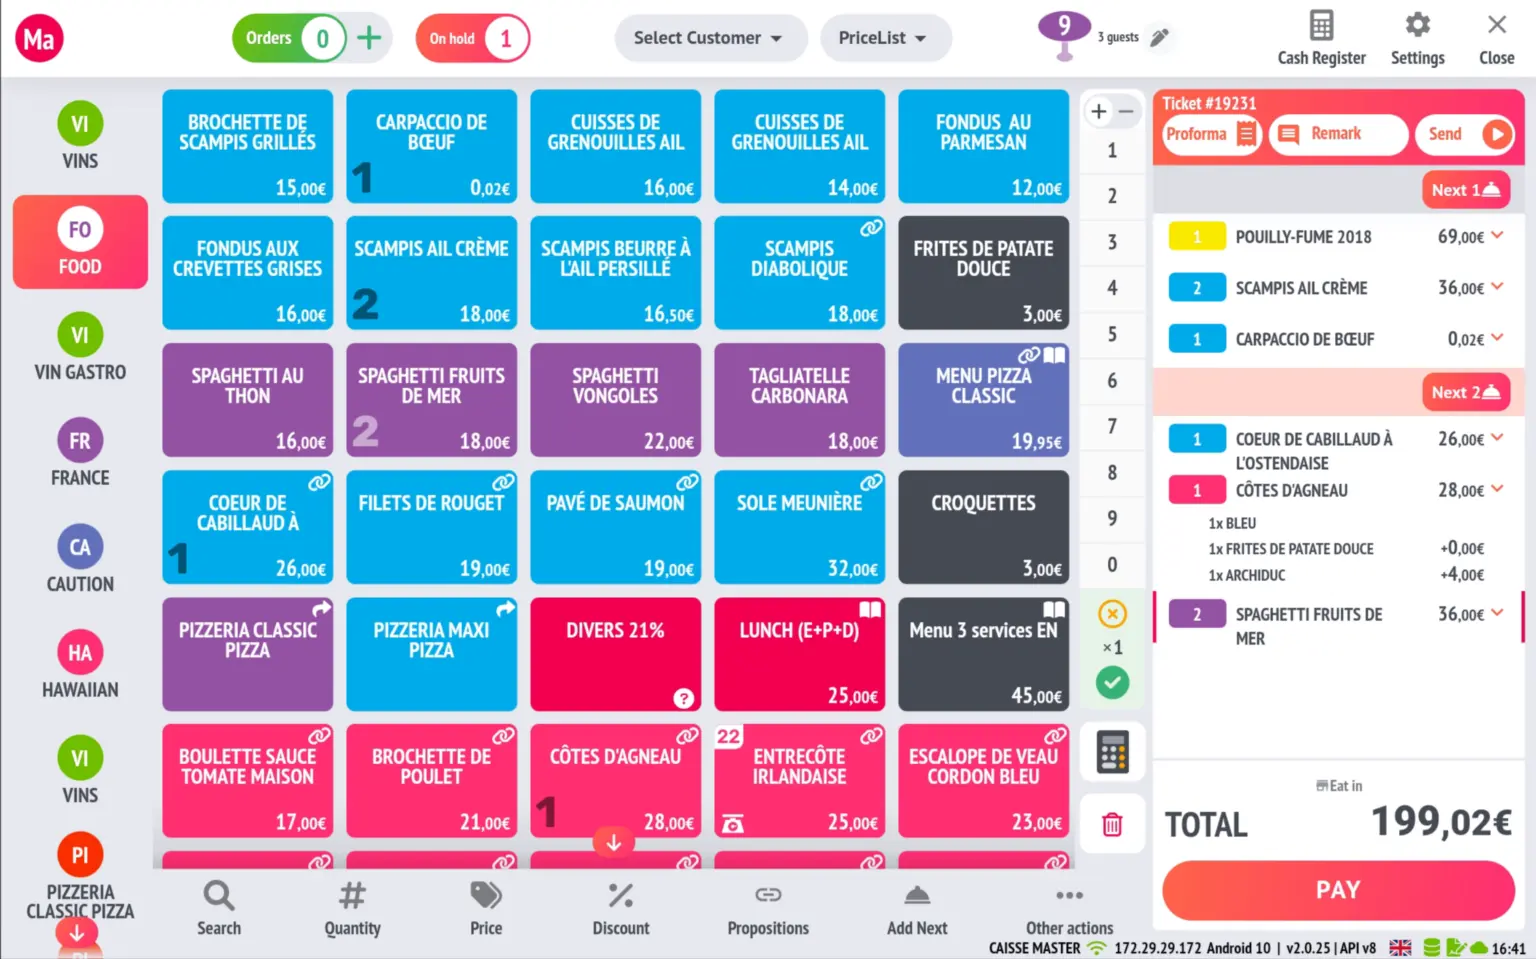
Added a number to the button representing the quantity of the item in the basket being edited
Option to choose the size of the matrix menu (small, medium, large)
Added user rights for table transfers and payment splits.
- Improvements made in version 2.0.26:
Added new settings in the POS regarding the display of text on matrix buttons.
KitchenMax Evolution
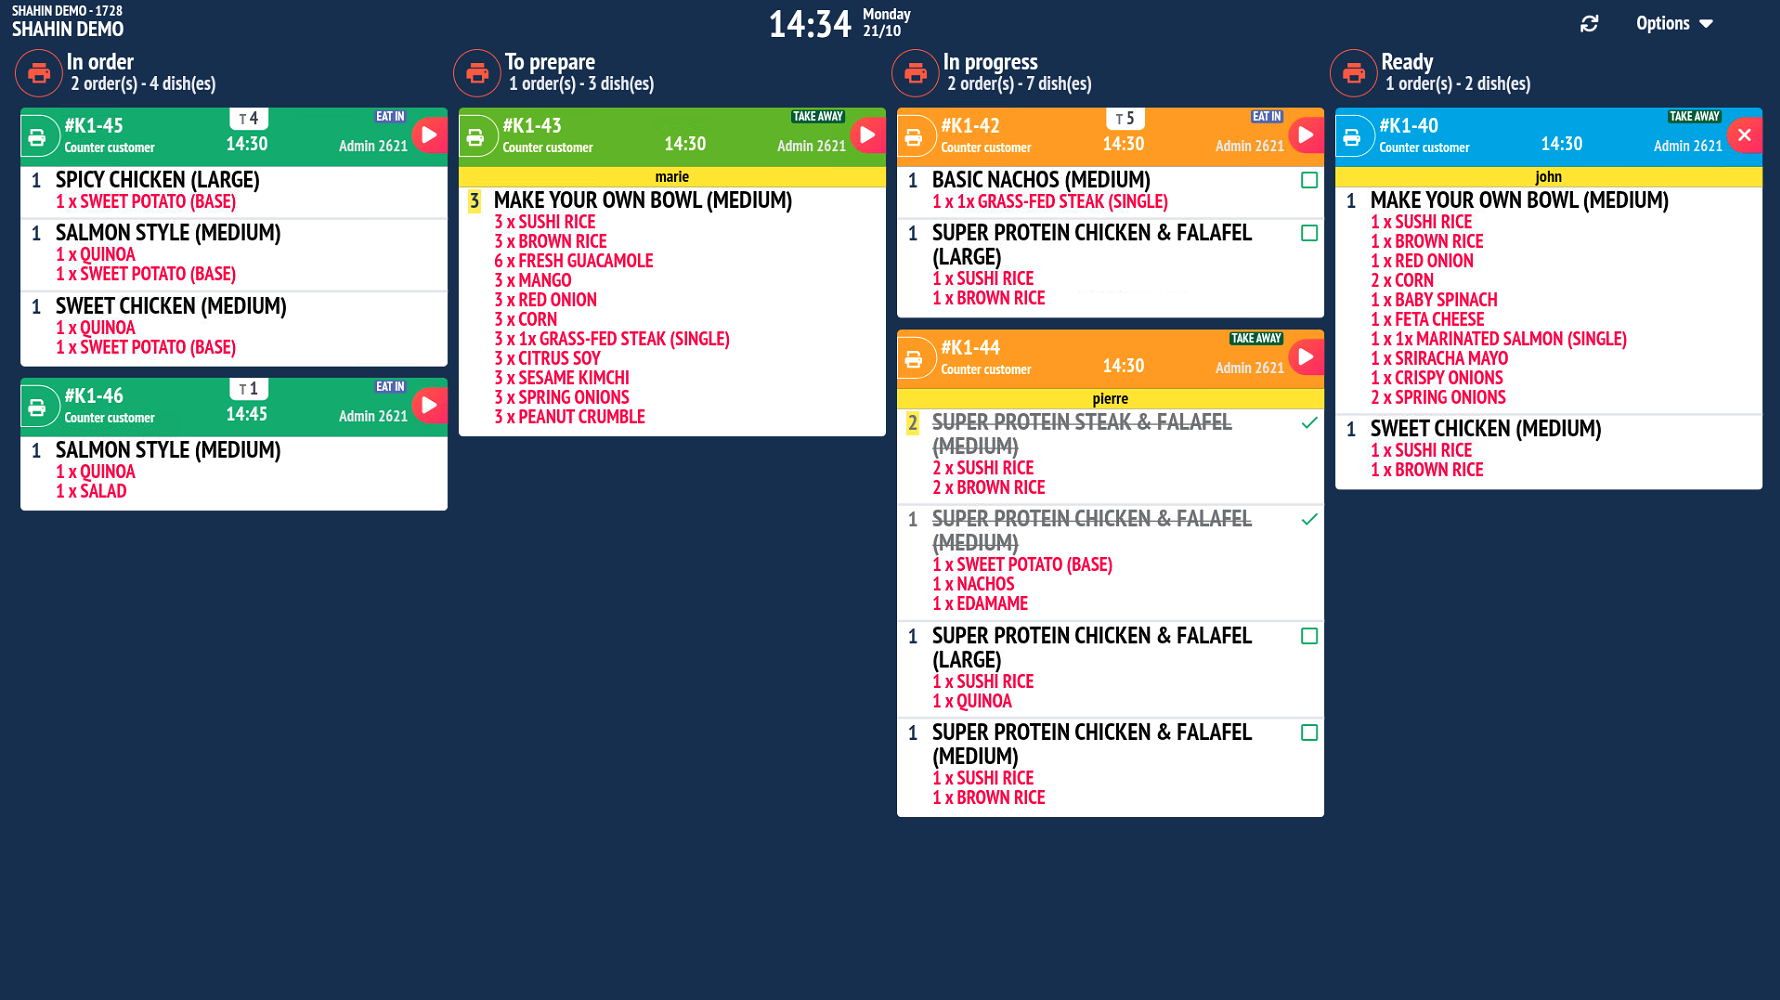
This new version of the Kitchen Display introduces a redesigned look with new features.
KAN BAN view redesign: The background has been modified, with a specific header colour for each status. The readability of tasks to be completed has also been improved.
New view added: A new feature allows you to switch to a view displaying tasks to be completed by time slot. A timeline is added to the right side of the screen, allowing you to navigate between different time slots throughout the day. At the top left, a status filter is available to view only tasks in the current time slot.
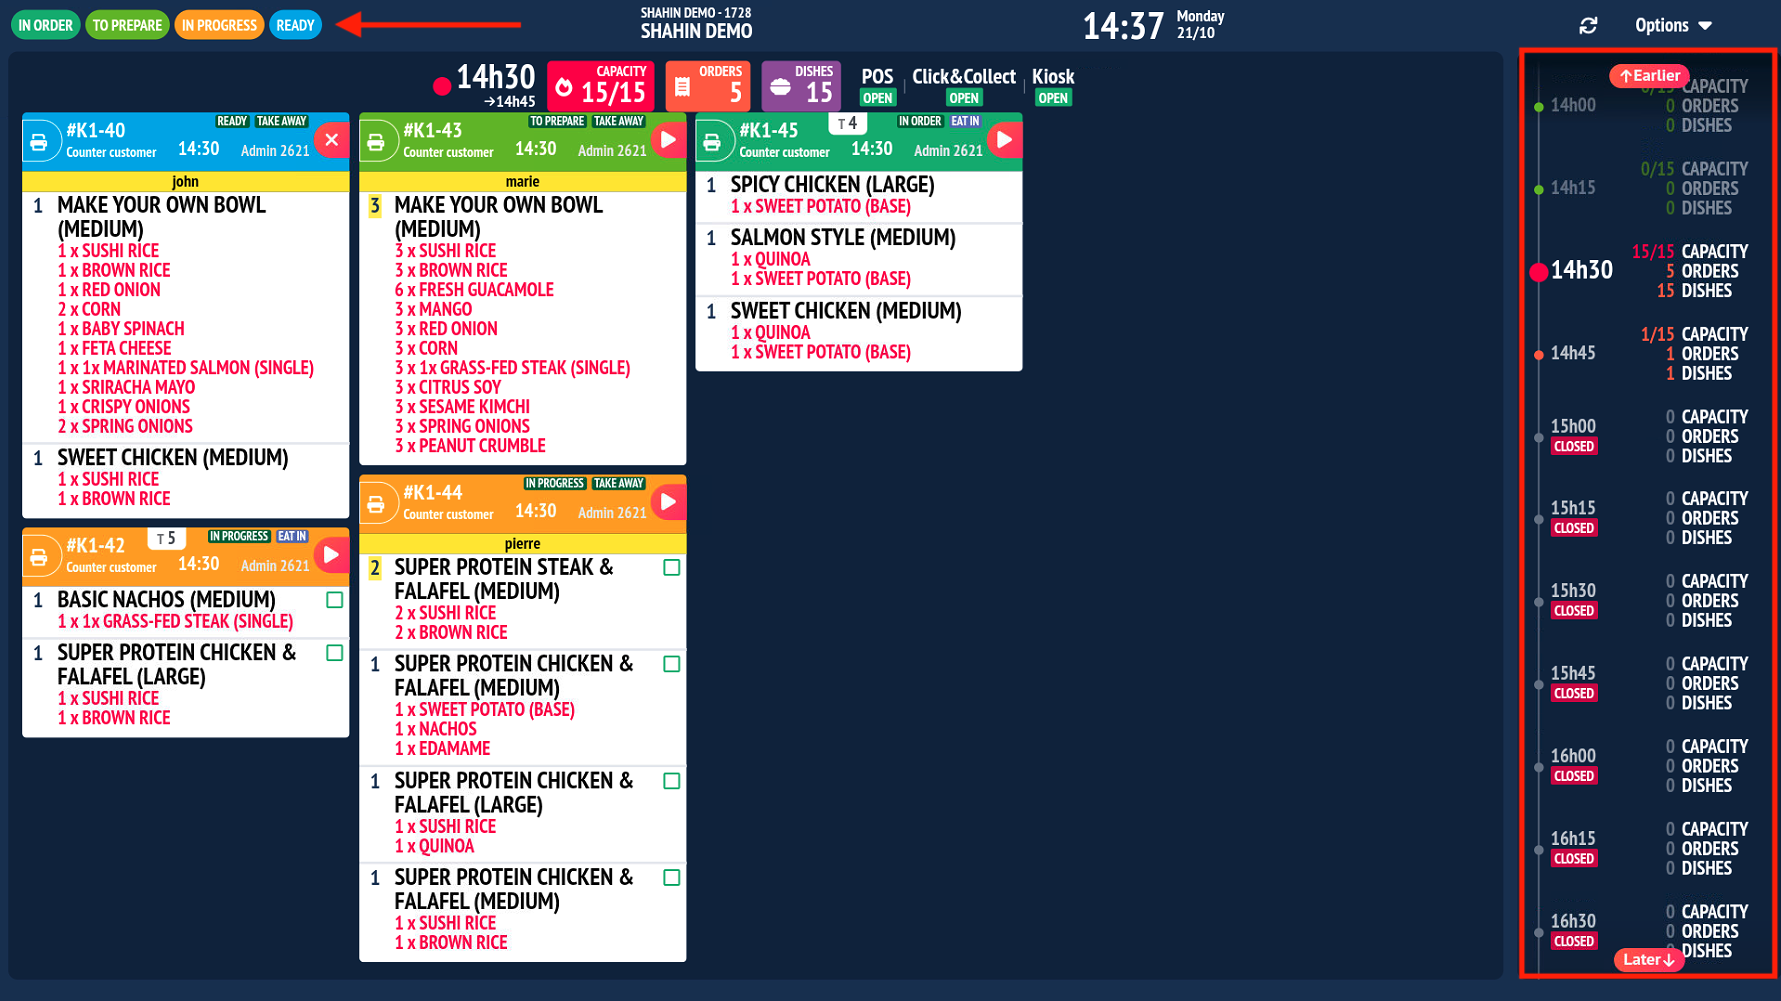
Options ➔ Settings ➔ Kitchen ➔ POS configuration 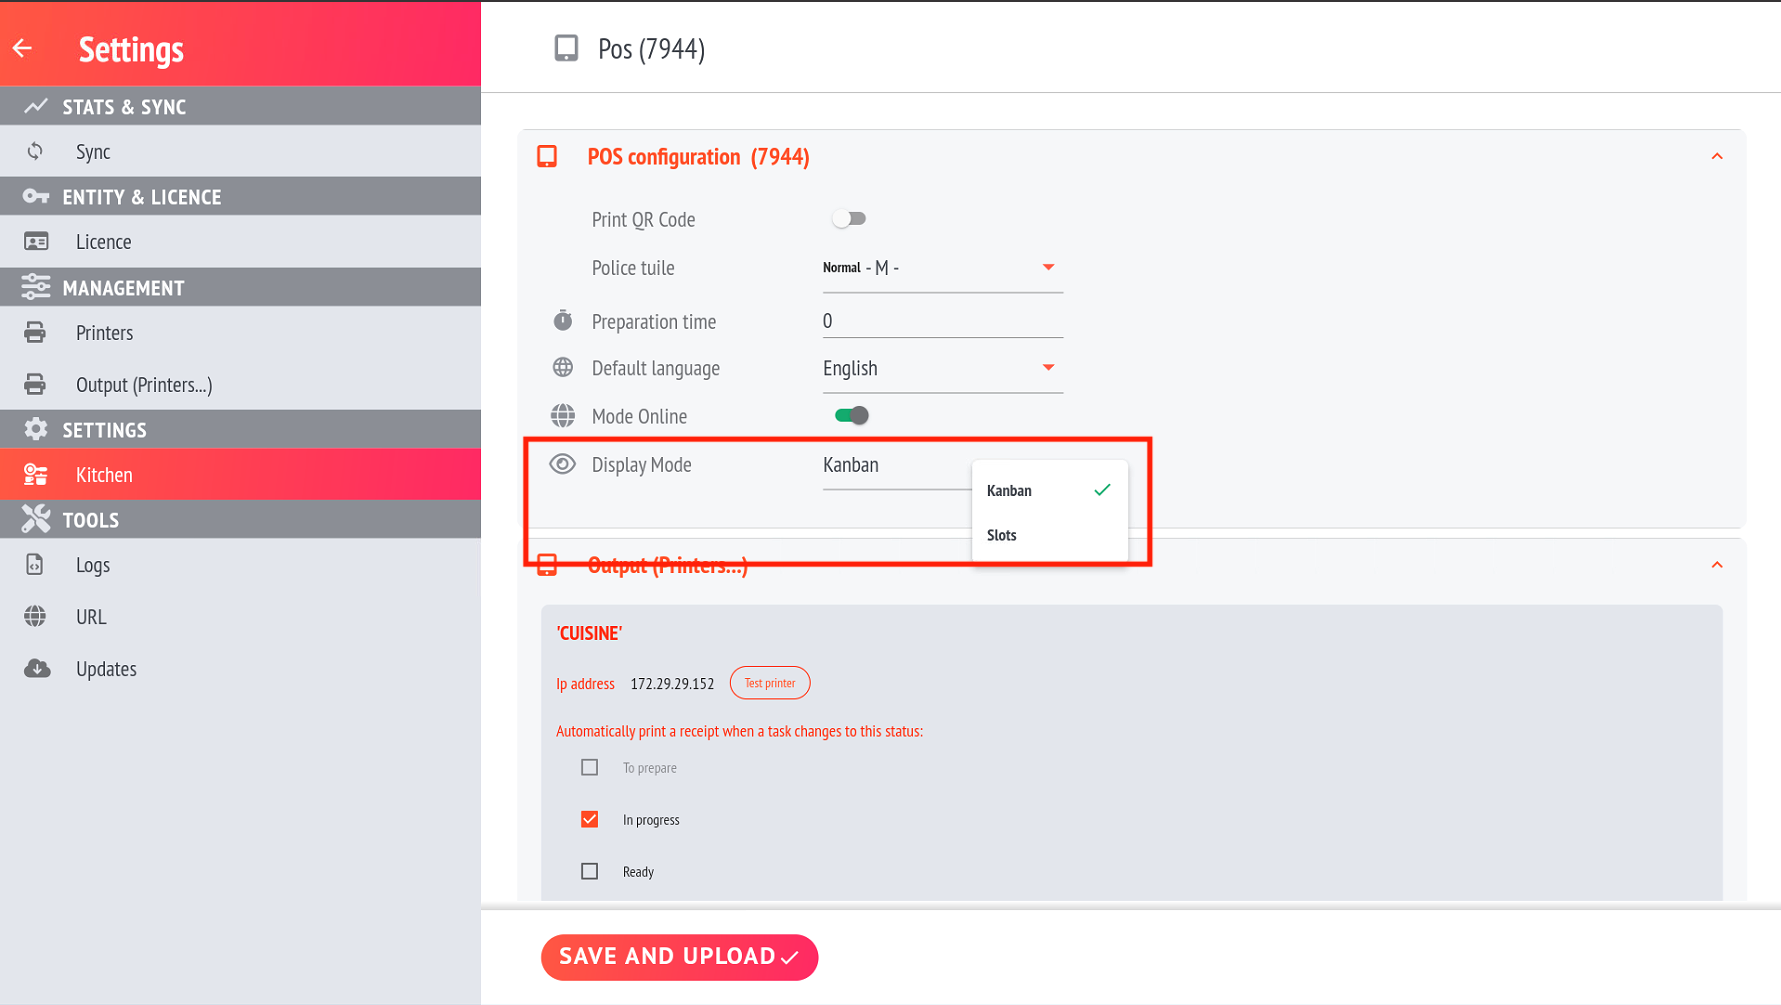
Highlight overdue tasks: Overdue tasks will be placed at the top of the list and highlighted with a slightly red background.
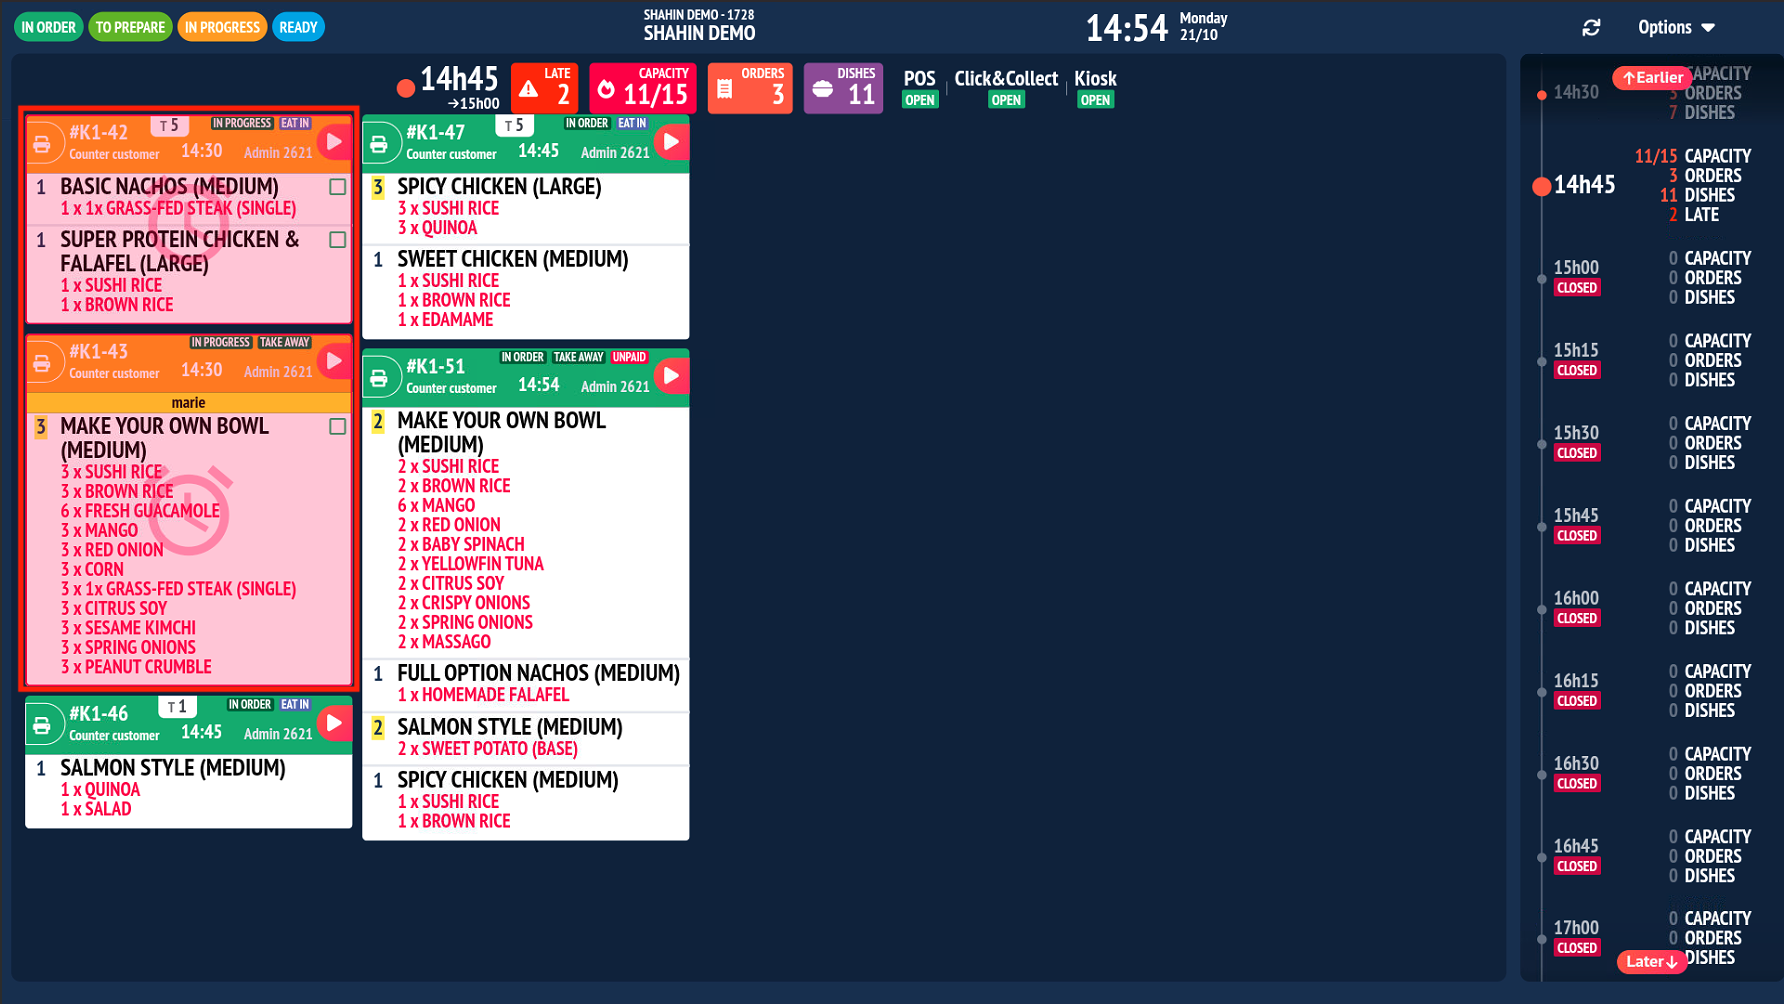
Notifications added when modifying a task: No need to refresh the screen while tracking tasks. Now, a notification will be displayed to the user, allowing them to refresh the screen when they want to.
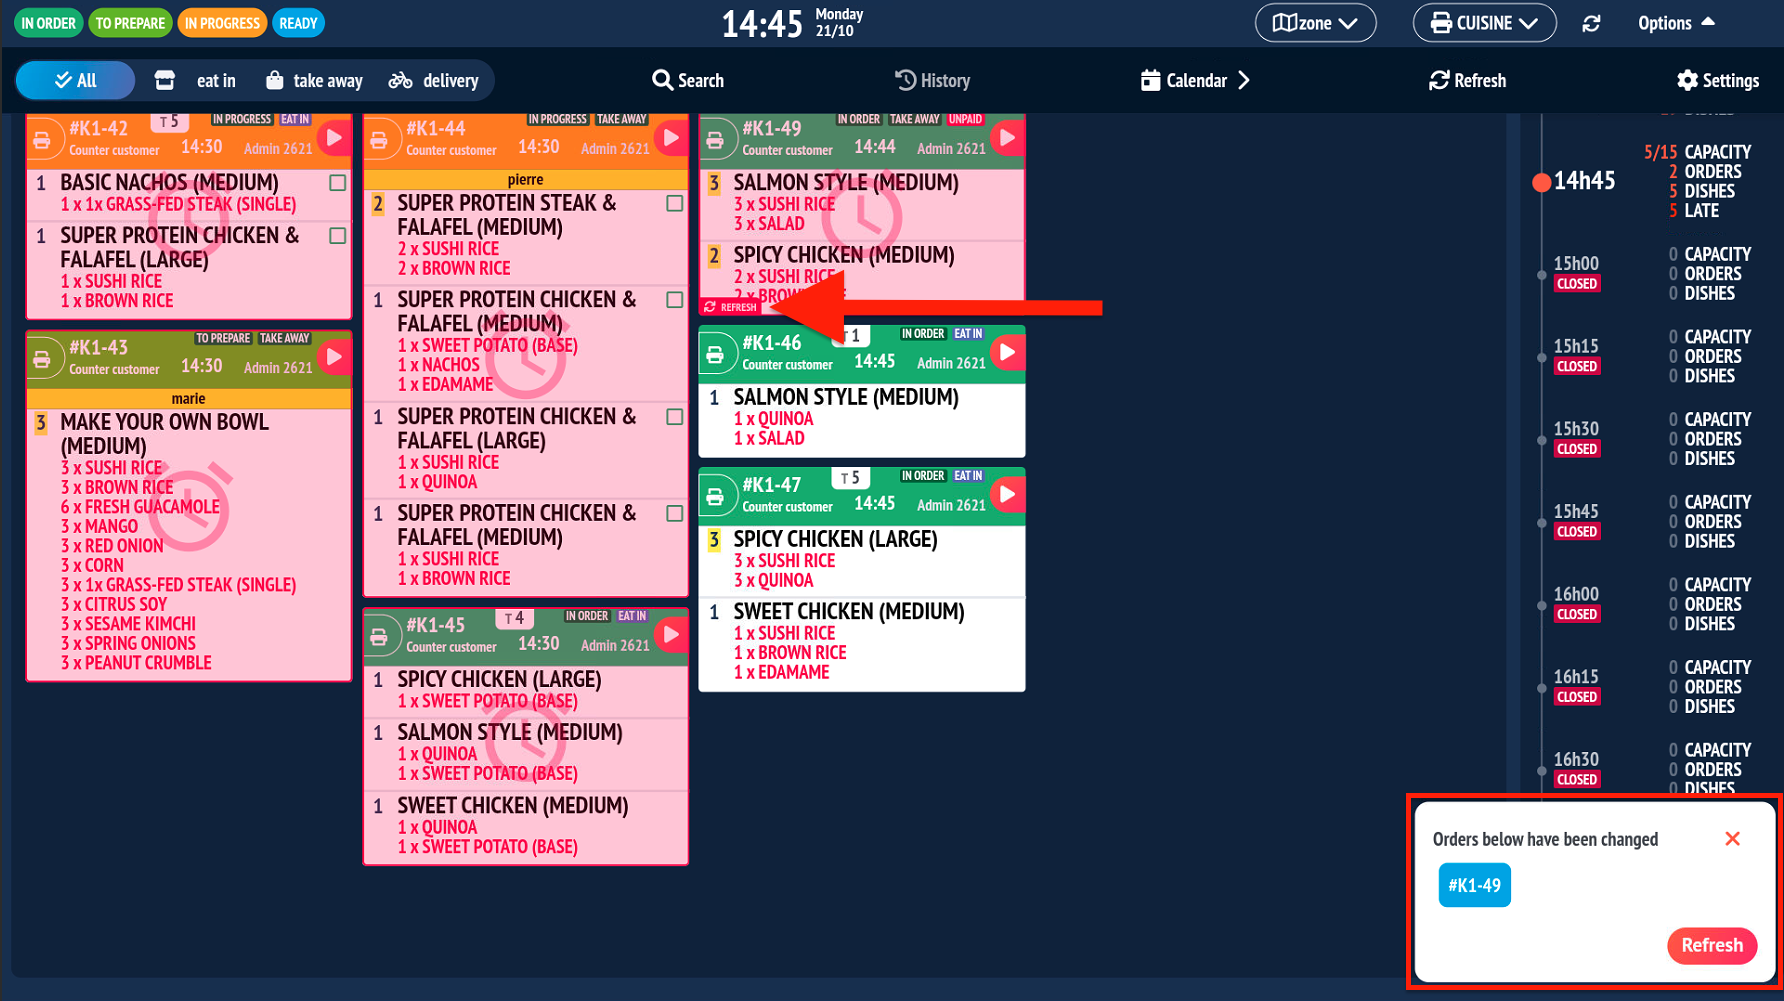
Changing the status and printing a summary ticket: To change the status of a task, use the progress arrow at the top right of each task. You can also change or revert to a previous status by long-pressing the task. A pop-up will show you all available statuses. In addition, you can print a complete summary of the items related to the ticket that generated this task.
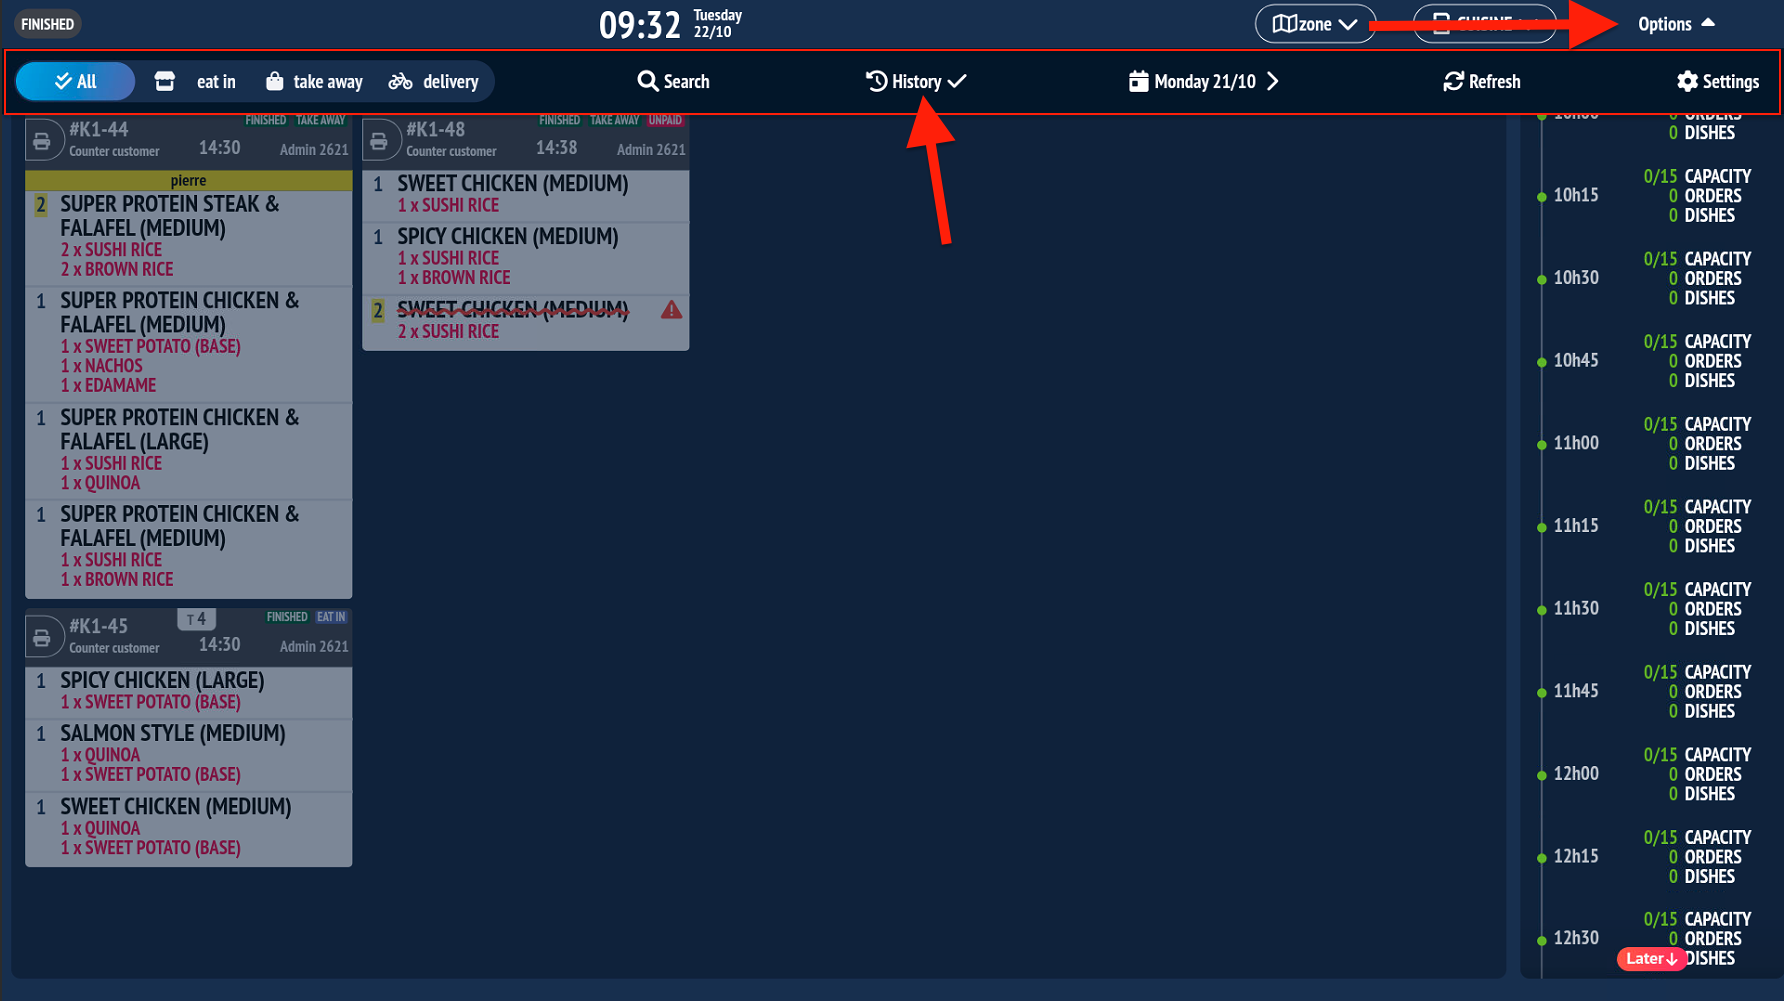
Advanced options: To access advanced options, tap the ‘Options’ button at the top right of your production screen.
You will find the following features:
- Filter by consumption mode (All, On-site, Takeaway and Delivery)
- A ‘Search’ button to find a task by scanning a QR code or entering the order number, table number, or customer name.
- A ‘History’ button to view completed tasks
- A calendar to navigate between past and future days
- A button to manually refresh the entire production screen
- A ‘Settings’ button to access the configuration screen
Production units (capacity)
Previously, we could only process a maximum number of orders per time slot.
To resolve this issue, production units were introduced.
For example, an order for 99 pizzas had the same weight as an order for a single pizza.
From now on, each order is managed according to its volume of production units. These units can be configured directly on each item or globally for a product family.
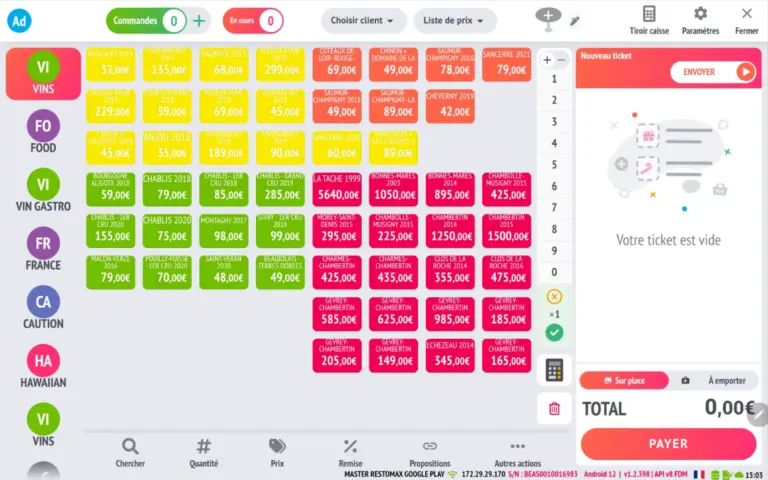
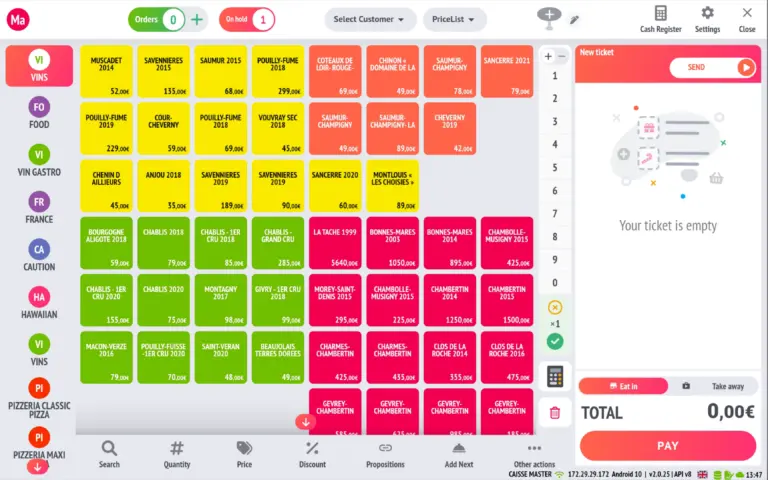
This is how production units are represented on the kitchen display.
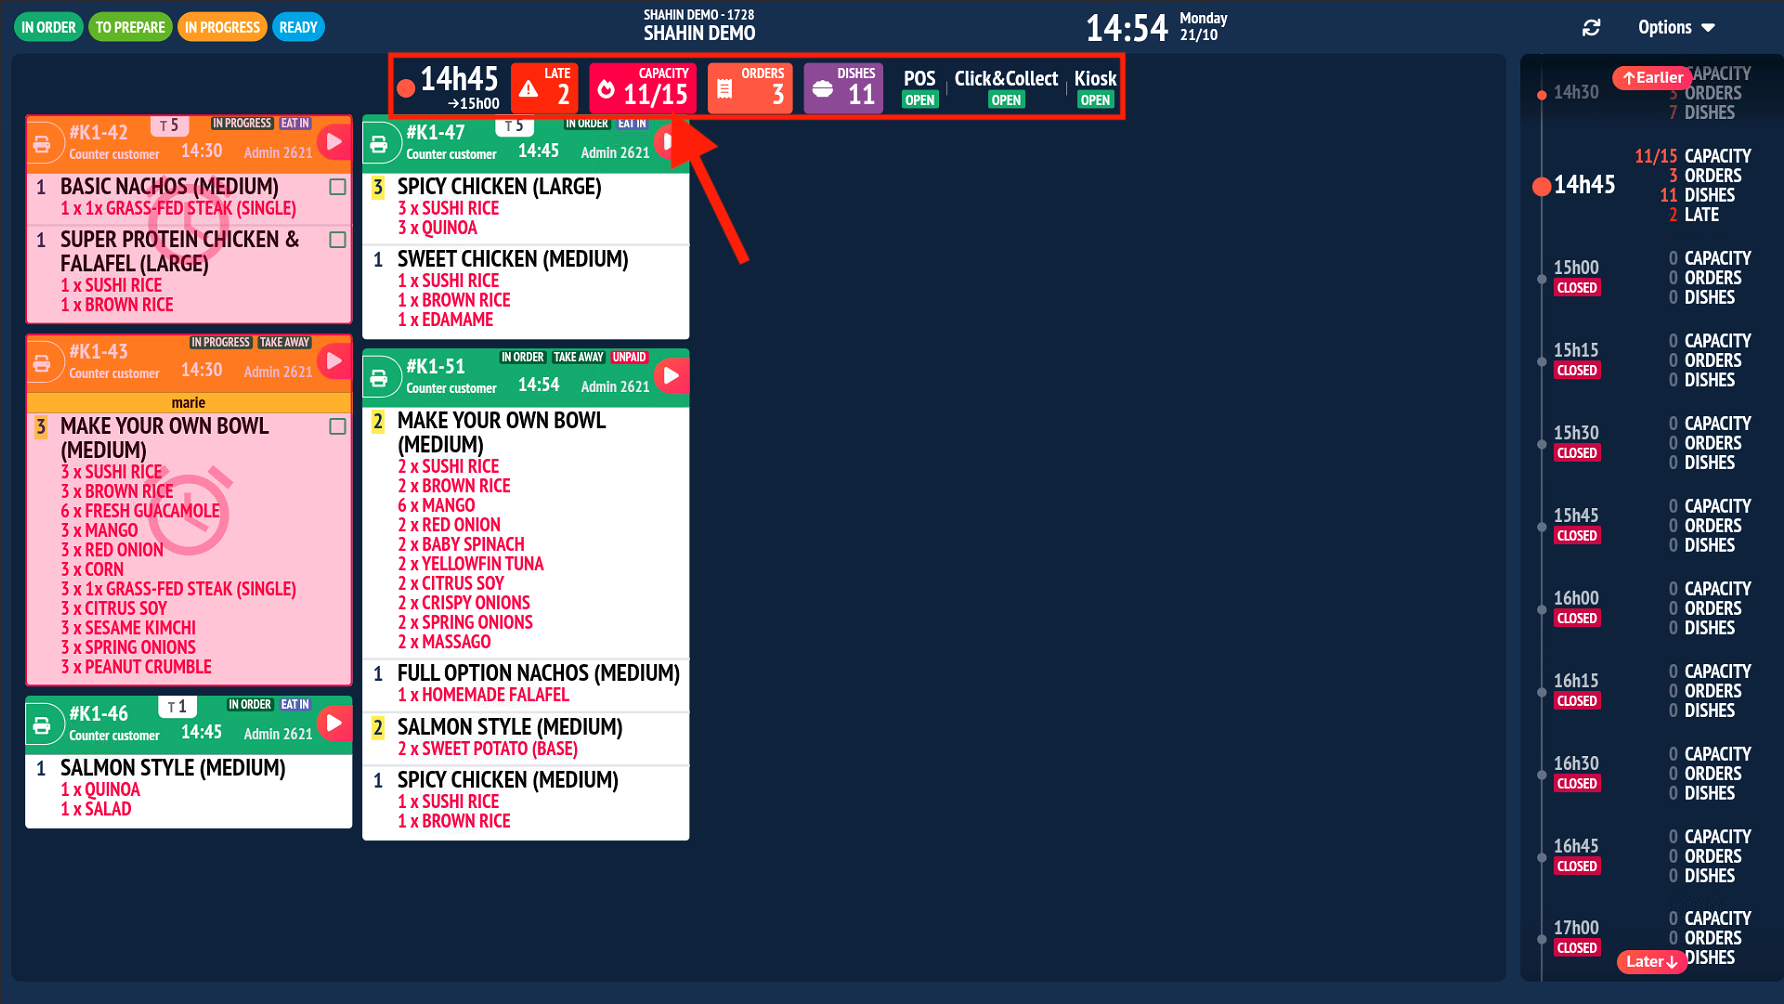
To activate production units on your cash register and/or kiosk, please go to settings and activate in POS ➔ Use kitchen production schedules.
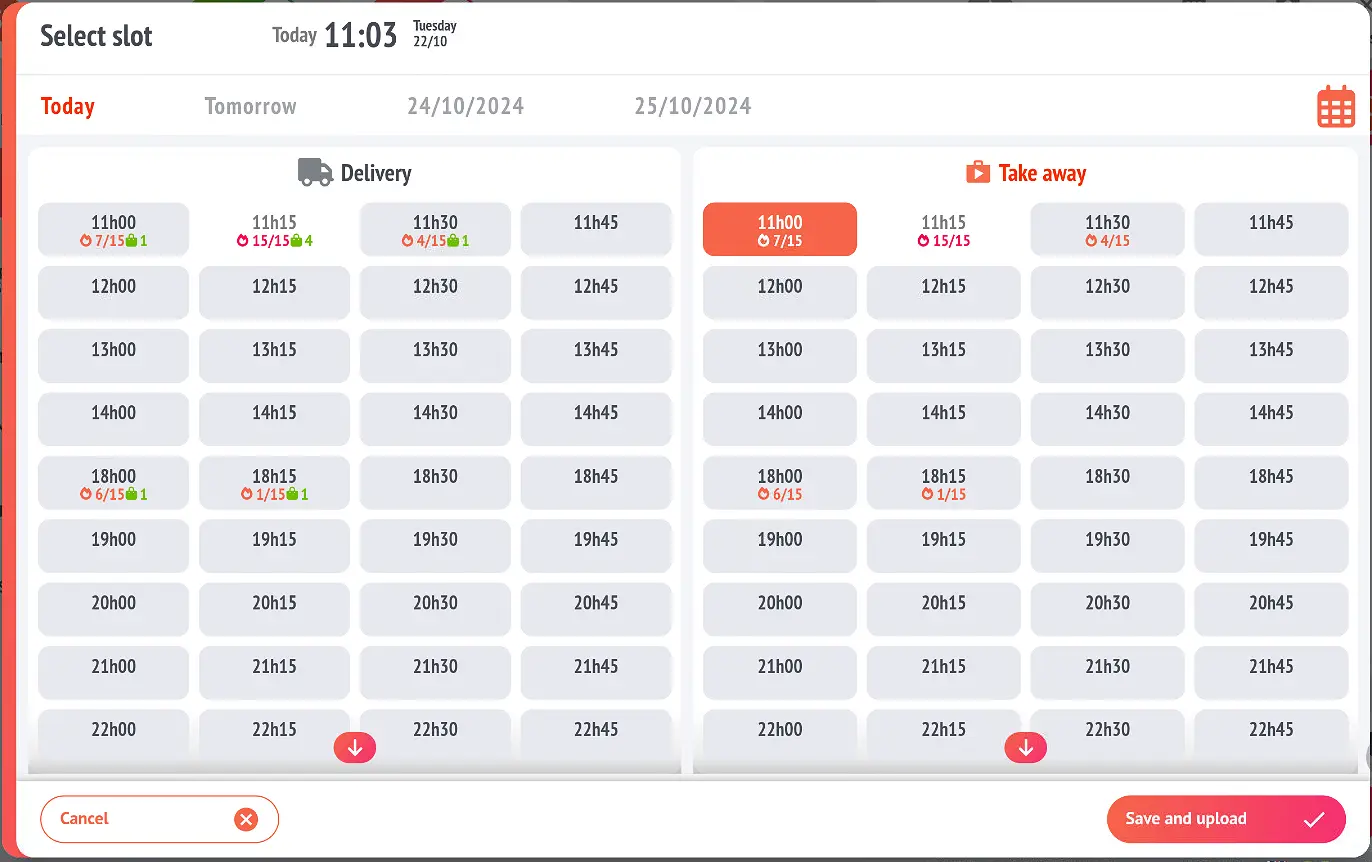
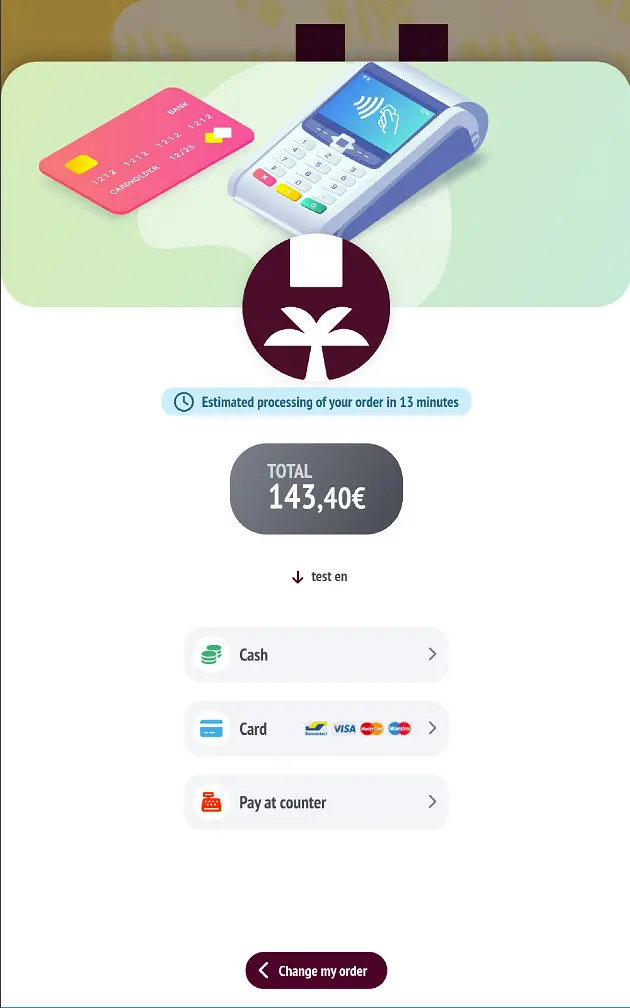
- For the cash register, when you create an order, a new screen will appear allowing you to choose a time slot based on the method of consumption. No restrictions have been put in place at the cash register, so users can place orders in slots that are already full.
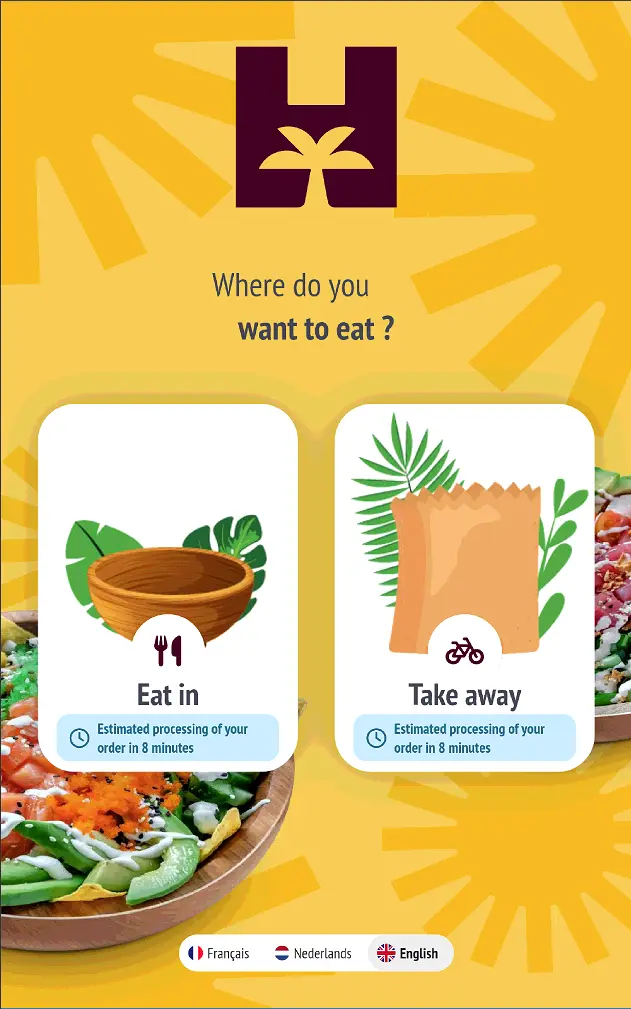
- For the kiosk, a message has been added about consumption methods at the beginning of the ordering process and another at the end of the order on the payment screen indicating the estimated time before the order is ready for collection.
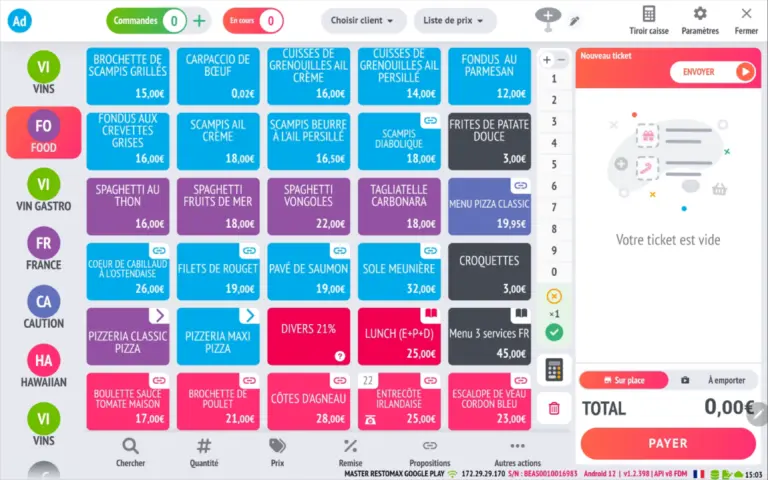
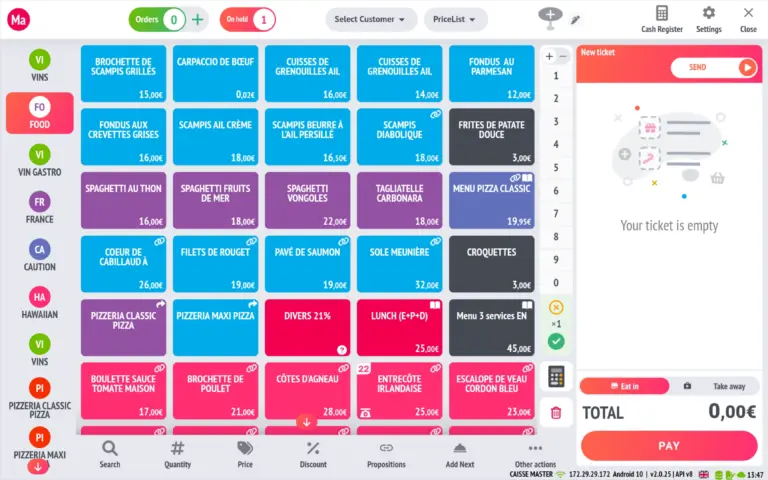
New matrix layout
This improvement provides better ergonomics and readability.
- Reorganisation of button display in the matrix: Button sizes are now automatically adjusted to fit the matrix, ensuring better readability.
- Button line colours: The text colours are automatically adjusted to match the background colour of the button (e.g. yellow background = black text) for better contrast.
- Icons on buttons: The icons are directly integrated into the background colour, optimising the space available on the button.
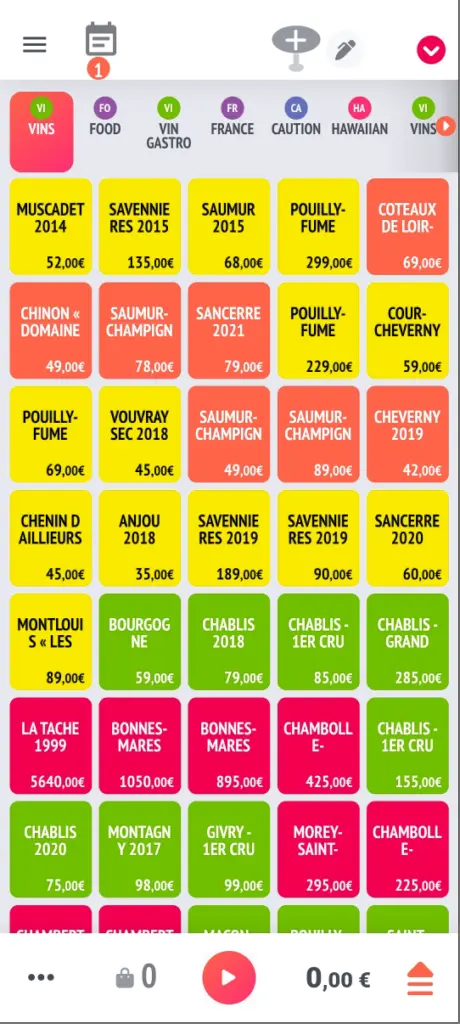
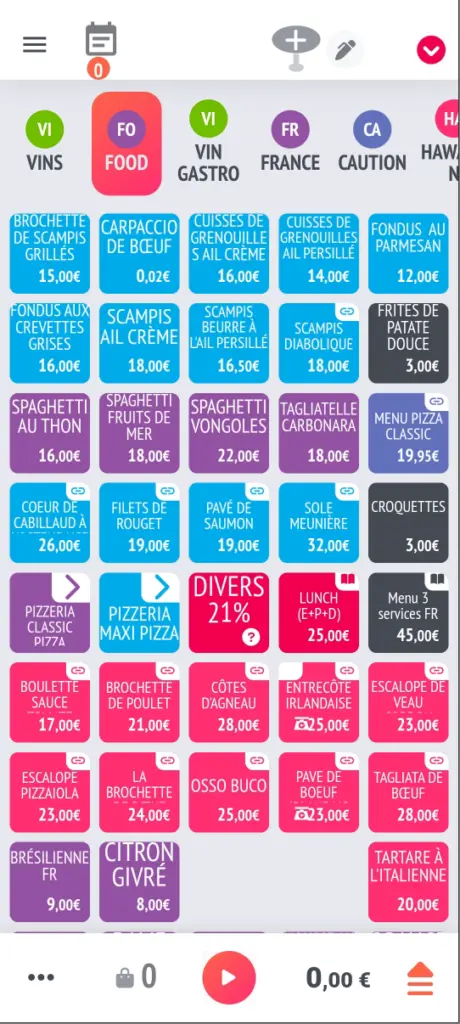
before VS after (tablet mode)
before VS after (mobile mode)
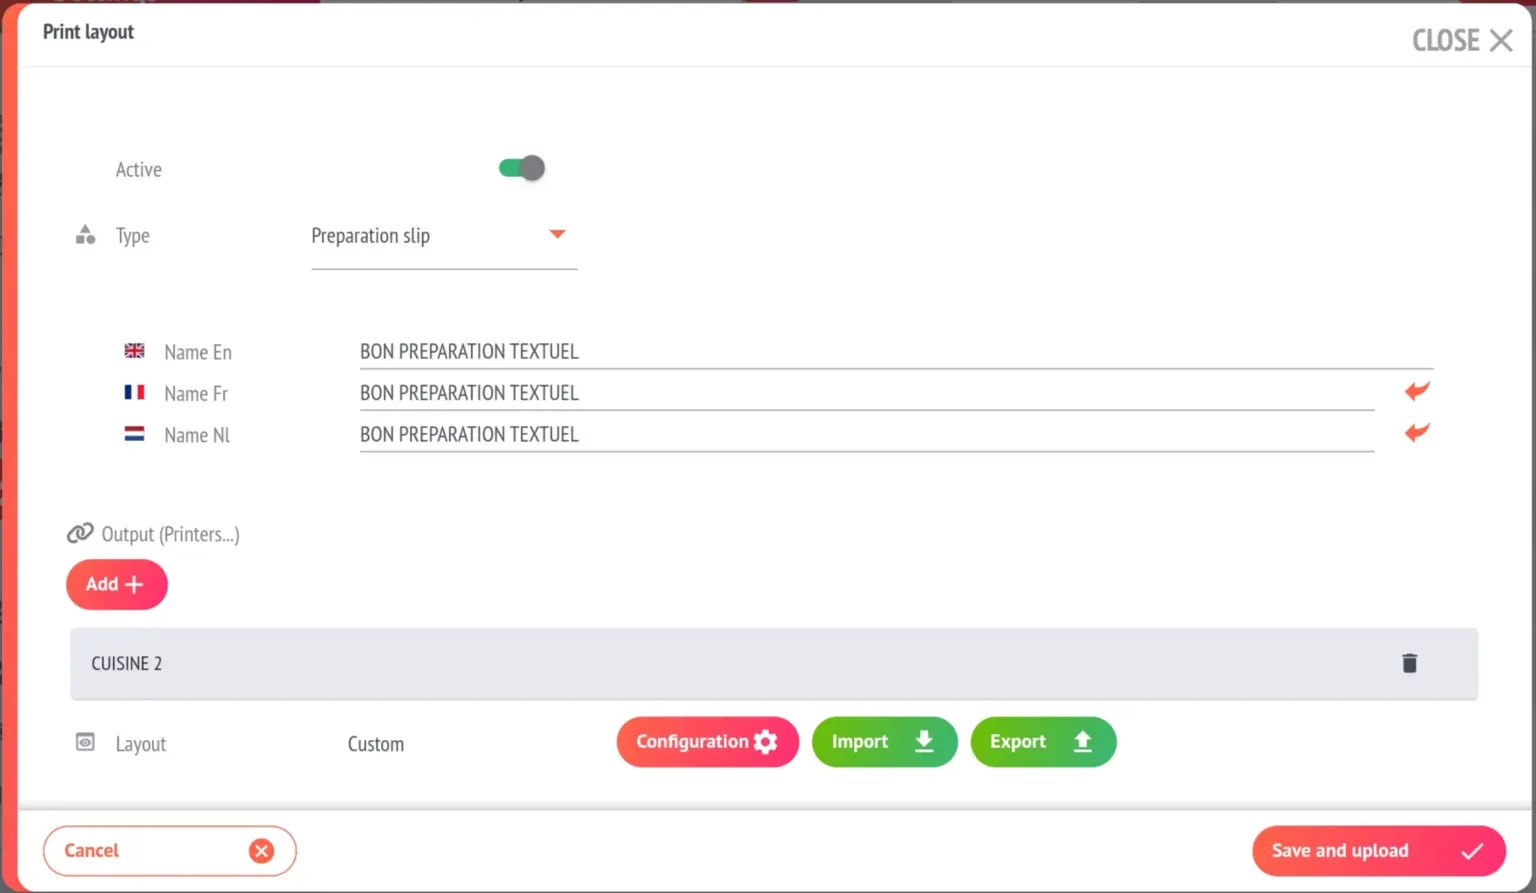
Custom print layout
- A new section has been added to the settings of your RESTOMAX application ➔ Print layout

- You can create your own print layouts for preparation tickets and bills, then apply them to the outputs of your choice.
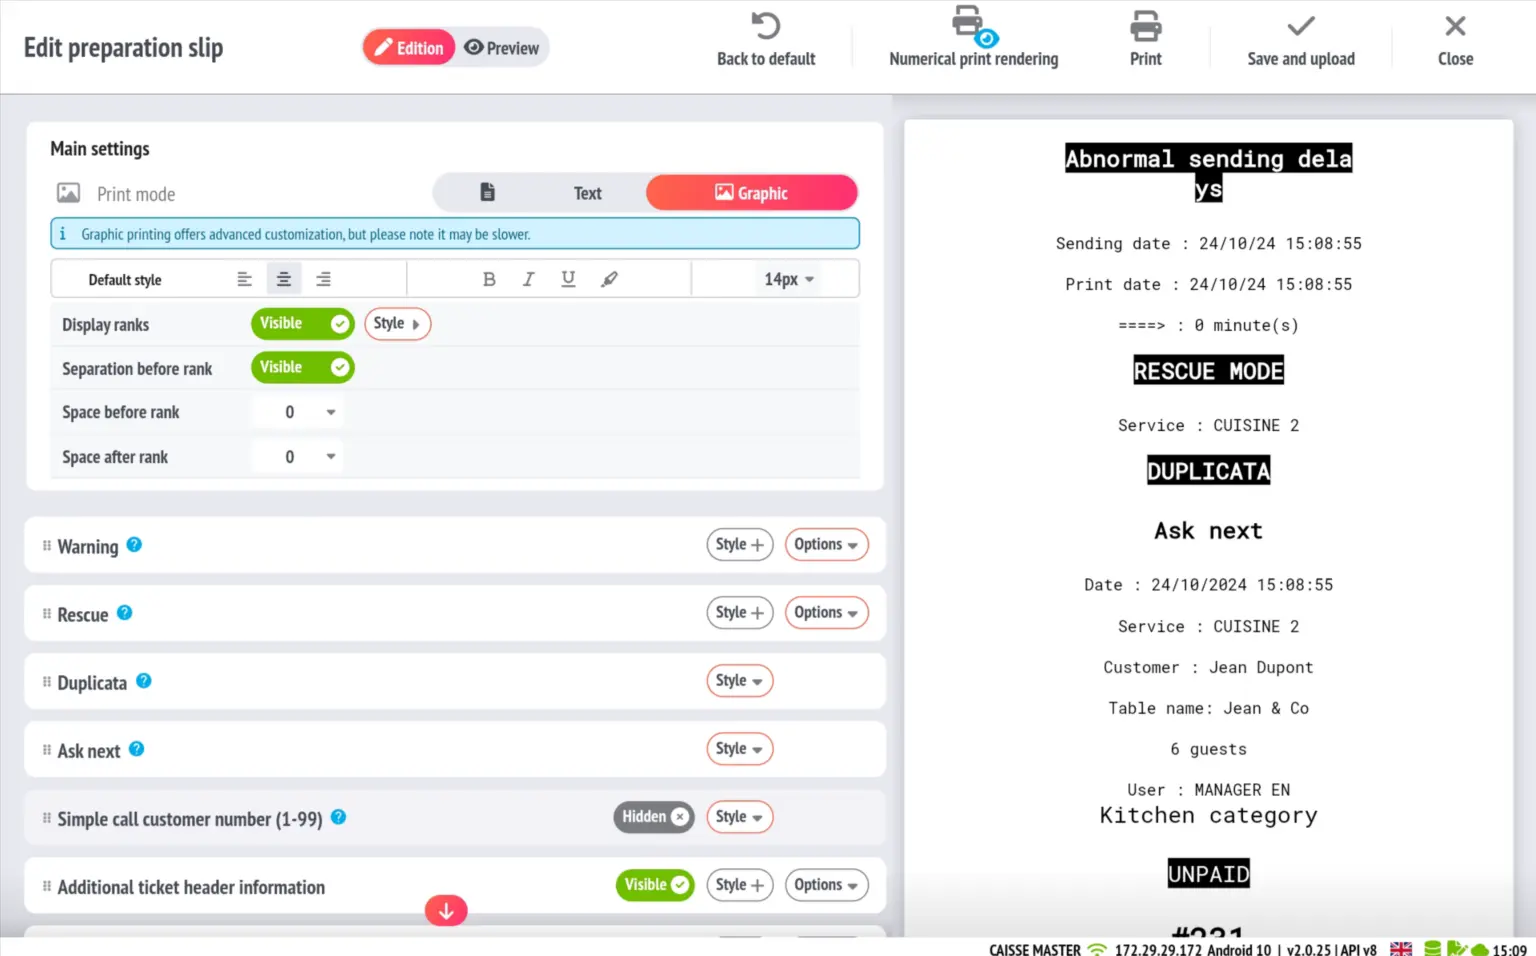
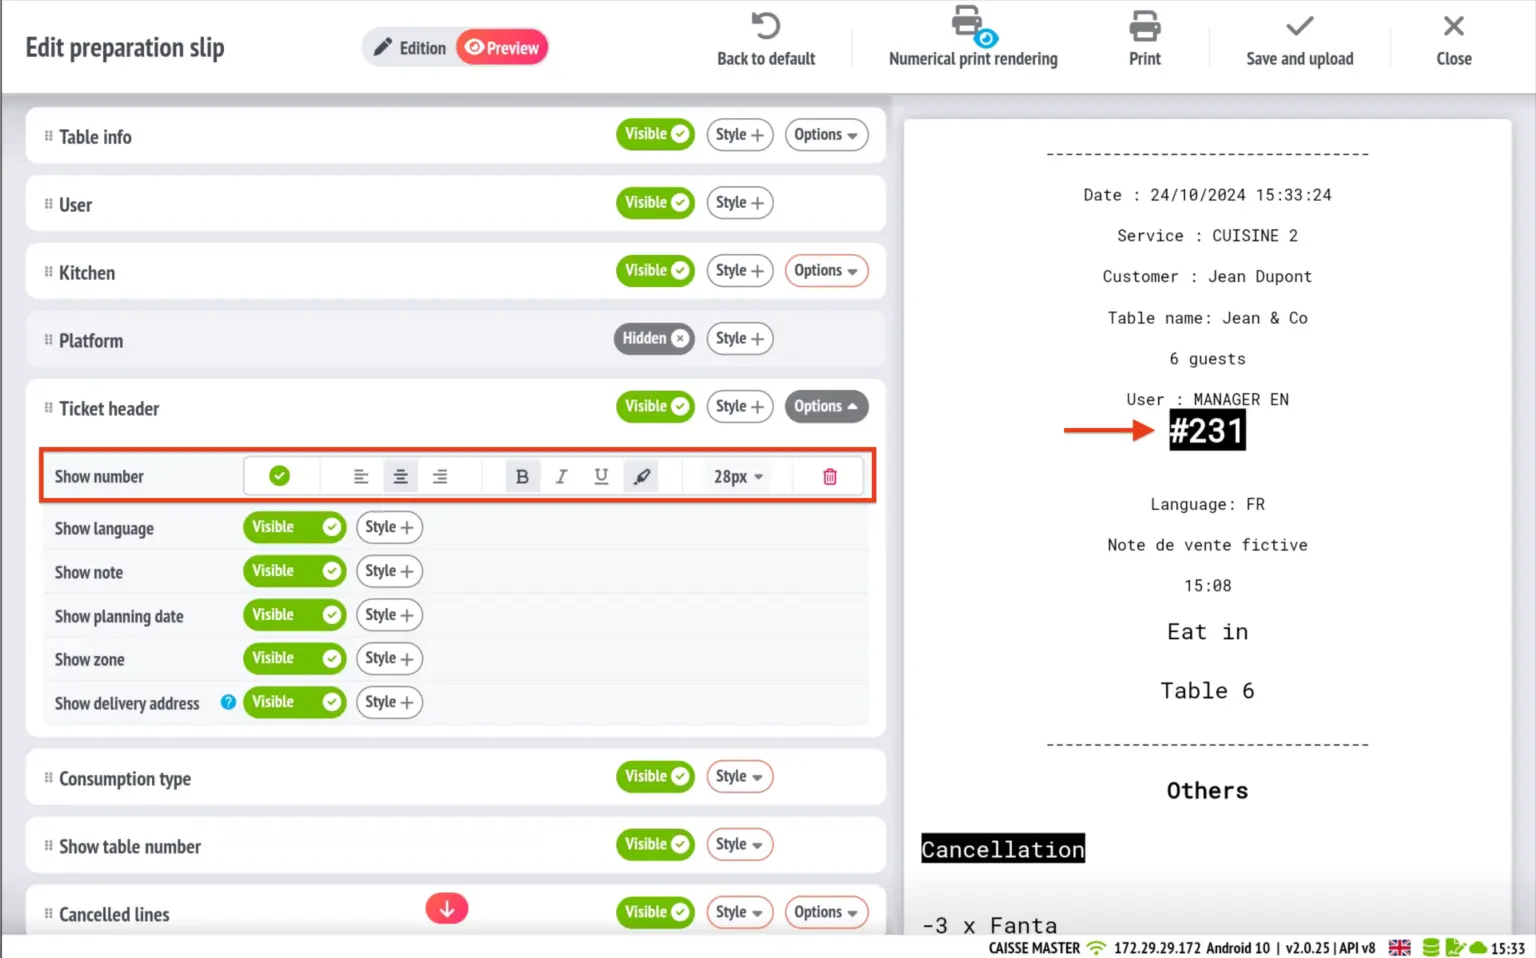
- Two print modes are now available for all printers integrated with the restomax application:
- Text printing (default mode for all printers except STAR printers): this mode is faster but offers fewer customisation options.
- Graphic printing (mode automatically applied to STAR printers): this mode allows advanced customisation, although it is slightly slower than text printing.
- Export and import print layouts so you don't have to do the same work multiple times in different locations.
- Each section and subsection of the bill and preparation ticket has been listed. For each of them, it is possible to:
- Enable or disable (except for sections considered as systems)
- Add a style (alignment, bold, italic, underlined, inverted colour, font size selection)
Some additional features
- Audible alert when an item is added to the basket (option enabled in POS settings).
- Number on the button representing the quantity of the item in the basket currently being edited.
- Menu size of matrices (option enabled in POS options).
- User rights for table transfers and payment splits.
Improvements made to the release of version 2.0.26
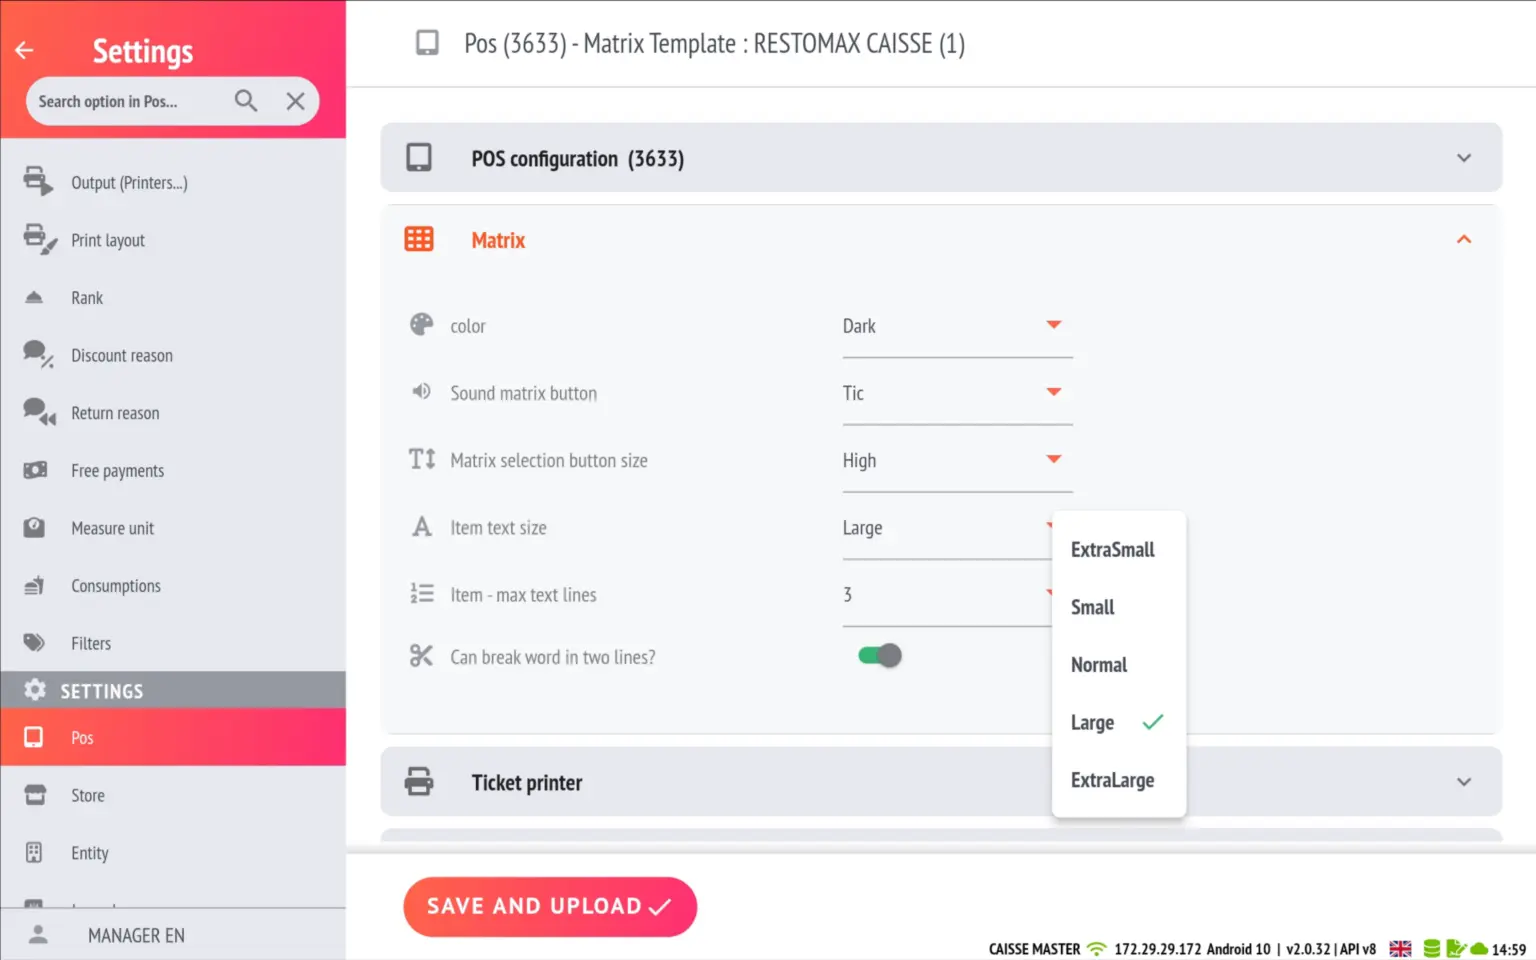
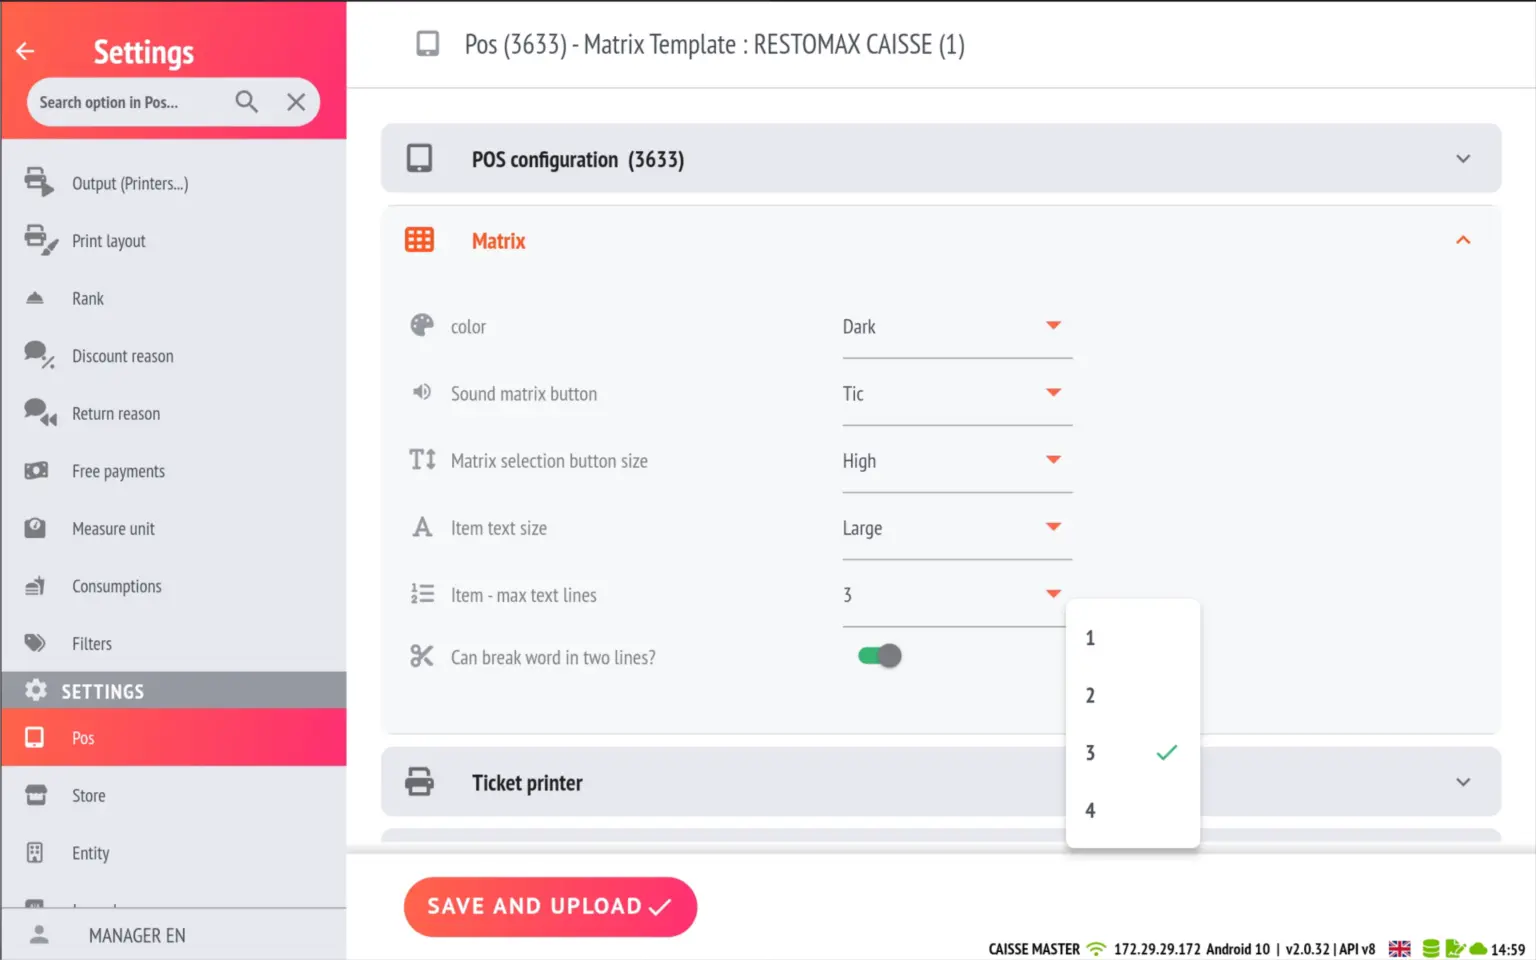
New ‘Matrix’ section in the POS, providing visual improvements to the text displayed on the matrix buttons. It is now possible to:
- select from five font sizes
- set the number of lines visible on the buttons
- enable an option to truncate text if necessary.