Things to know before you start
Initializing the first till is a very important step, because you are also creating the structure of the entire organization, the RESTOMAX account where all the data will be stored!
- Step 1 - Authentication
- Step 2 - Contact details of the establishment
- Step 3 - Choosing your business sector
- Add an extra till or another RESTOMAX solution
Step 1: Authentication
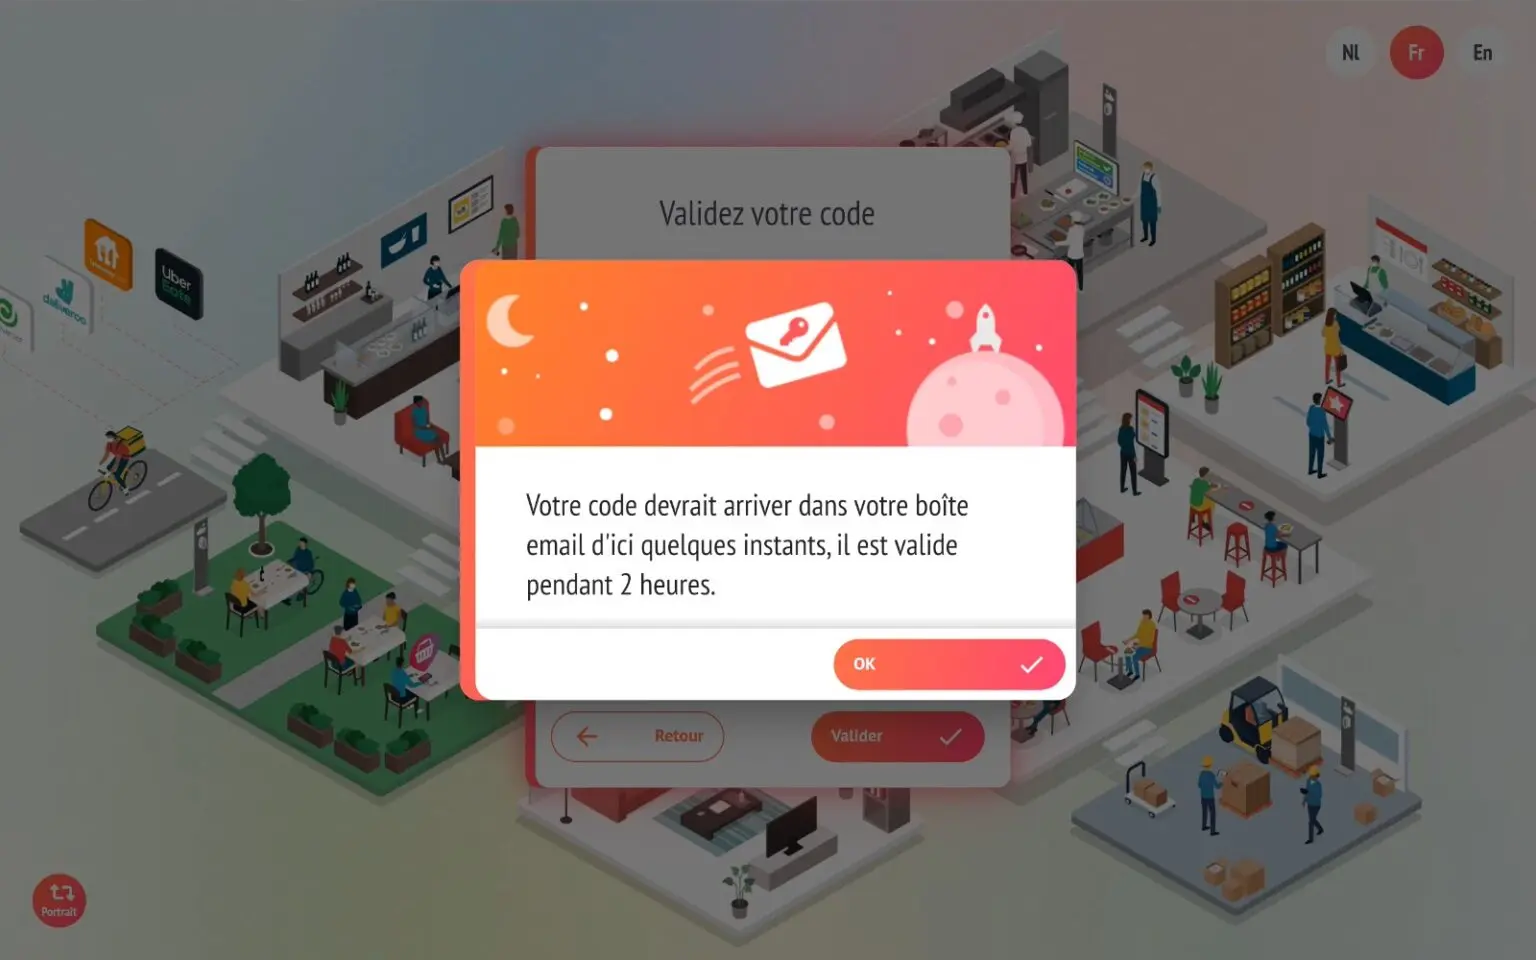
Once the application has been launched, enter your email address to receive your unlock code and your licence code once the till has been created.

You will then receive your unlock code by email:
RESTOMAX partner: This screen should not appear if you are in Expert mode, as your code is valid for several months. If this is the case, don't hesitate to ask your partner manager to activate expert mode.
Step 2: Contact details
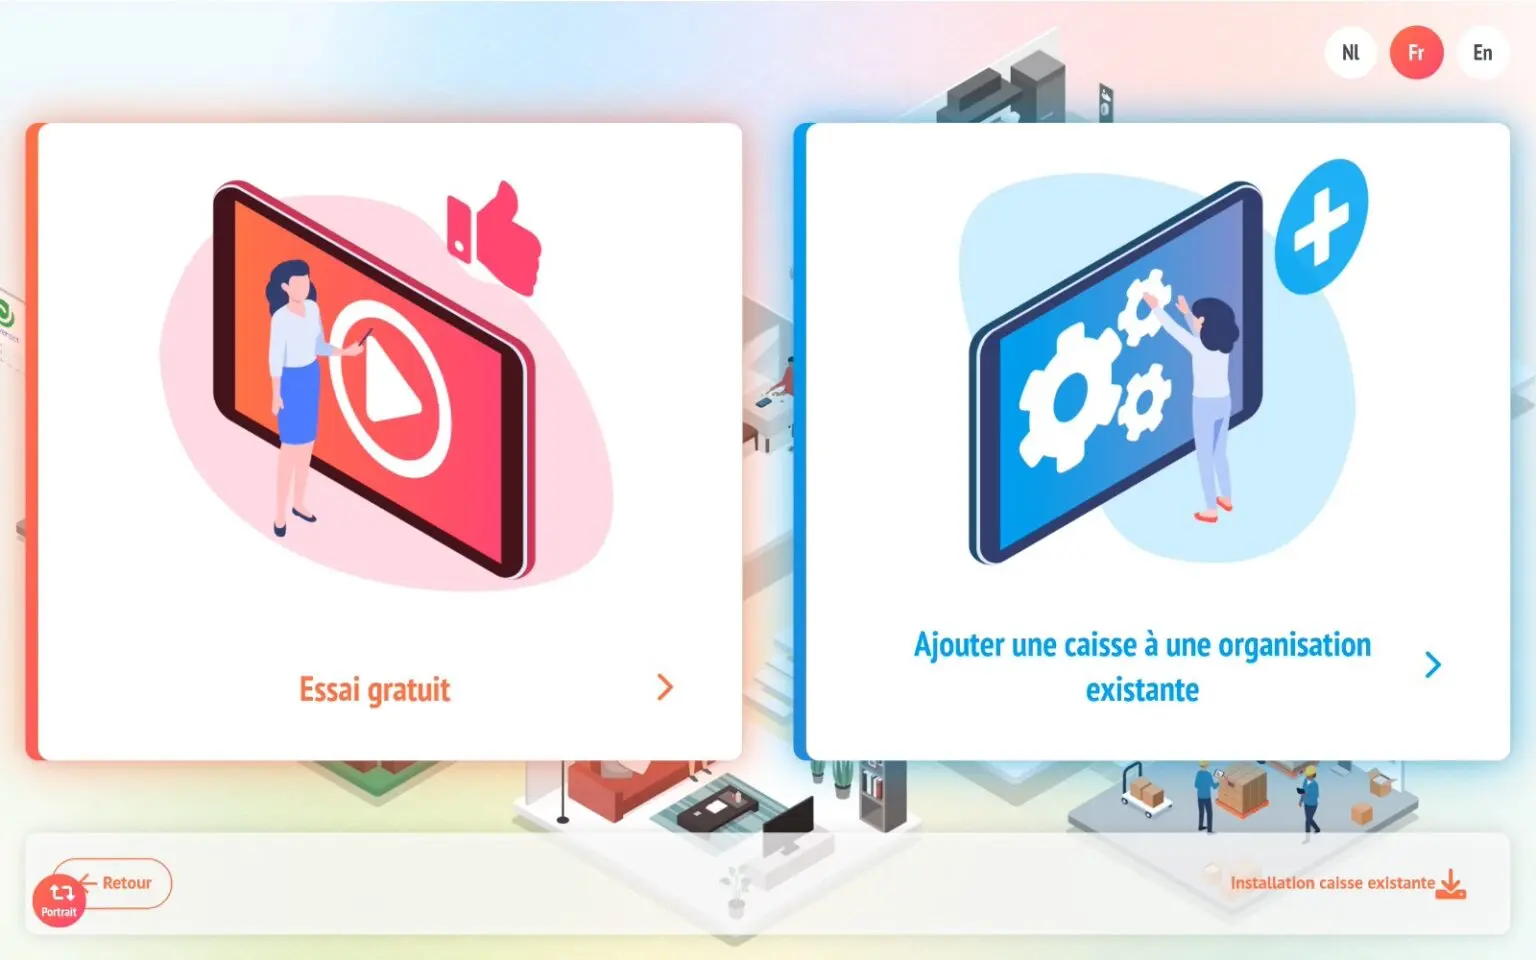
Once the code has been validated, select the ‘free trial’ option.
We'll look at the ‘Add an additional checkout’ option in another article.
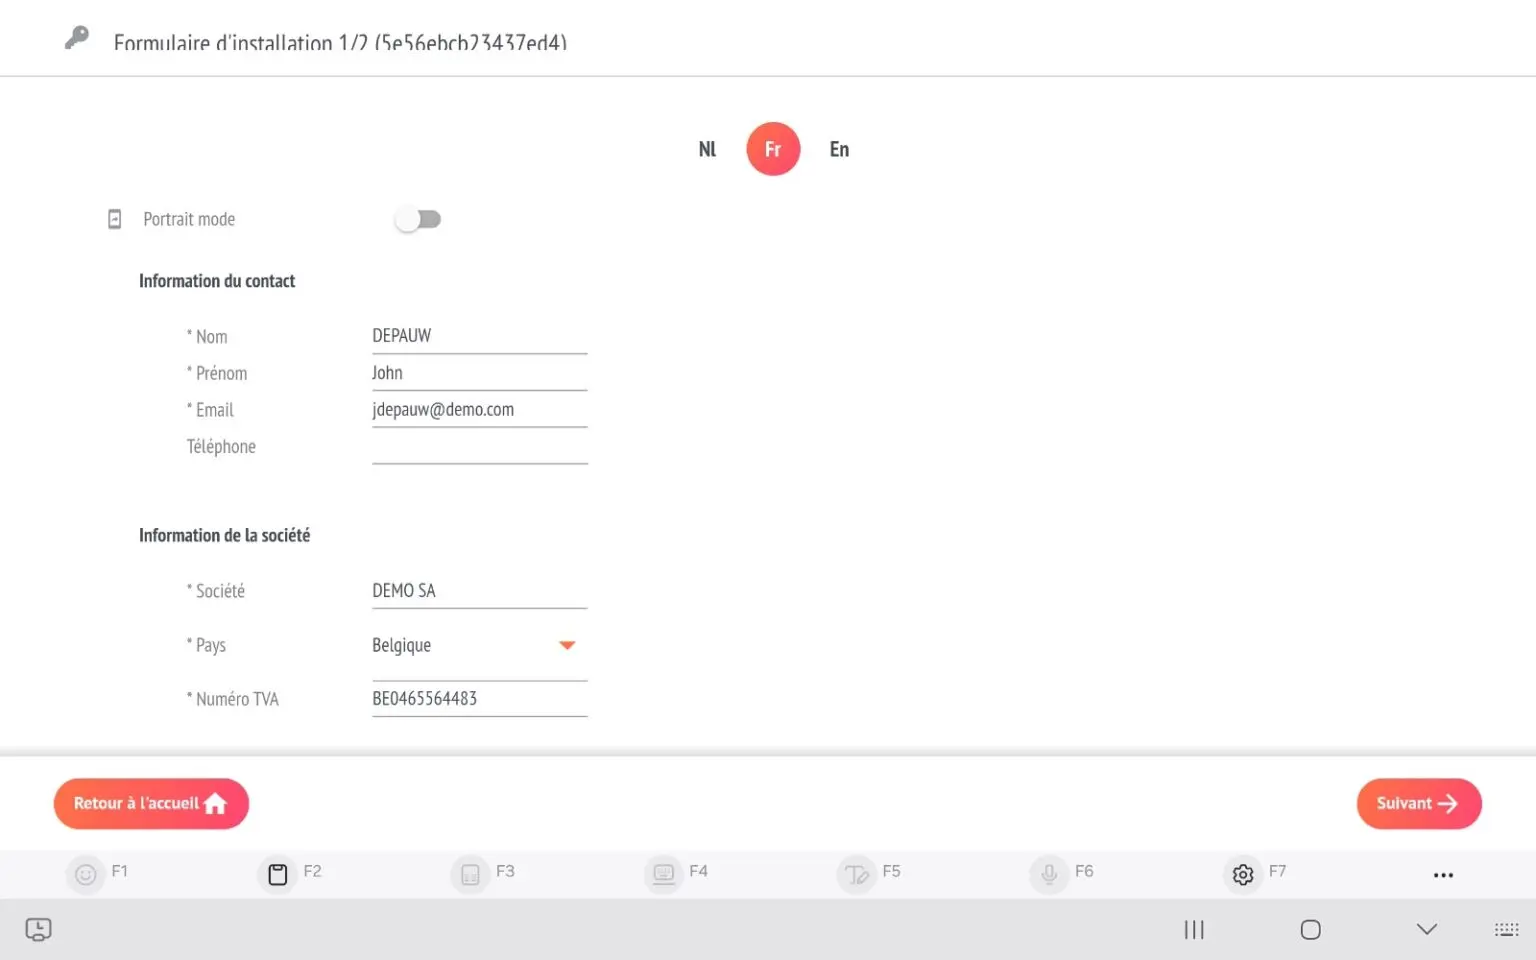
On the next screen, fill in the details that will be used to create the organisation, the RESTOMAX account.
Contact = Manager of the establishment
Company = the company that will be invoiced for the use of the till
Next screen:
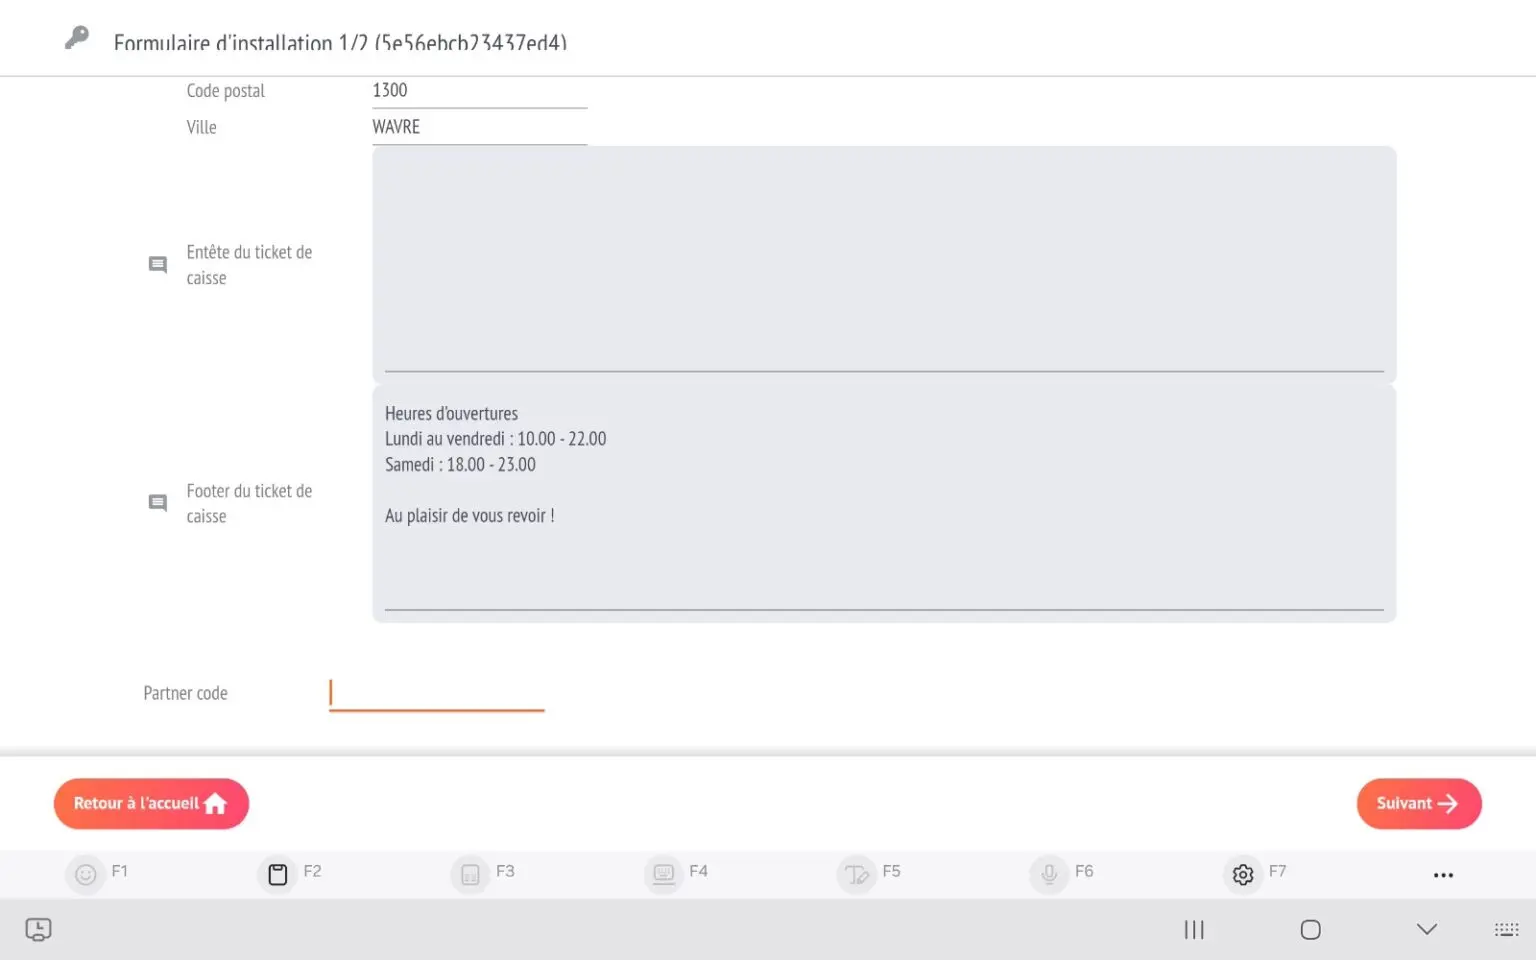
Caisse = We recommend using an explicit name to easily identify the fund within the organisation, here MASTER1 in our example.
Shop = details of the establishment or restaurant where the checkout will be located
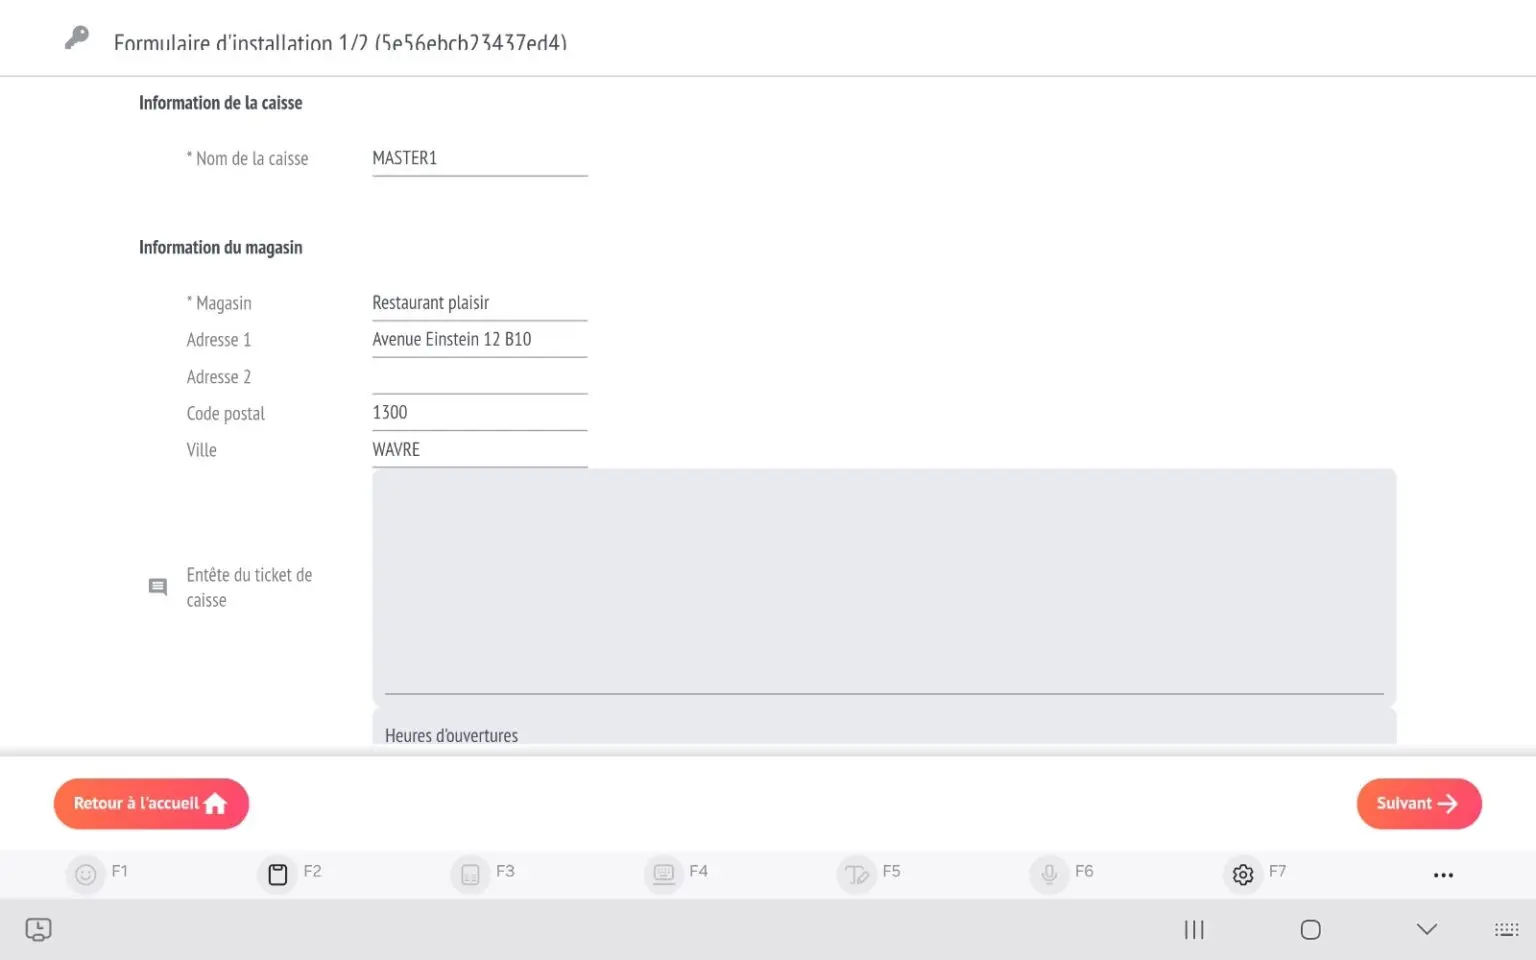
You can already add text to the header or footer of the till receipt. This can of course be modified later in the till or your web back office.
RESTOMAX partner : ATTENTION - IMPORTANT
You must enter your partner ID in the ‘Partner code’ field. This is your 6-digit customer ID and is essential for associating this organisation with your partner account. If you do not enter your code, you will not see this account in the partner portal and it will then be impossible to unlock and invoice the licence.
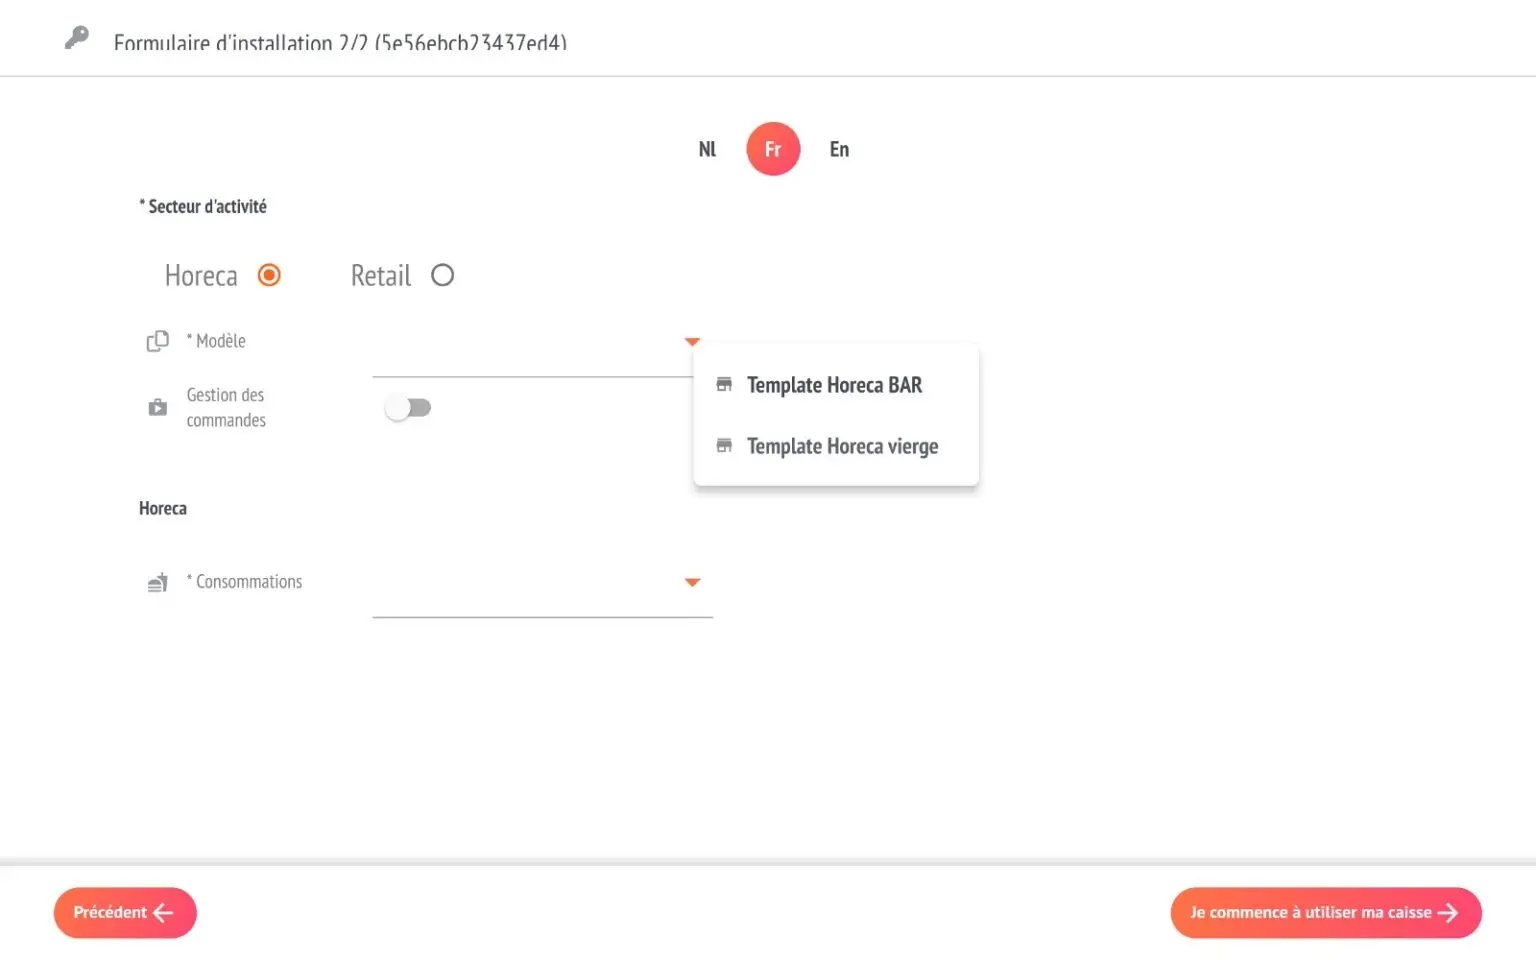
Step 3: Choose your business sector
On the next screen, choose your sector: Hospitality or Retail
You will have the opportunity to choose models with templates :
- or with pre-prepared items and sales matrices, like the BAR in our example, to make your life easier.
- is blank to avoid and then import all the elements.
The ‘order management’ option should be ticked if you plan to manage orders to be prepared in advance. This option can be activated at a later date.
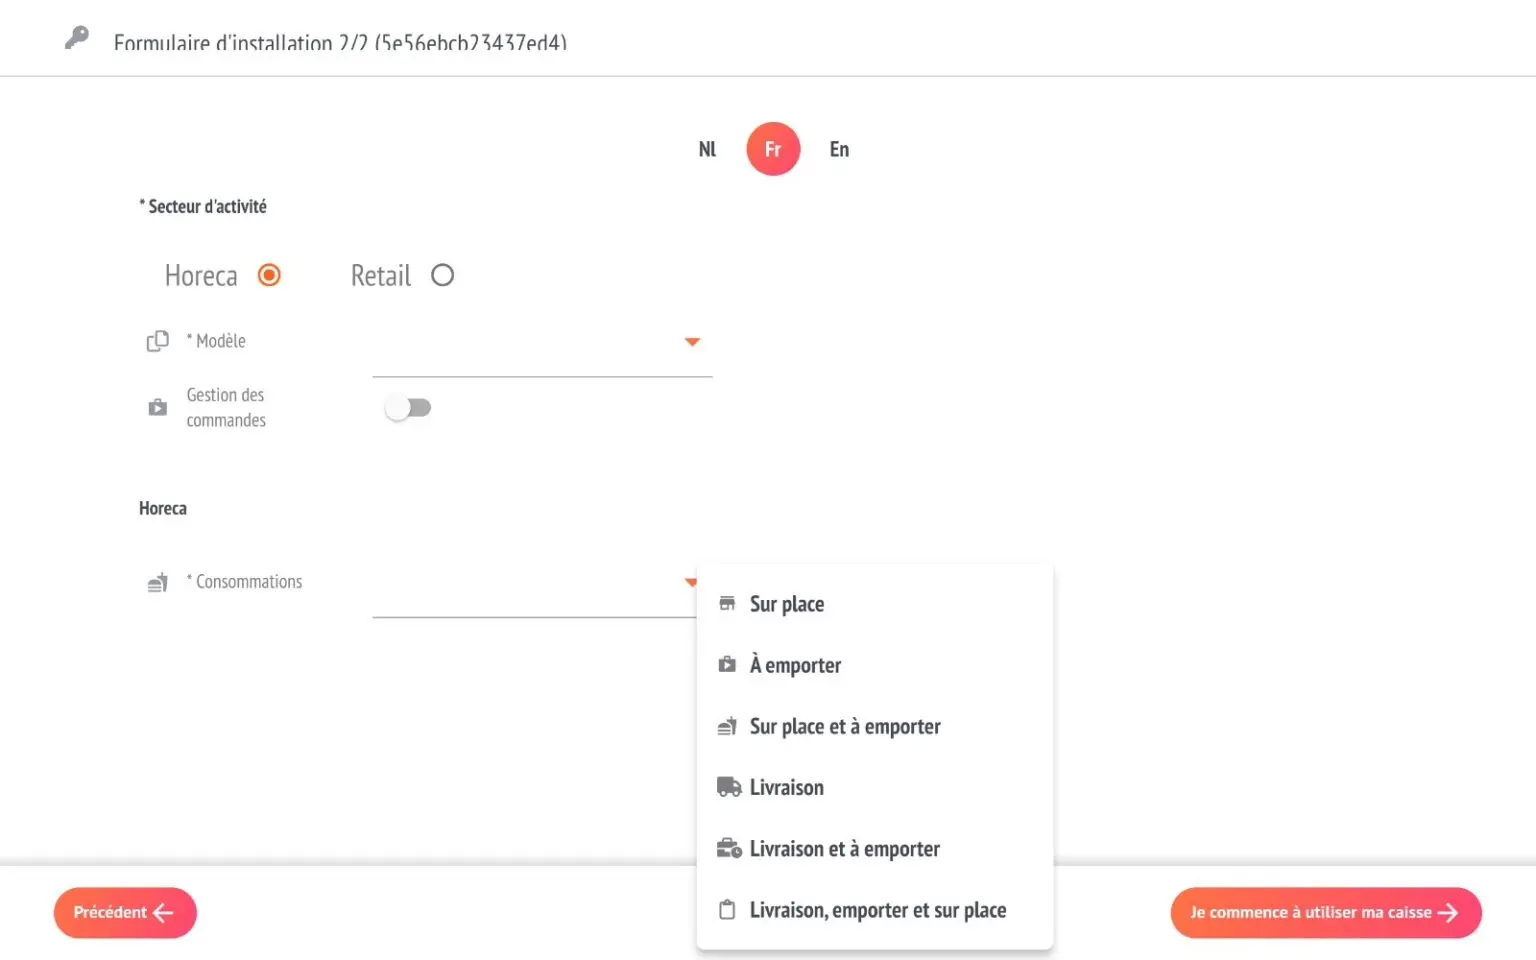
You also choose the consumption mode you want to apply to the store and its associated tills. This choice can also be changed later in the store settings.
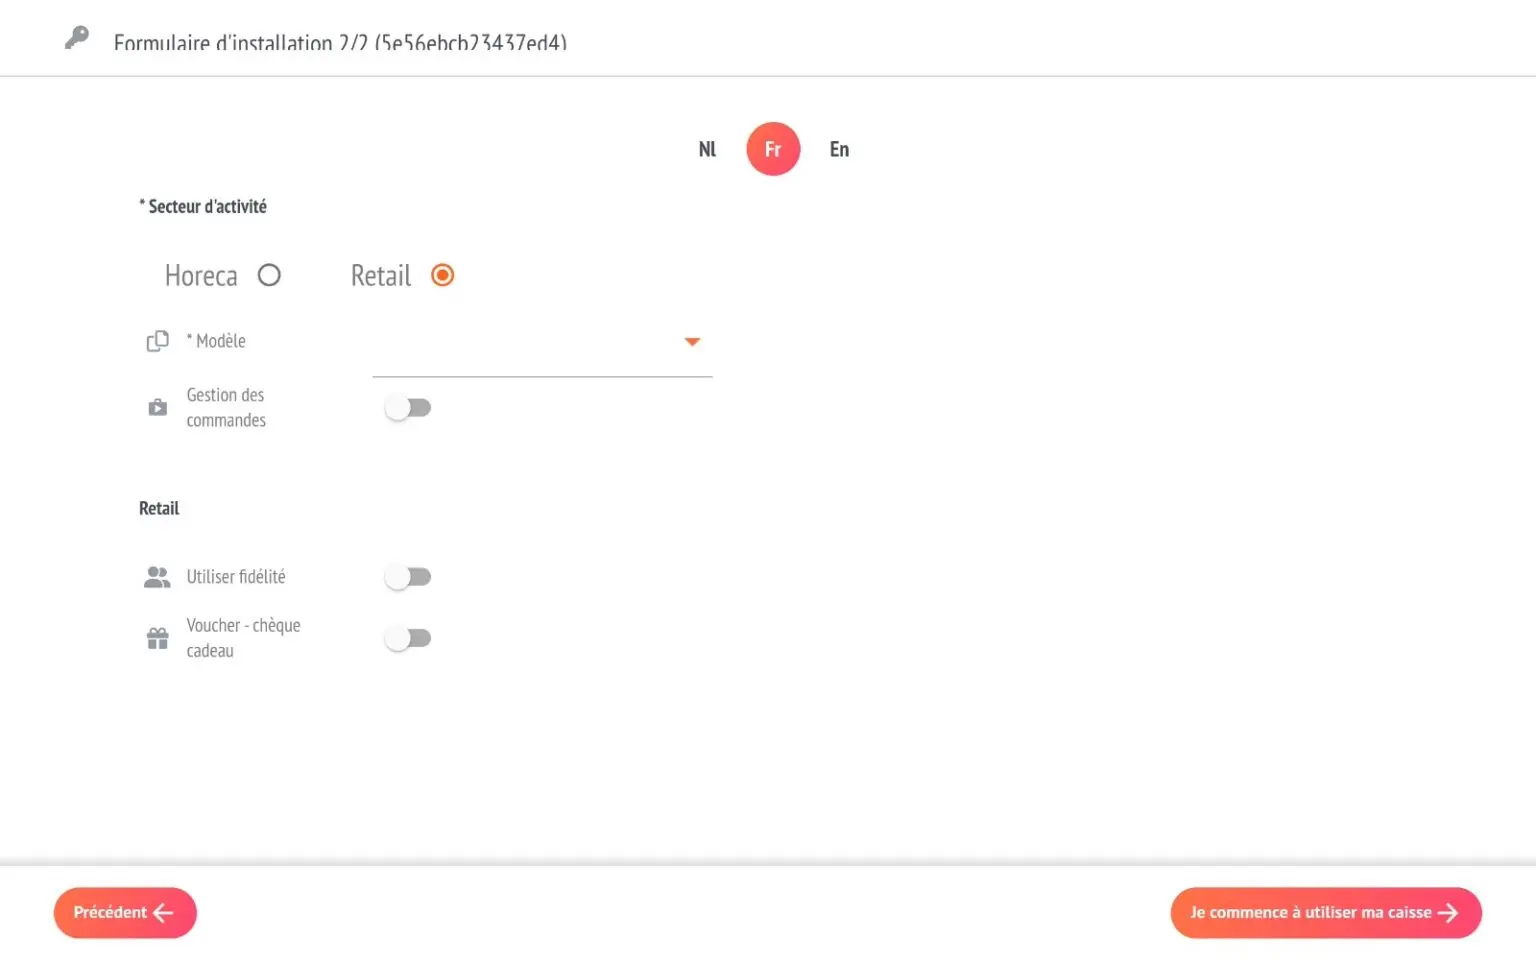
If you choose the RETAIL sector, other options are available:
- Loyalty: if you want to be able to award benefits in points or percentages for the purchase of certain items.
- Voucher - Gift voucher: if you want to generate vouchers
These options can be activated later in the settings, in the logs.
And now you can start the checkout!
You will receive an email with your licence code, which you should keep.
RESTOMAX partner :
You can then go to your portal to complete the information, unlock demo mode for production or add additional licences.
Add an extra till or another RESTOMAX solution
Now that you have created the organisation and the first main till, you can add additional tills or another RESTOMAX solution within the same organisation.