Overview of the main improvements in version 2.5.26 of the RESTOMAX cash register:
- Added a quick menu (long press) on the matrix in the sales screen.
- Option to make a refund from Vivawallet (only in API and Embedded mode)
- New options added to printer outputs
- Improvement of the follow-up complaint management system
- Super Mario can connect with a user who has a PIN code.
- Add Sunmi V3 Mix models, option to choose paper width for Sunmi models
- Added a new colour copy-paste feature on matrix buttons, with ‘select all’ to quickly apply the same colour to a matrix.
- Some additional features:
Automatic upload of PDF tickets to Azure Blob Storage.
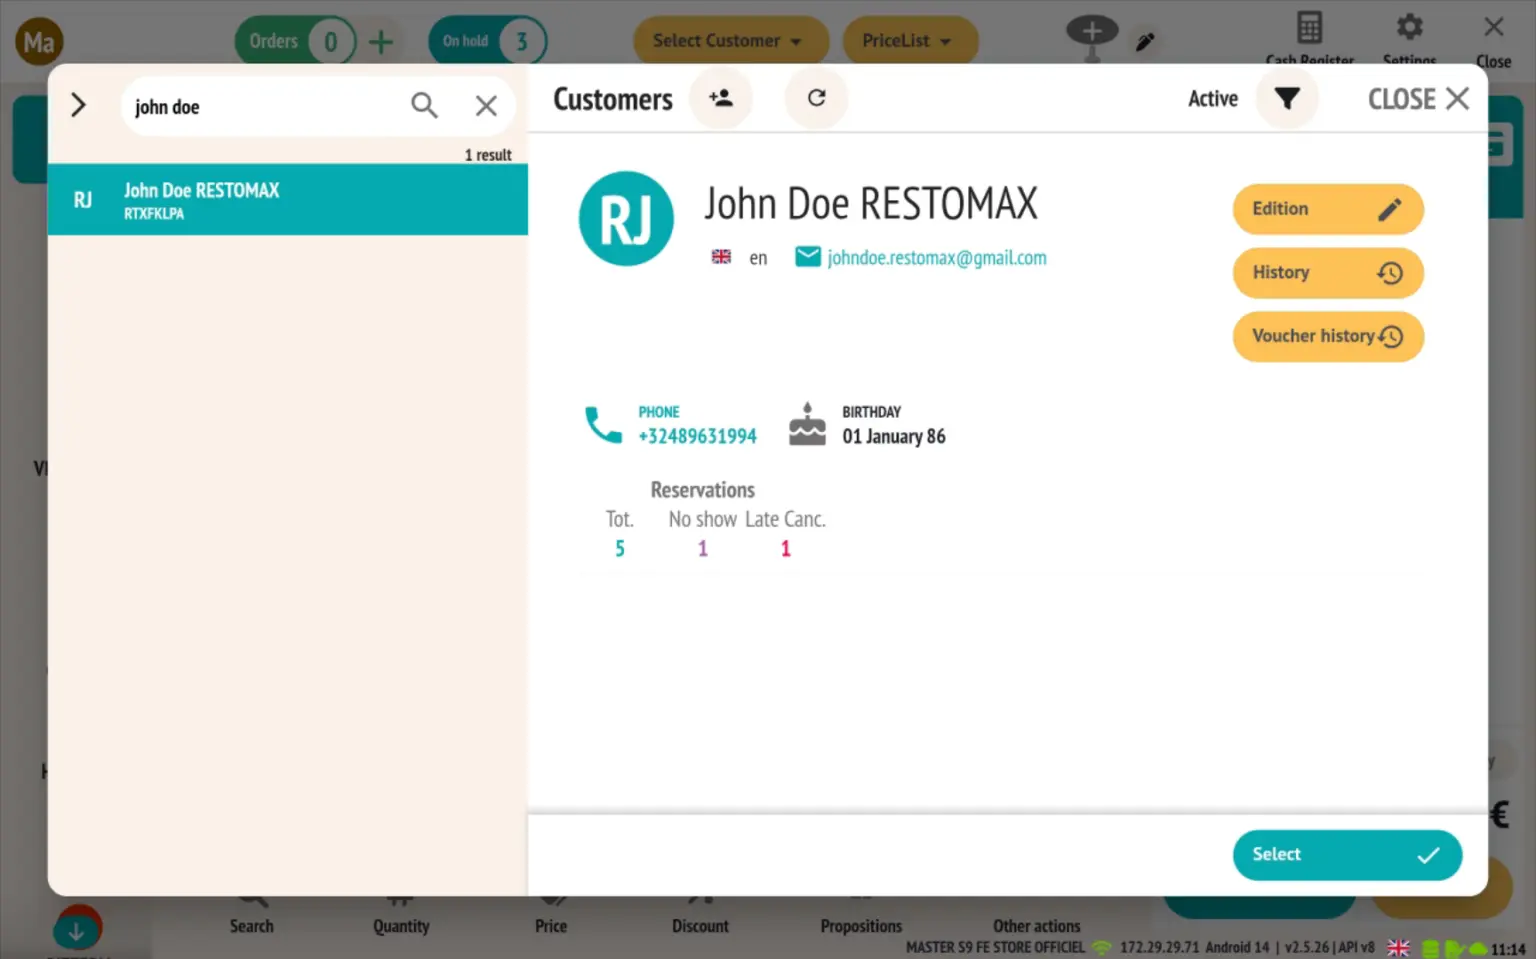
Reservations: display of total, no-show and late cancellation counters in the customer file and on the modification page.
Automatic opening of the Web Back Office with the current user.
Added the phone field to preparation slips for improved customer tracking.
Standardisation of telephone numbers in customer files.
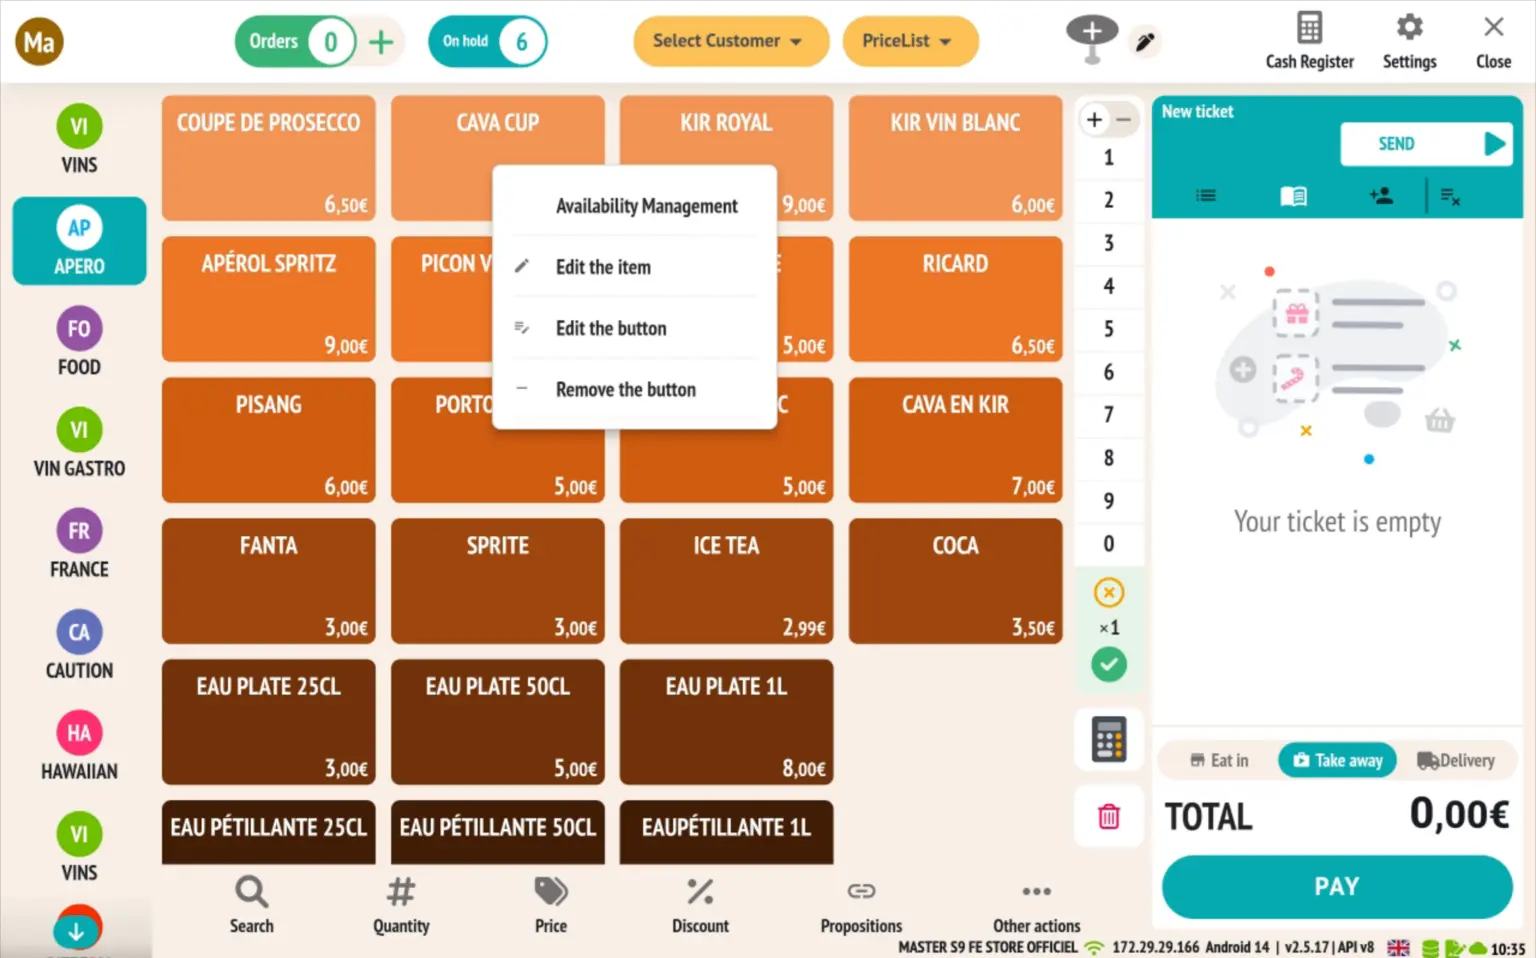
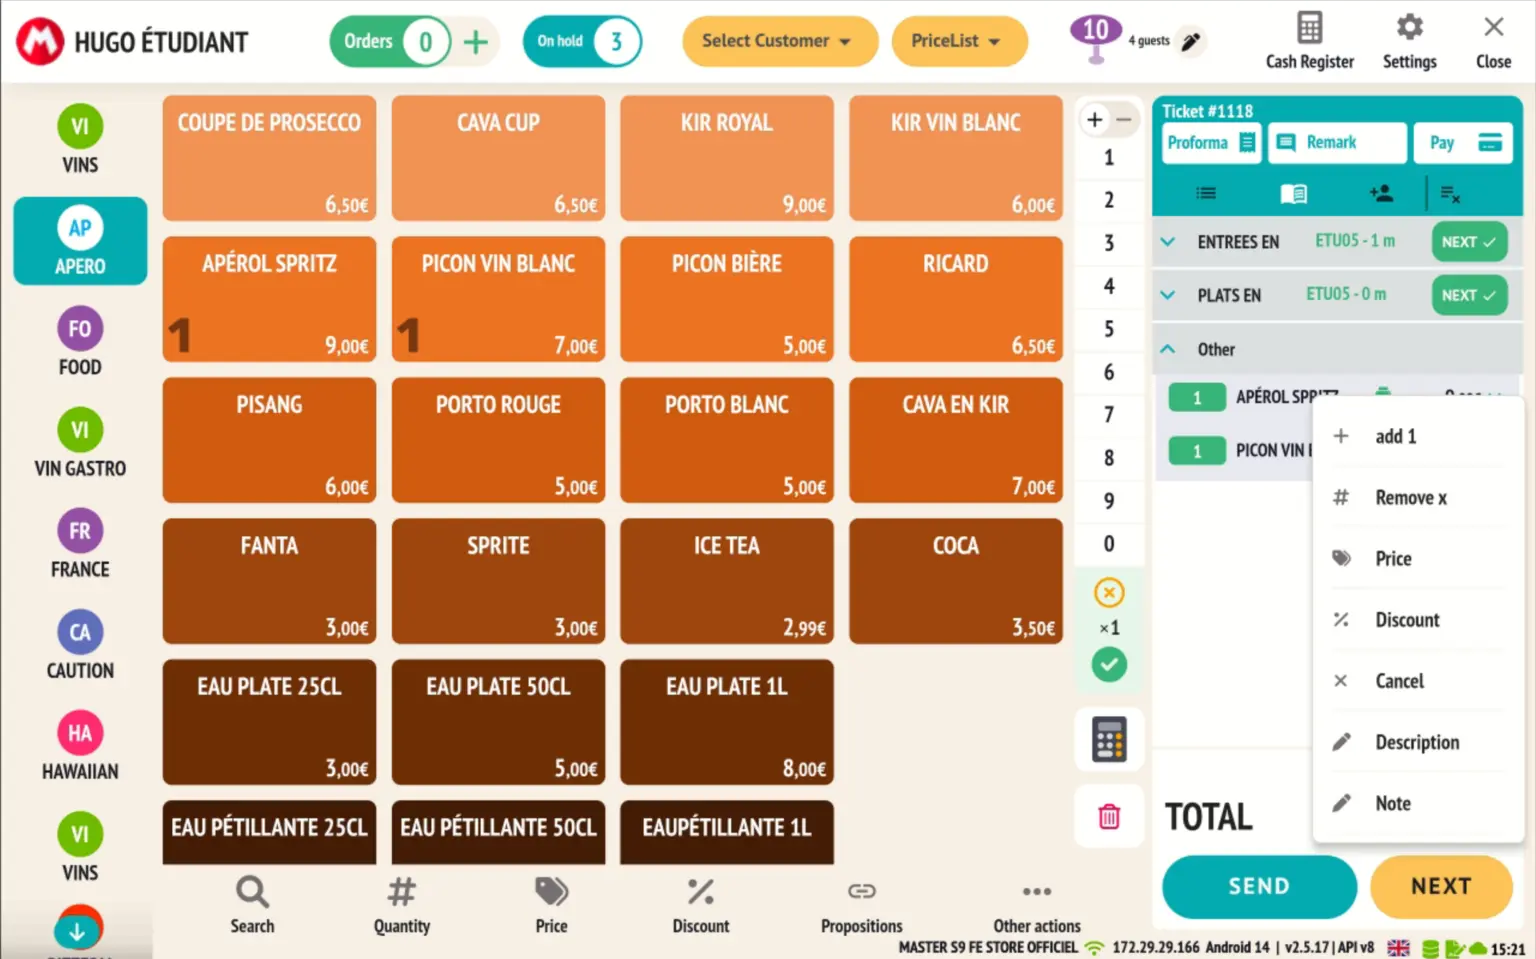
Added a context menu by long pressing on the matrix (sales screen)
Users with access to settings can now perform certain actions directly from the sales screen, thanks to a new long-press interaction on the matrix.
There are two possible use cases:
- Long press on an existing button
Displays a context menu providing access to the following actions:- Manage item availability
- Edit article information
- Edit button
- Delete the button from the matrix
(NB: this does not delete the article, only the button from the matrix)
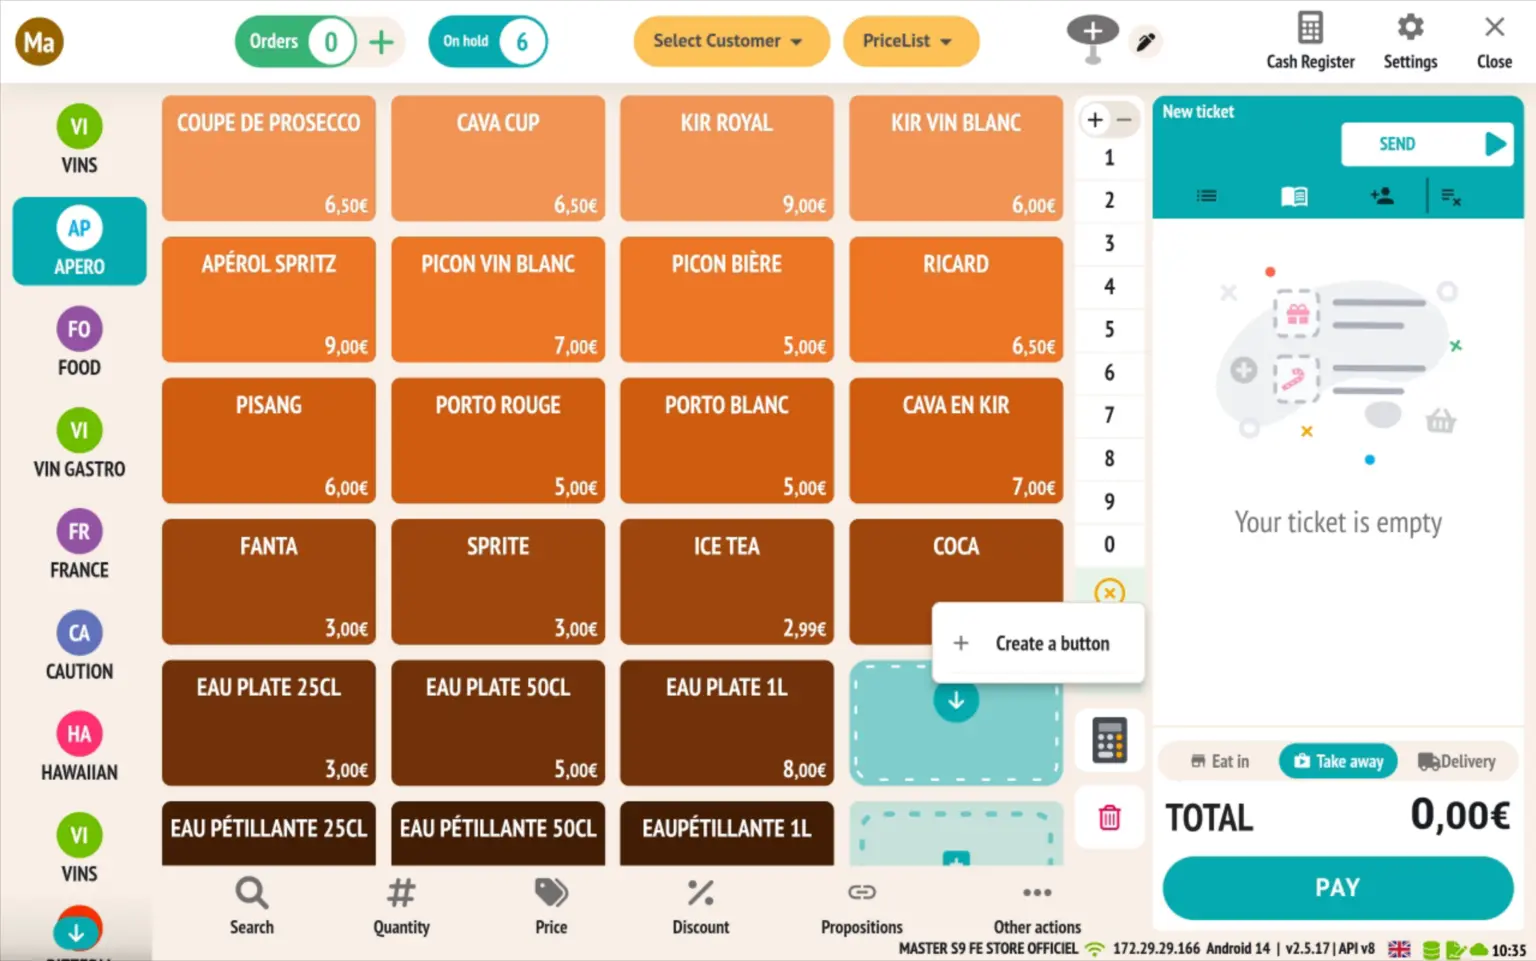
- Long press on an empty space
Proposes the creation of a new button at this location.
Request a refund via VivaWallet (Available only in API and Embedded mode)
RESTOMAX now allows you to submit refund requests directly from the sales screen to VivaWallet terminals, subject to certain conditions.
VivaWallet settings
- The unreferenced refund feature is not enabled by default.
👉 To enable it, please contact your VivaWallet sales representative or their support team. - ⚠️ ECR mode is not compatible with this feature.
Only API (Web service) and Embedded (Smart POS) modes are supported.
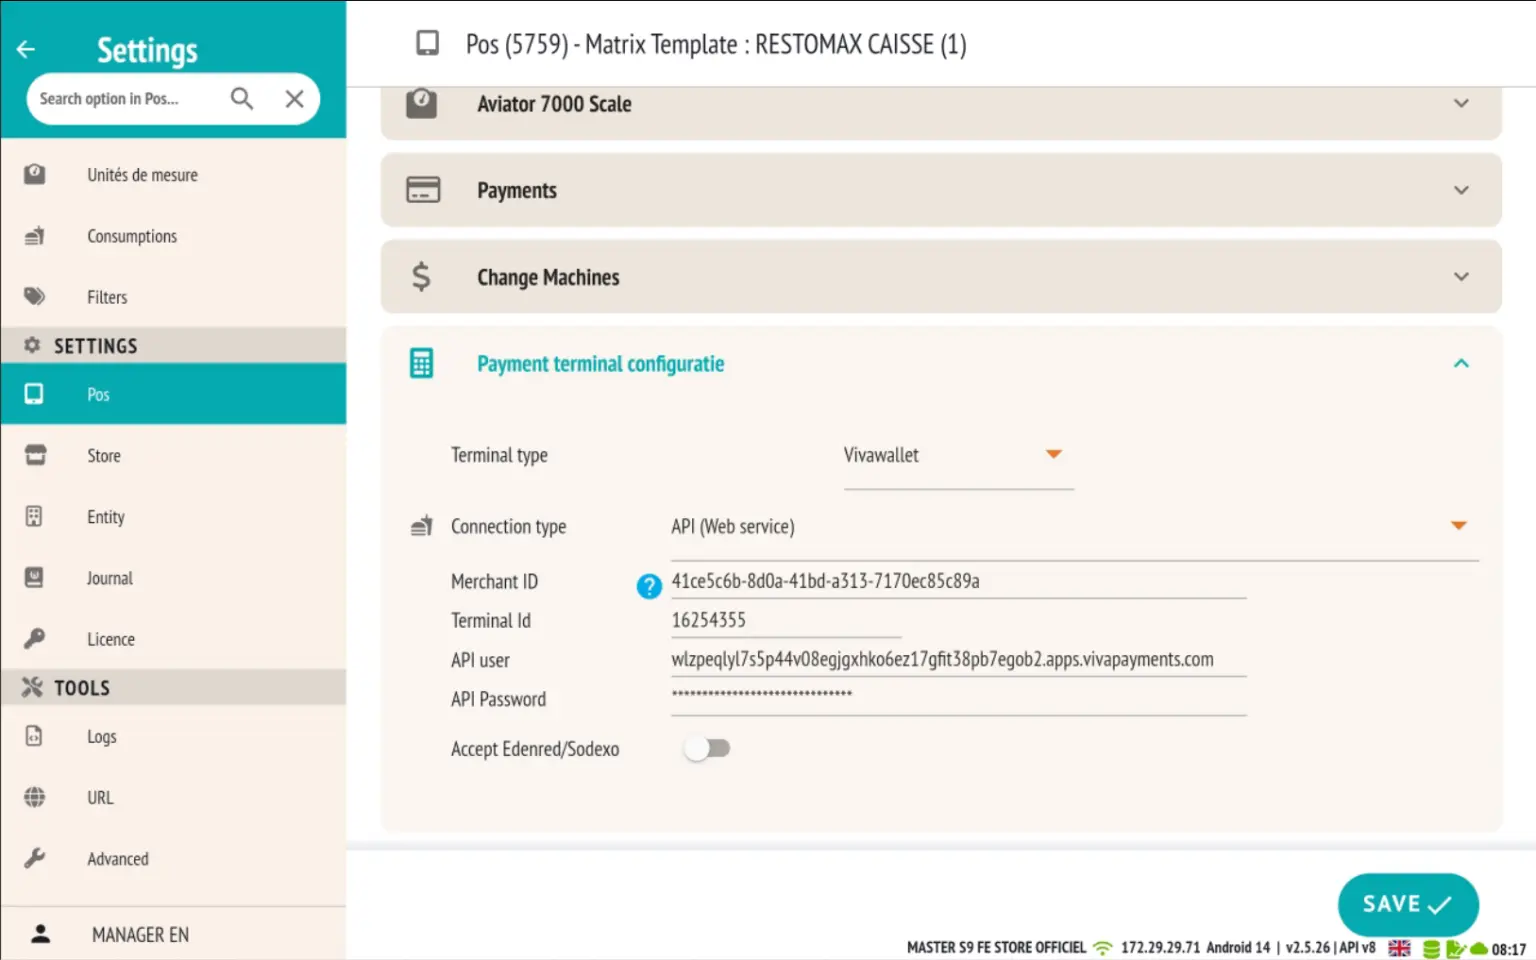
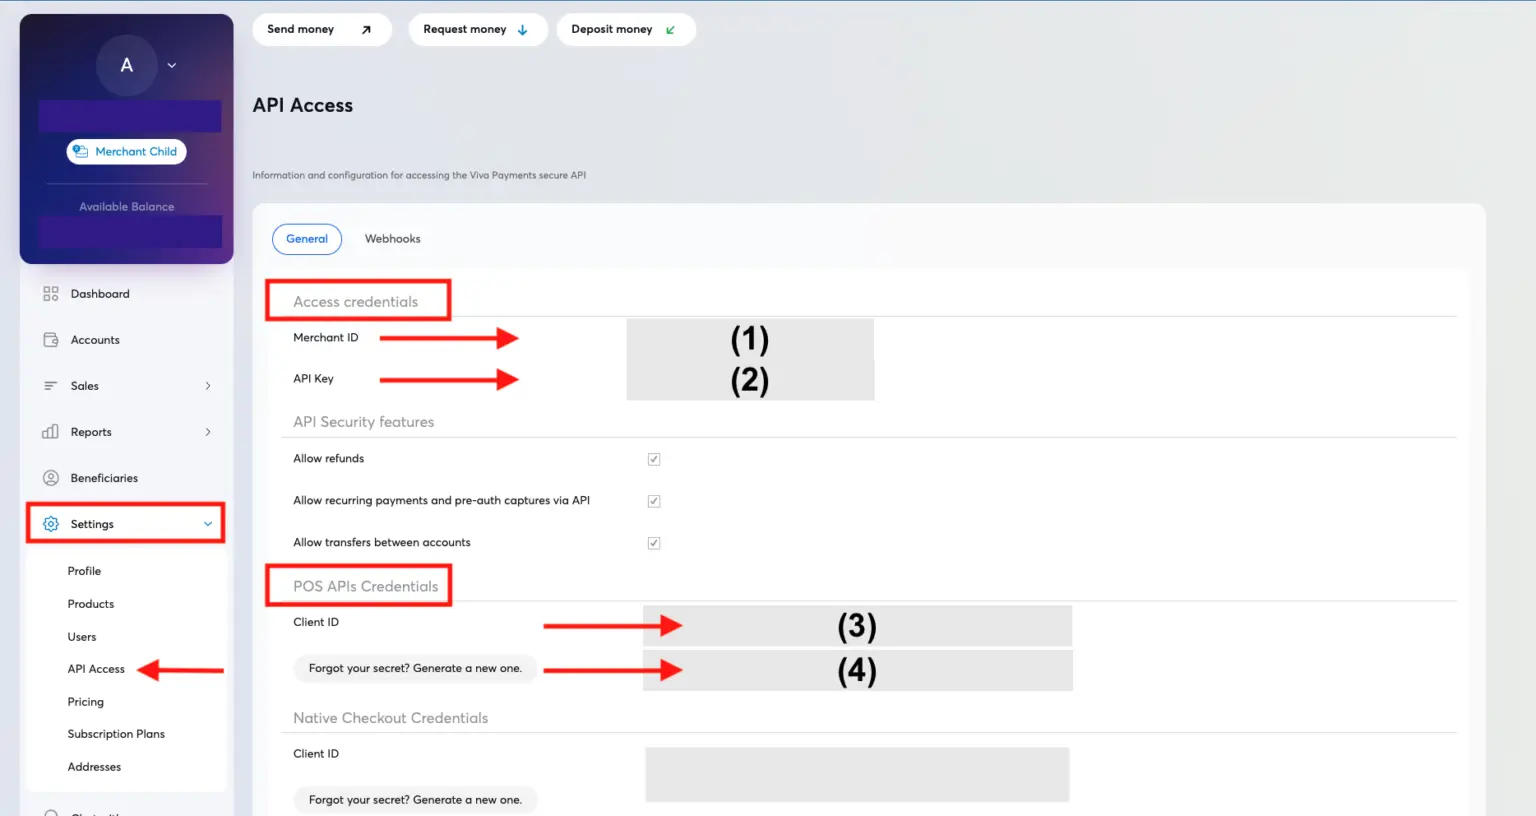
RESTOMAX side configuration
Access payment settings in RESTOMAX.
- Select the connection type:
API (Web service)
Embedded (Smart POS)
- Please fill in the required fields:
Merchant ID (1)
Terminal ID (2) (required only for API mode)
API User (3) (required only for API mode)
API Password (4) (required only for API mode)
Automatic repayment initiation
Once the configuration is complete:
- Any sales document finalised with a negative total amount
- ...and paid via the ‘Credit Card’ button
➡️ Automatically sends a refund request to the VivaWallet terminal, in the same way as a standard payment.
New options for printer outputs
Three new options are now available to fine-tune printer output behaviour in your RESTOMAX cash register configuration:
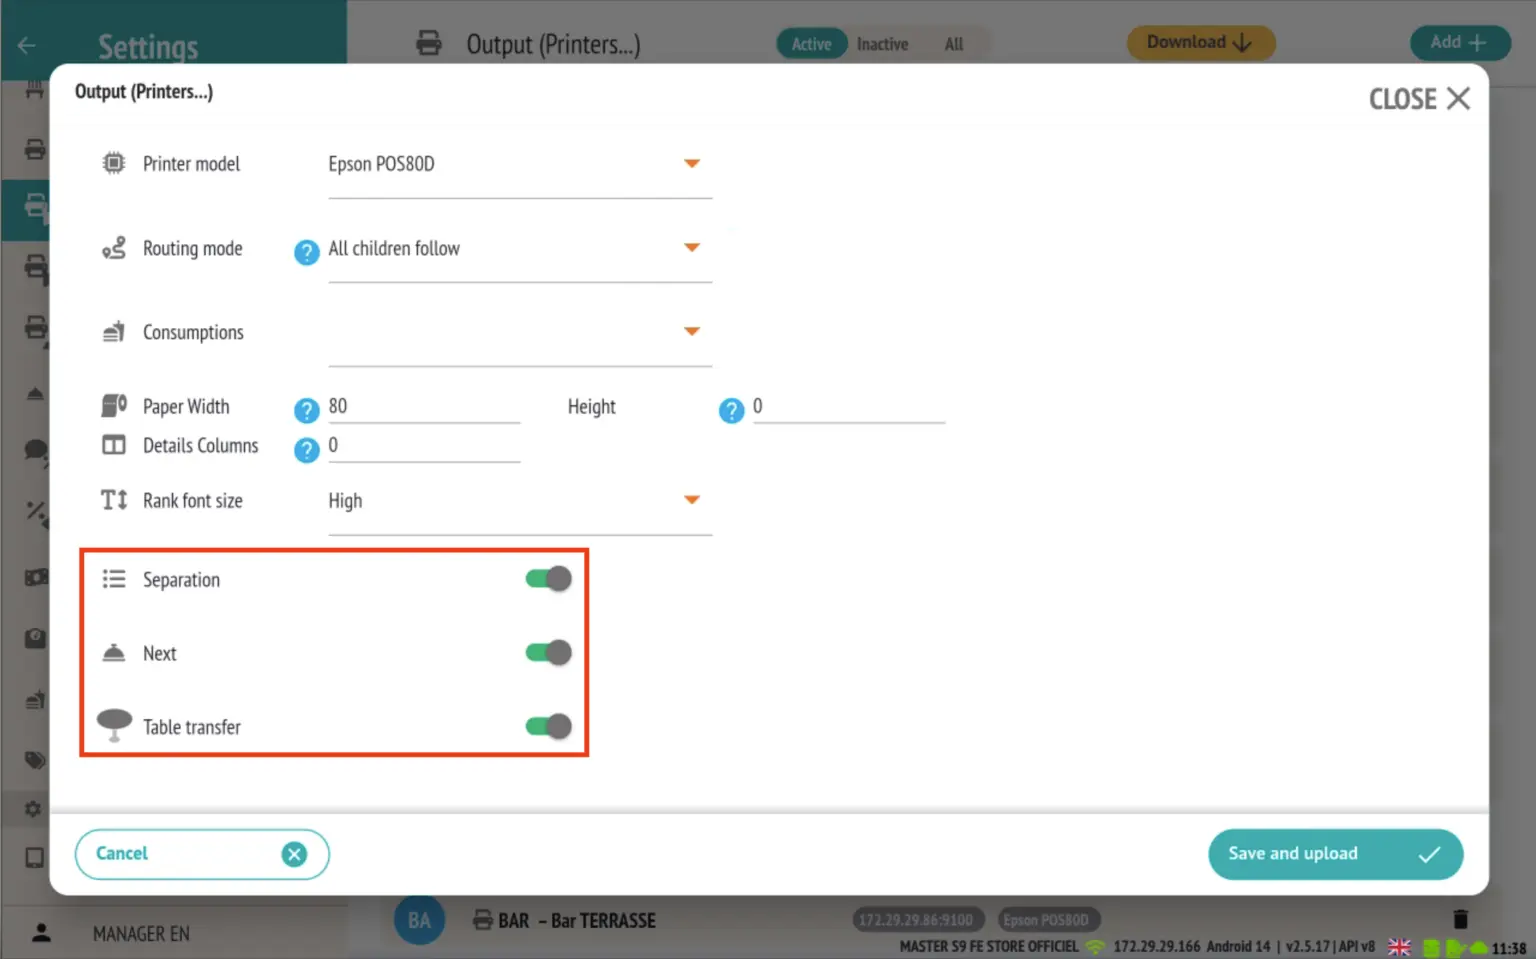
1. Separation (suite mode only)
Enables you to disable printing of separators (lines consisting of dashes) on preparation tickets.
These separators are usually used to distinguish between different groups of items. By disabling this option, the ticket will be printed without these separation lines.
2. ‘Suite’ option
By disabling this option on an output, items linked to this printer will no longer be ‘suitable’.
This means that if a block of items only contains items associated with non-suitable outputs, the Next button will not be displayed.
However, if at least one item in the block is linked to a suitable output, the ‘Next’ button will appear but will only send the request to that printer output.
Example:
If the ‘Suite’ option is disabled for the BAR output, it will no longer be possible to send a suite to this printer.
If a group of items only contains products intended for the BAR, the ‘Continue’ button will not appear.
3. Table transfer
You can now disable printing of tickets related to table transfers for each printer output.
For example, if you no longer want the dessert printer to receive printouts during a table transfer, simply disable this option for that output.
Improvement of the follow-up complaint system
The follow-up complaint system has been enhanced with a new, more intuitive management mode, facilitating service in the dining room and coordination of orders sent to the kitchen.
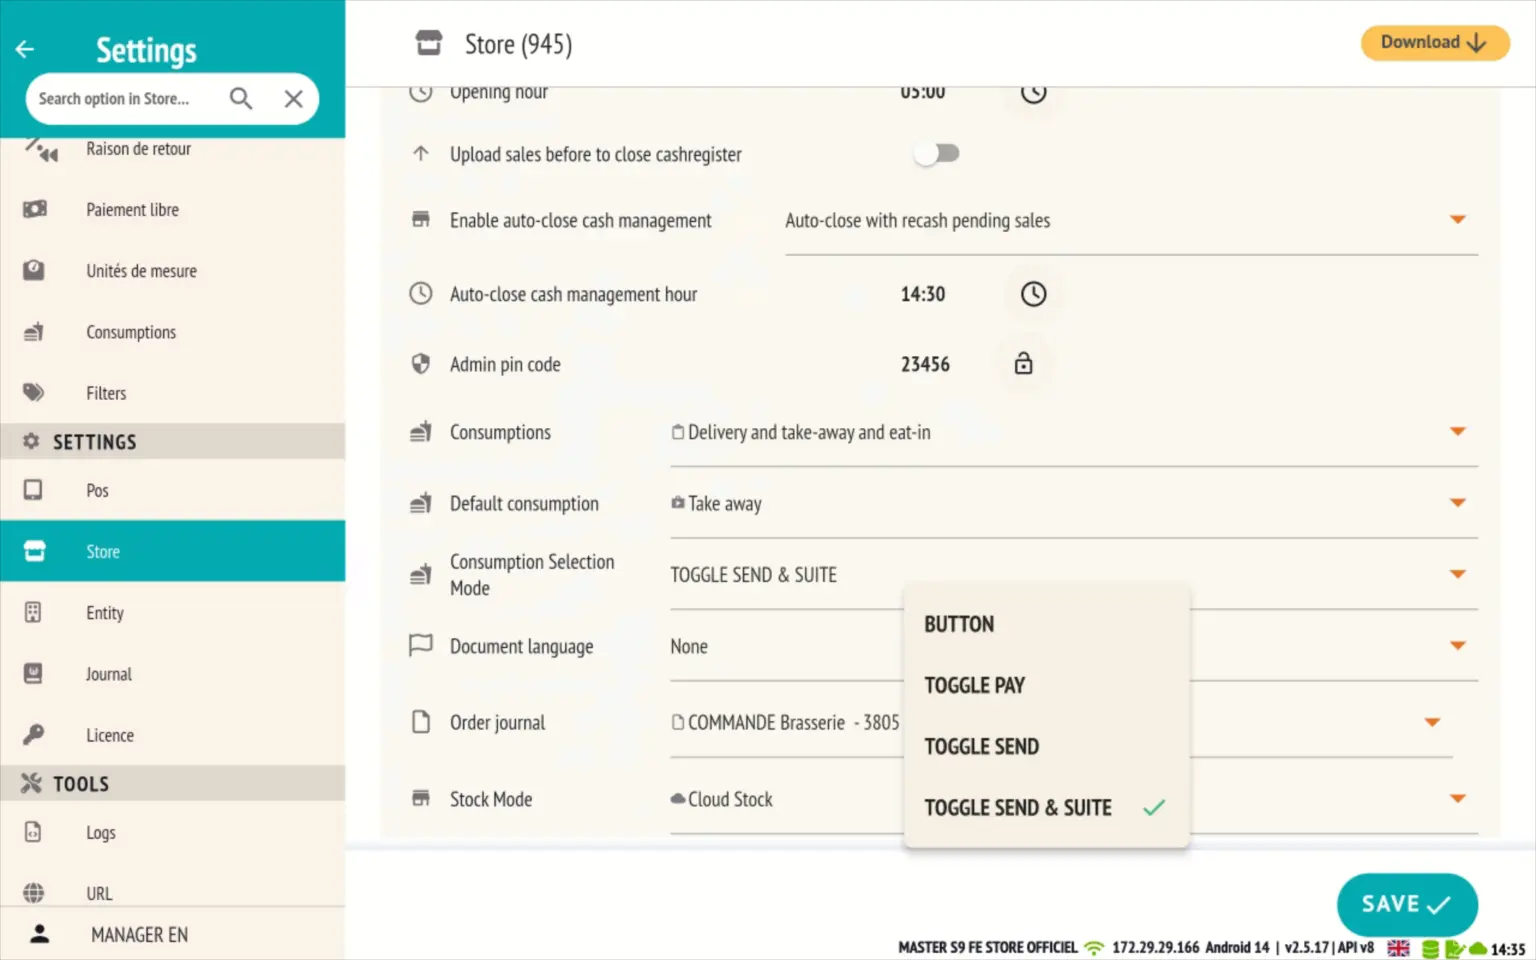
Mode activation
To activate this new follow-up complaint mode, go to the store settings and set the consumption selection mode to:
TOGGLE SEND & SUITE
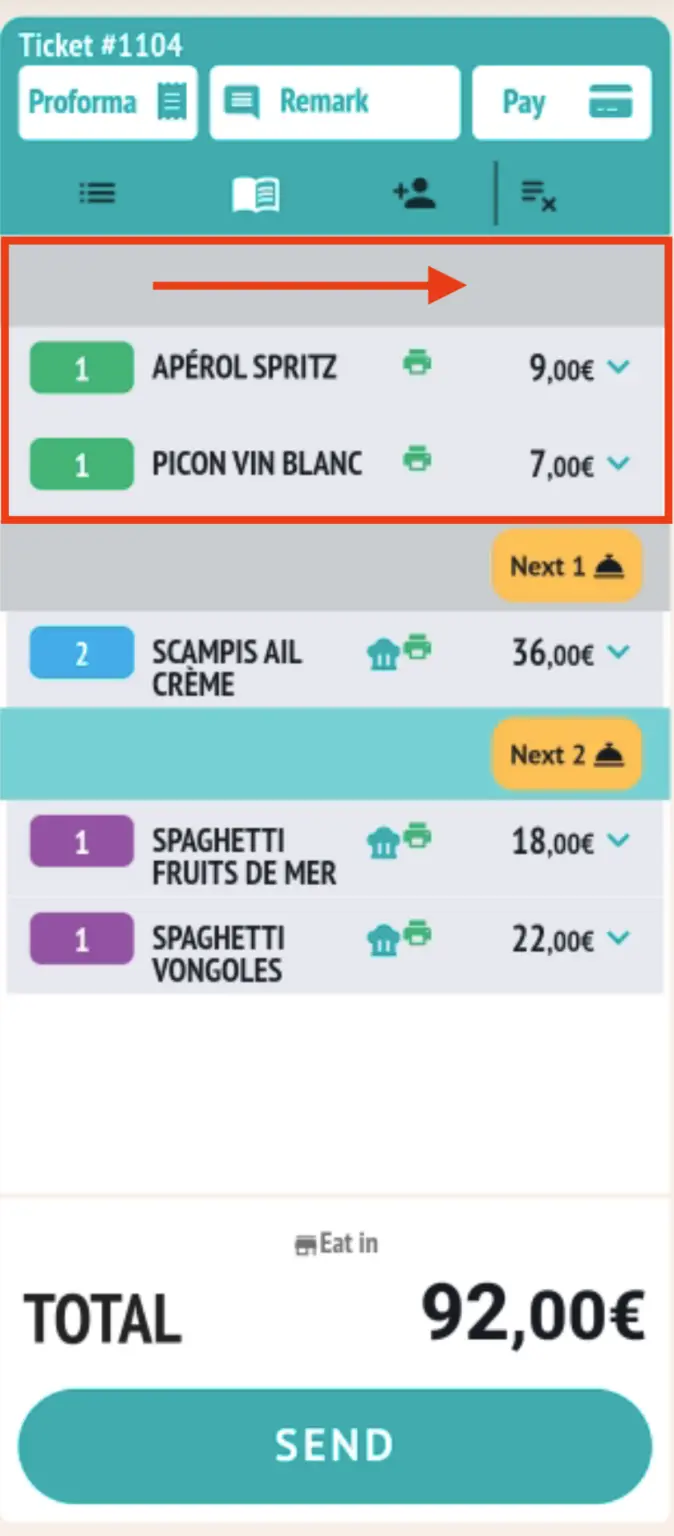
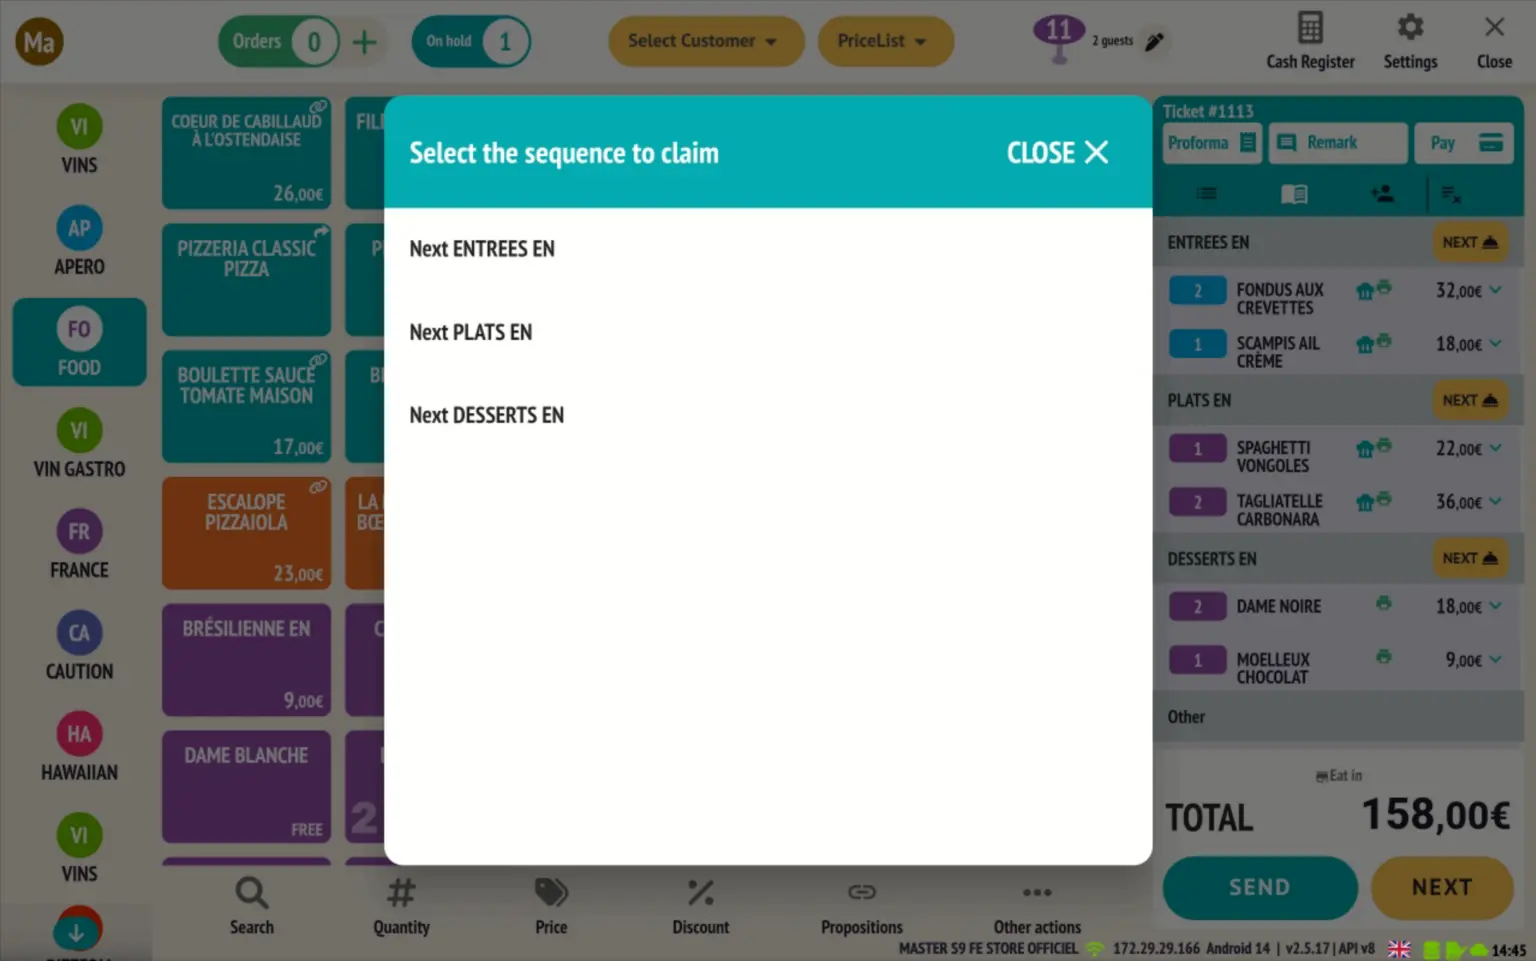
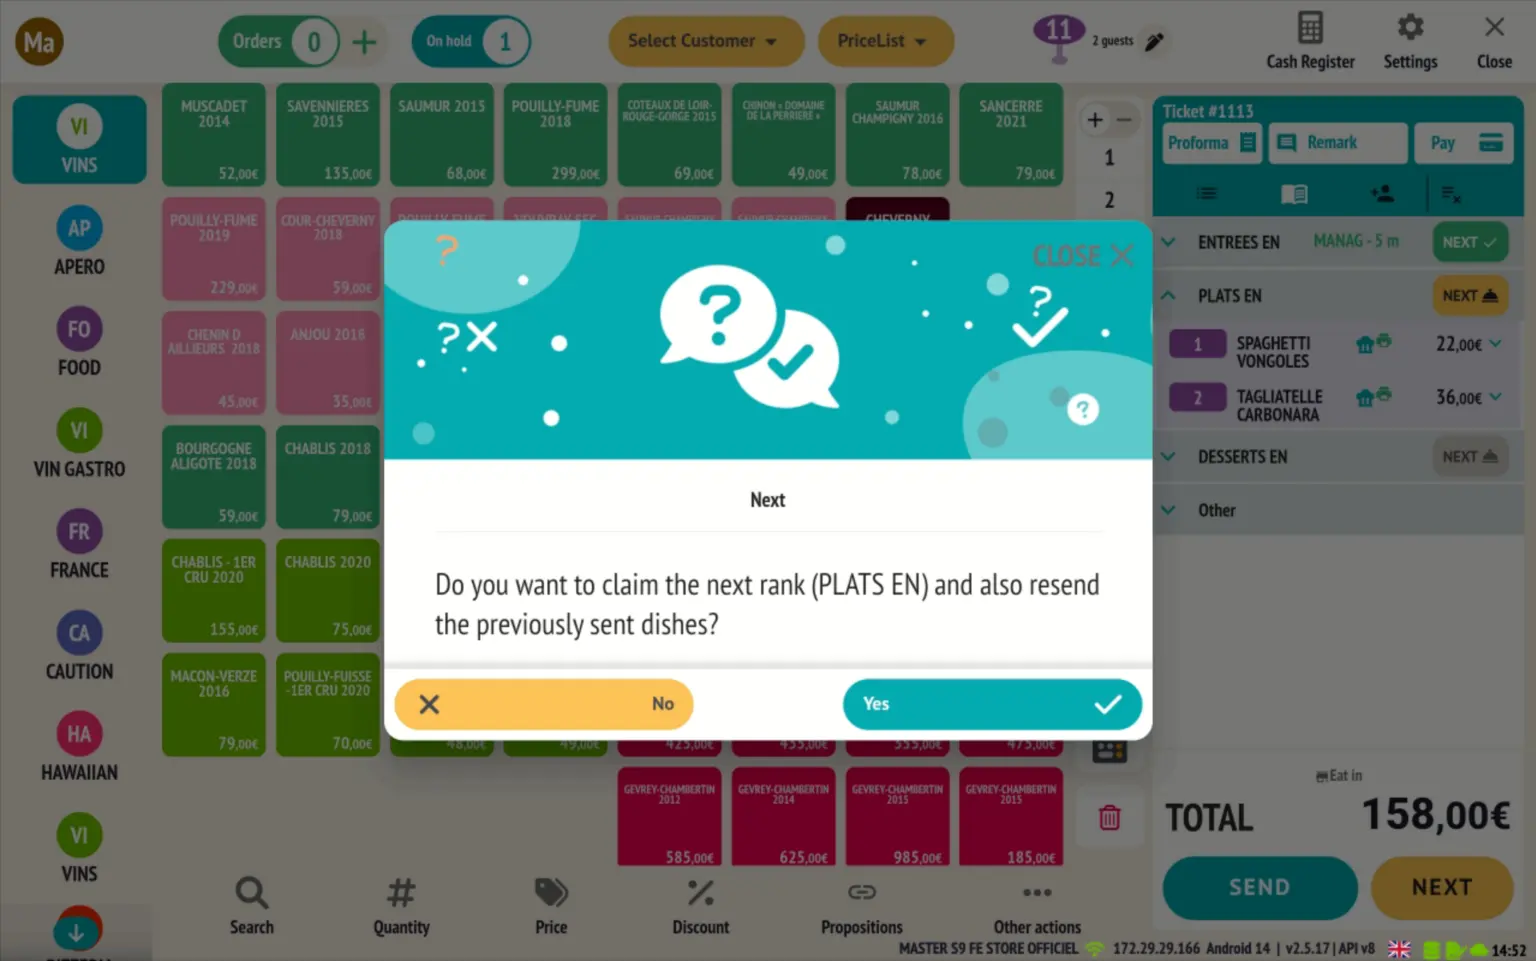
New ‘Continue’ button on the sales screen
A ‘CONTINUE’ button now appears at the bottom of the basket, next to the ‘SUBMIT’ button.
This button allows you to request the next service without having to manually select the corresponding rank in the virtual ticket.
The old method (manually searching for a row to follow) is still available for greater flexibility.
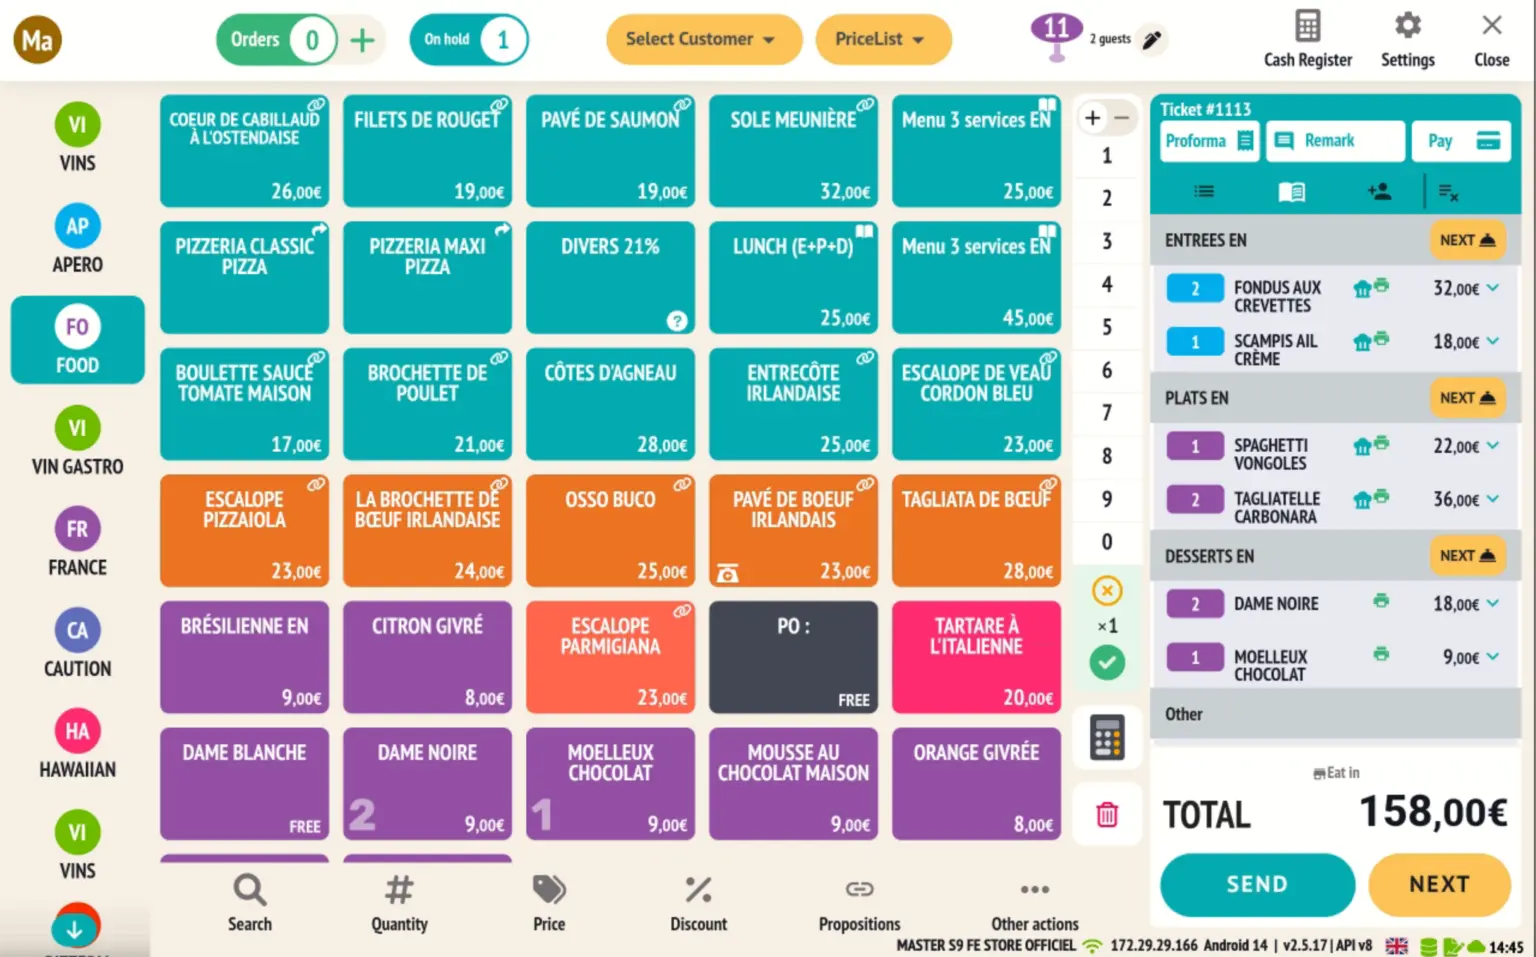
Complaint tracking with employee name and timer
When a follow-up is requested:
- The short name of the employee appears directly on the corresponding block.
- A timer indicates how many minutes have passed since the next course was requested, for better timing management in the kitchen.
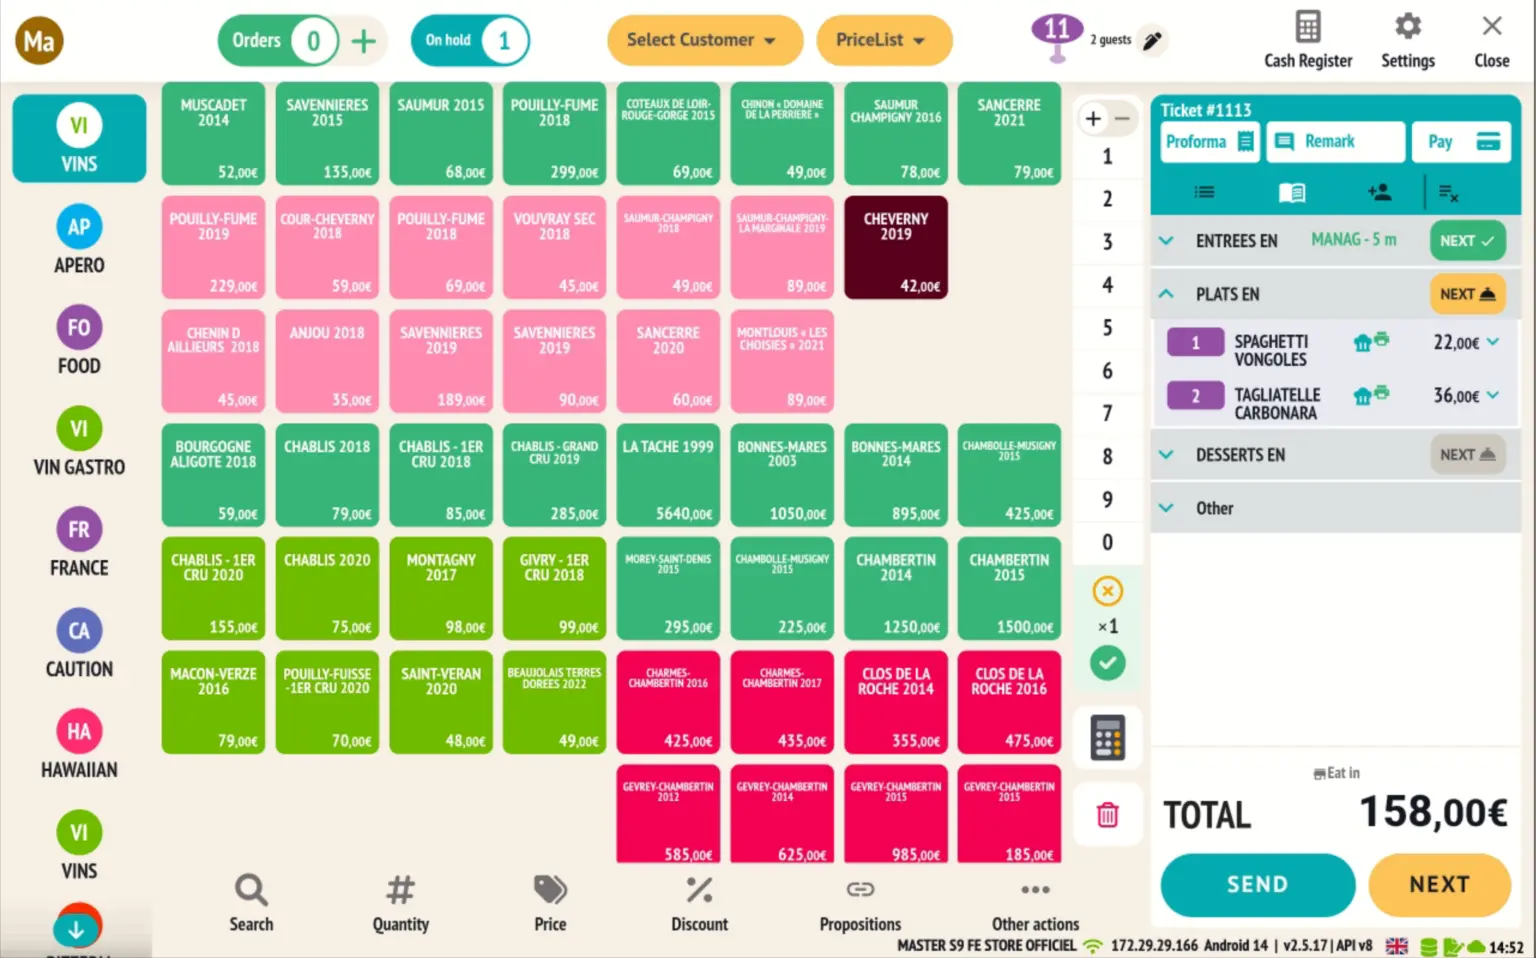
Option to send sequences sequentially (POS optimisation)
A new option can be enabled in the POS settings to require sequential sending of sets according to their logical order (starter → main course → dessert).
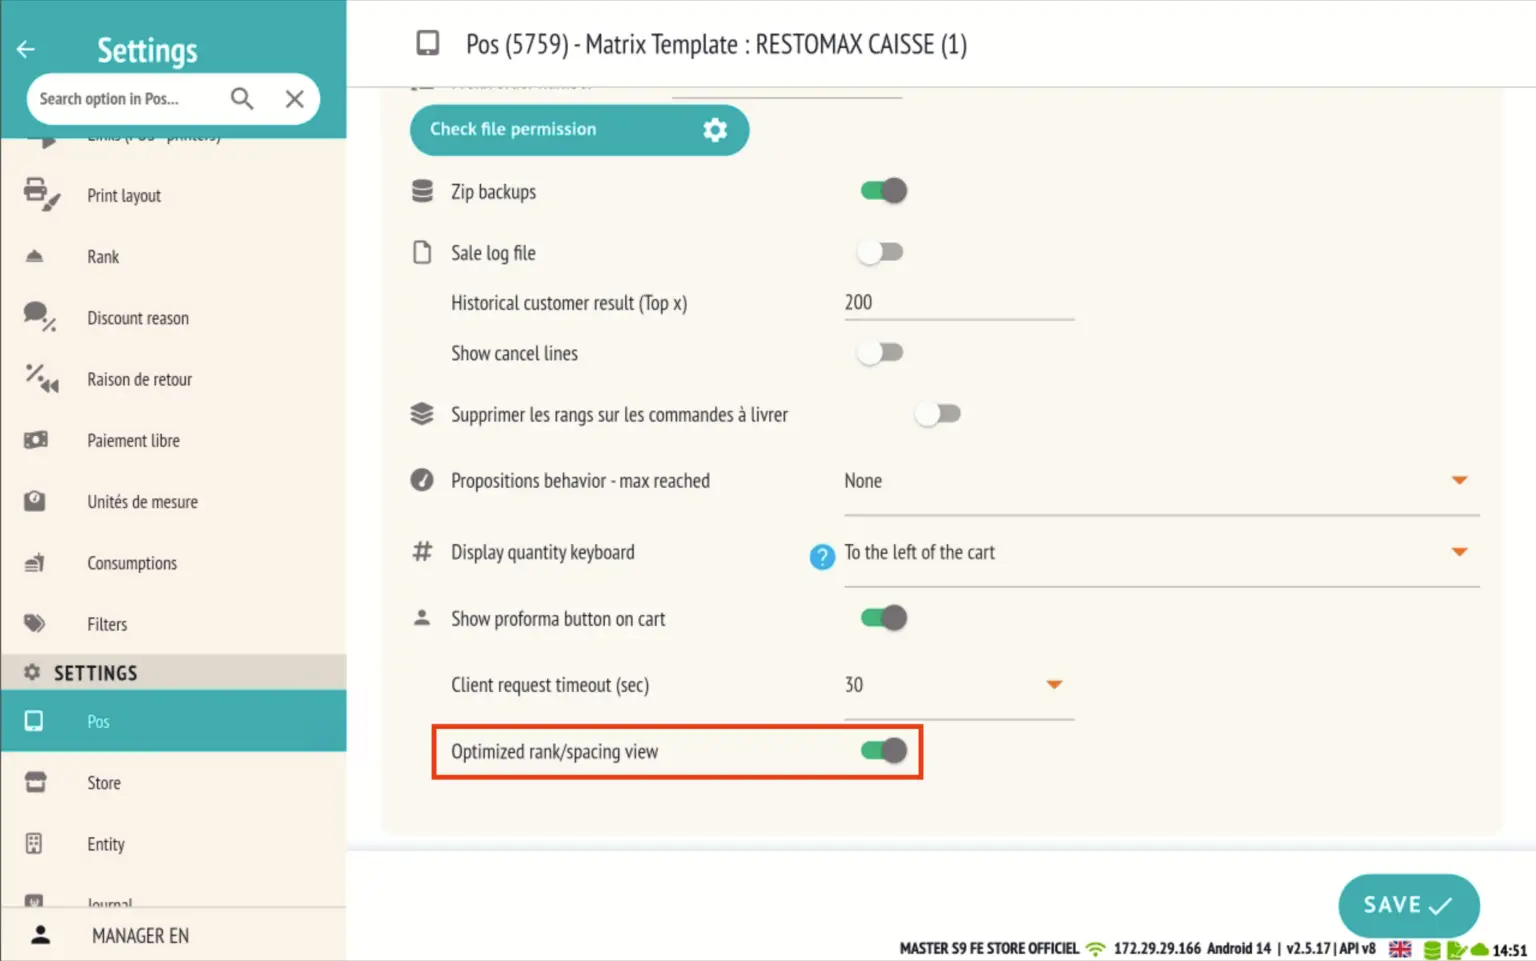
Features associated with this option:
Blocks that are not yet claimable are greyed out.
The ‘NEXT’ button at the bottom of the basket only requests the lowest available rank.
When the ticket is reopened, only the block ready to be claimed is open.
If all sequences have been requested, the last block remains open for verification or final sending.

Super Mario connection with PIN code
The Super Mario feature allows a user with extended rights to act on behalf of another user, while maintaining complete traceability.
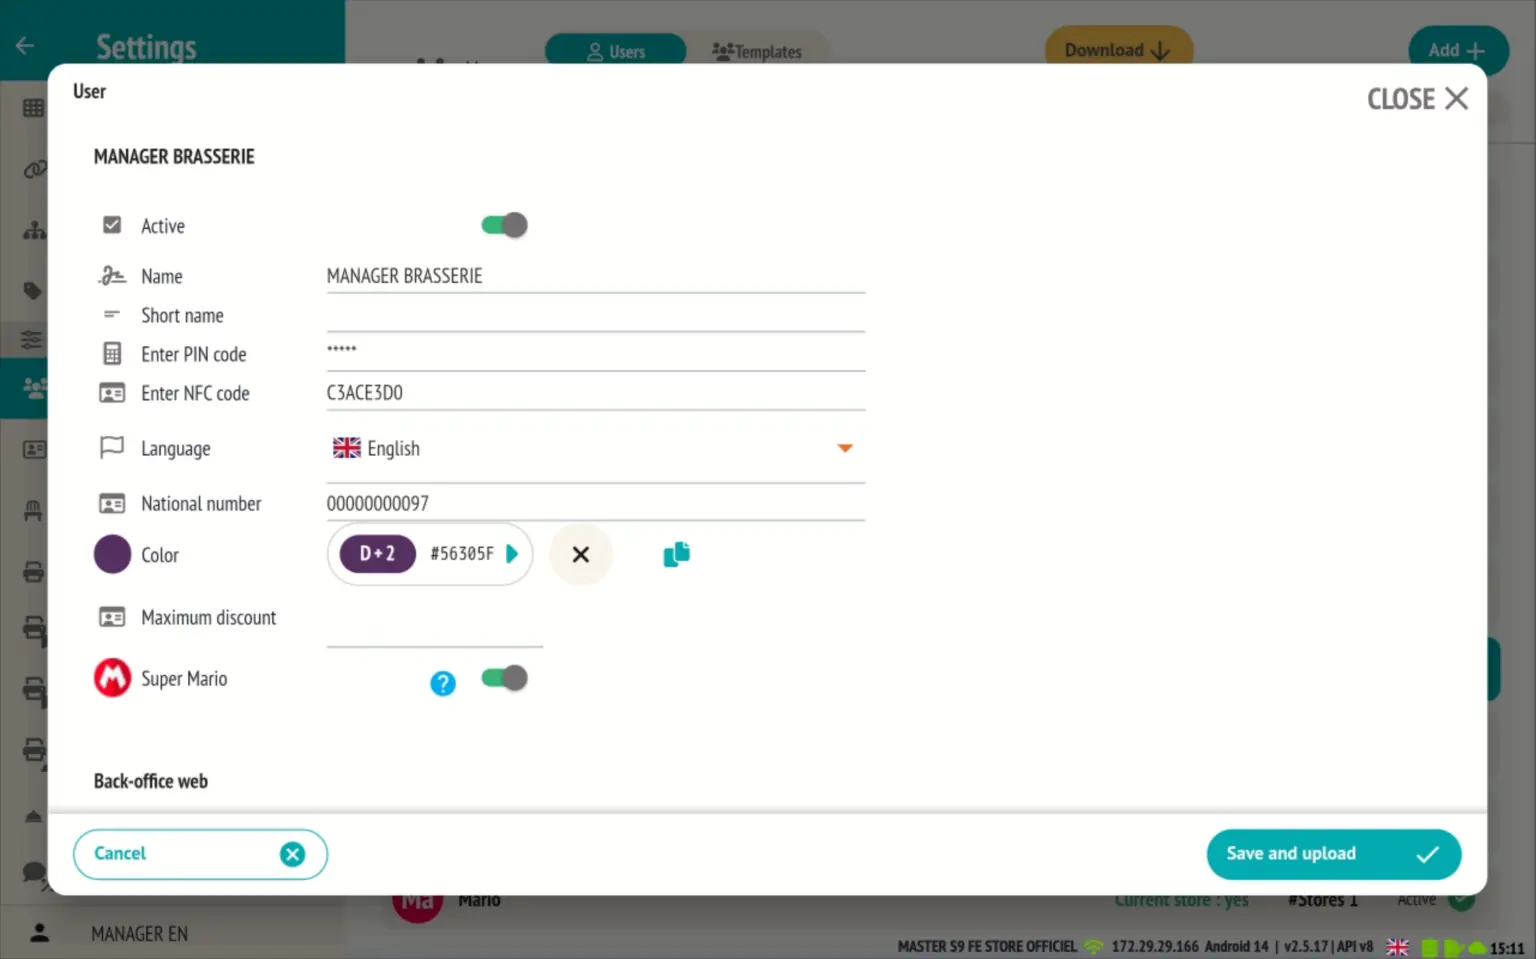
Super Mario Activation
- This option can be enabled directly in the relevant user profile.
- It allows the user to perform actions with full cash register privileges without appearing on the time clock.
- Access to Super Mario is only possible via the padlock icon on the login screen.
- It is mandatory to assign a PIN code to the Super Mario user to enable its use.
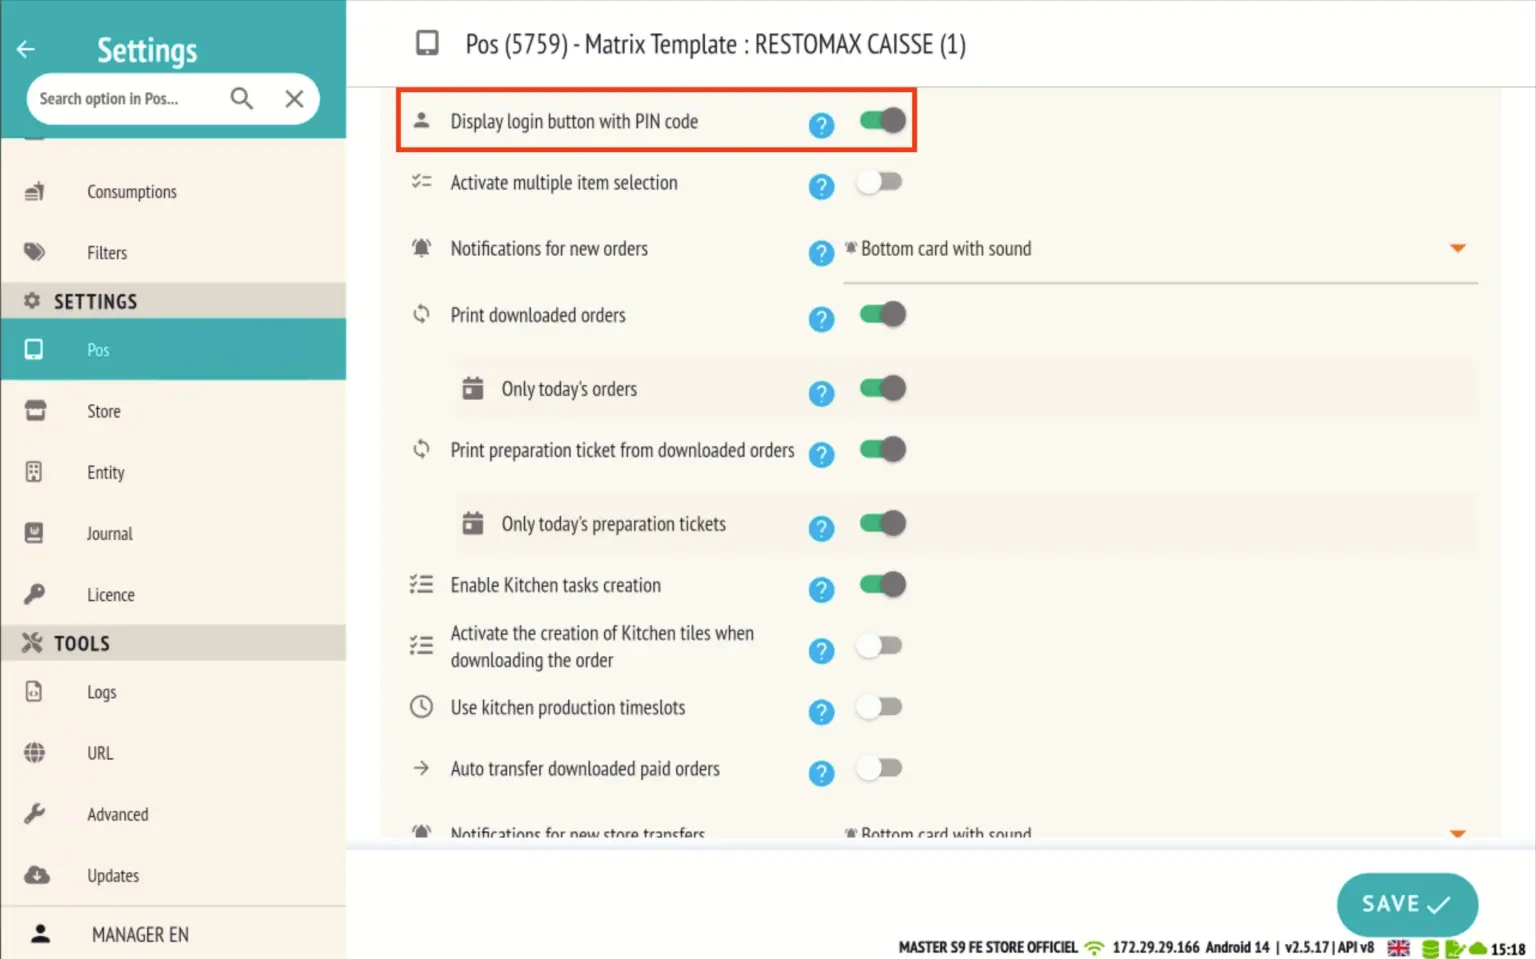
Reminder: To activate the padlock on the login screen, make sure that the dedicated option is enabled in the store settings.
Use in context
When a Super Mario user works on a document that has already been opened by another user, the actions are performed on behalf of the original user.
👉 However, if no user session is active (e.g., opening a new table, cash-in or cash-out), a pop-up window will appear allowing you to select the user for whom you wish to perform the action.
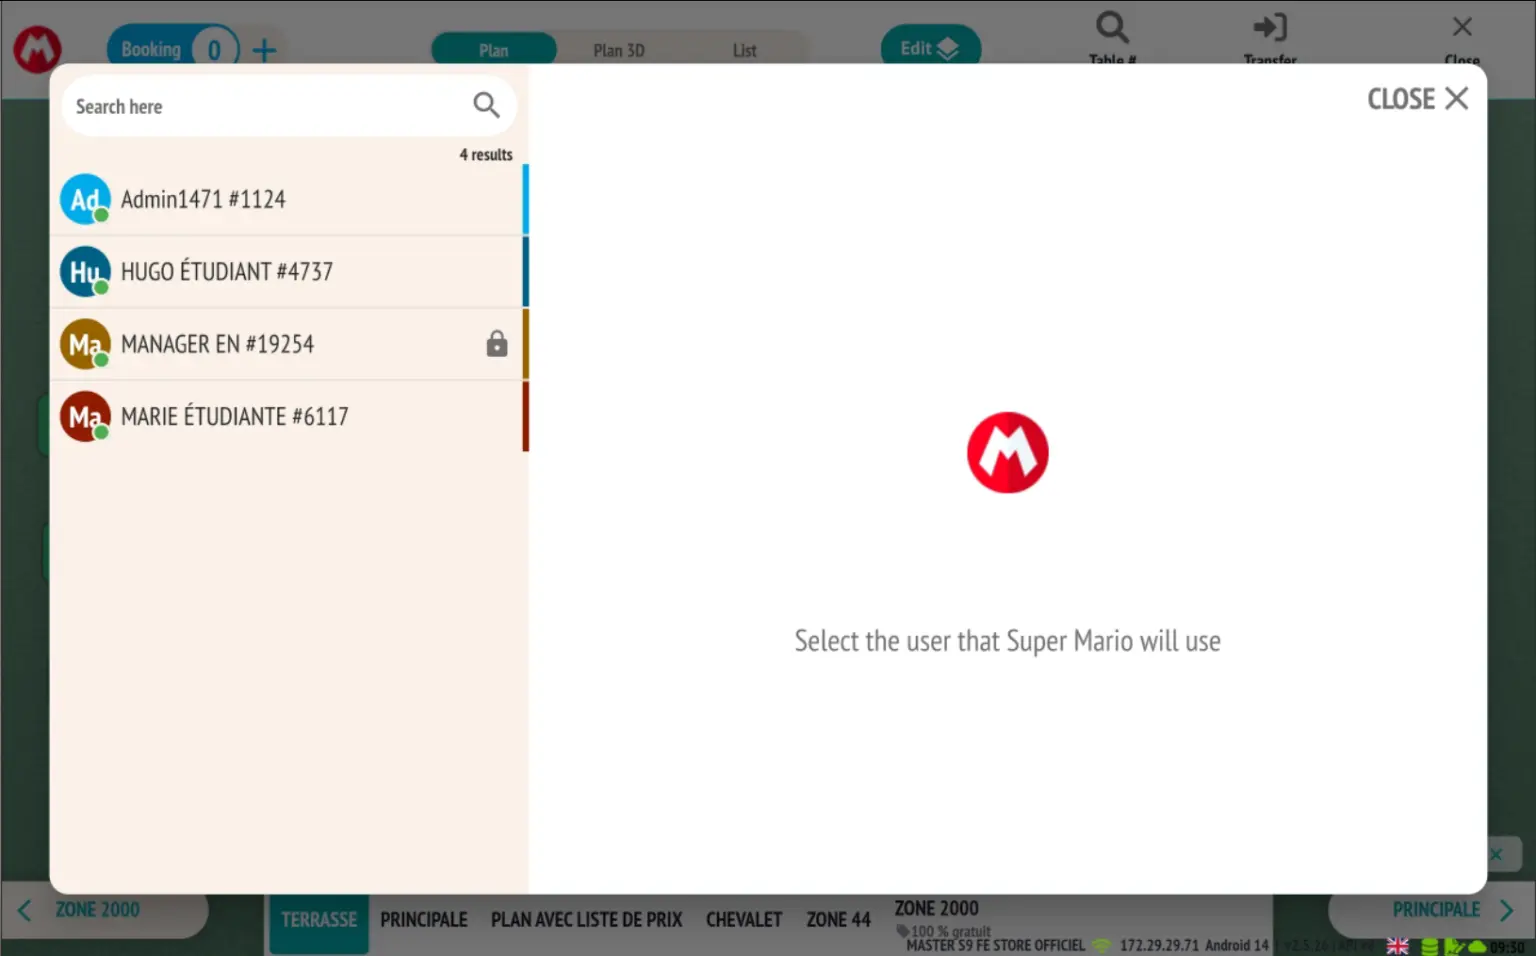
This ensures complete traceability and flexible use of Super Mario mode depending on the context.
- At the top left of the sales screen, you will see the Super Mario icon accompanied by the name of the user represented.
- In the trace, a specific column displays:
- The name of the Super Mario who performed the action
- The name of the user for whom the action was performed.
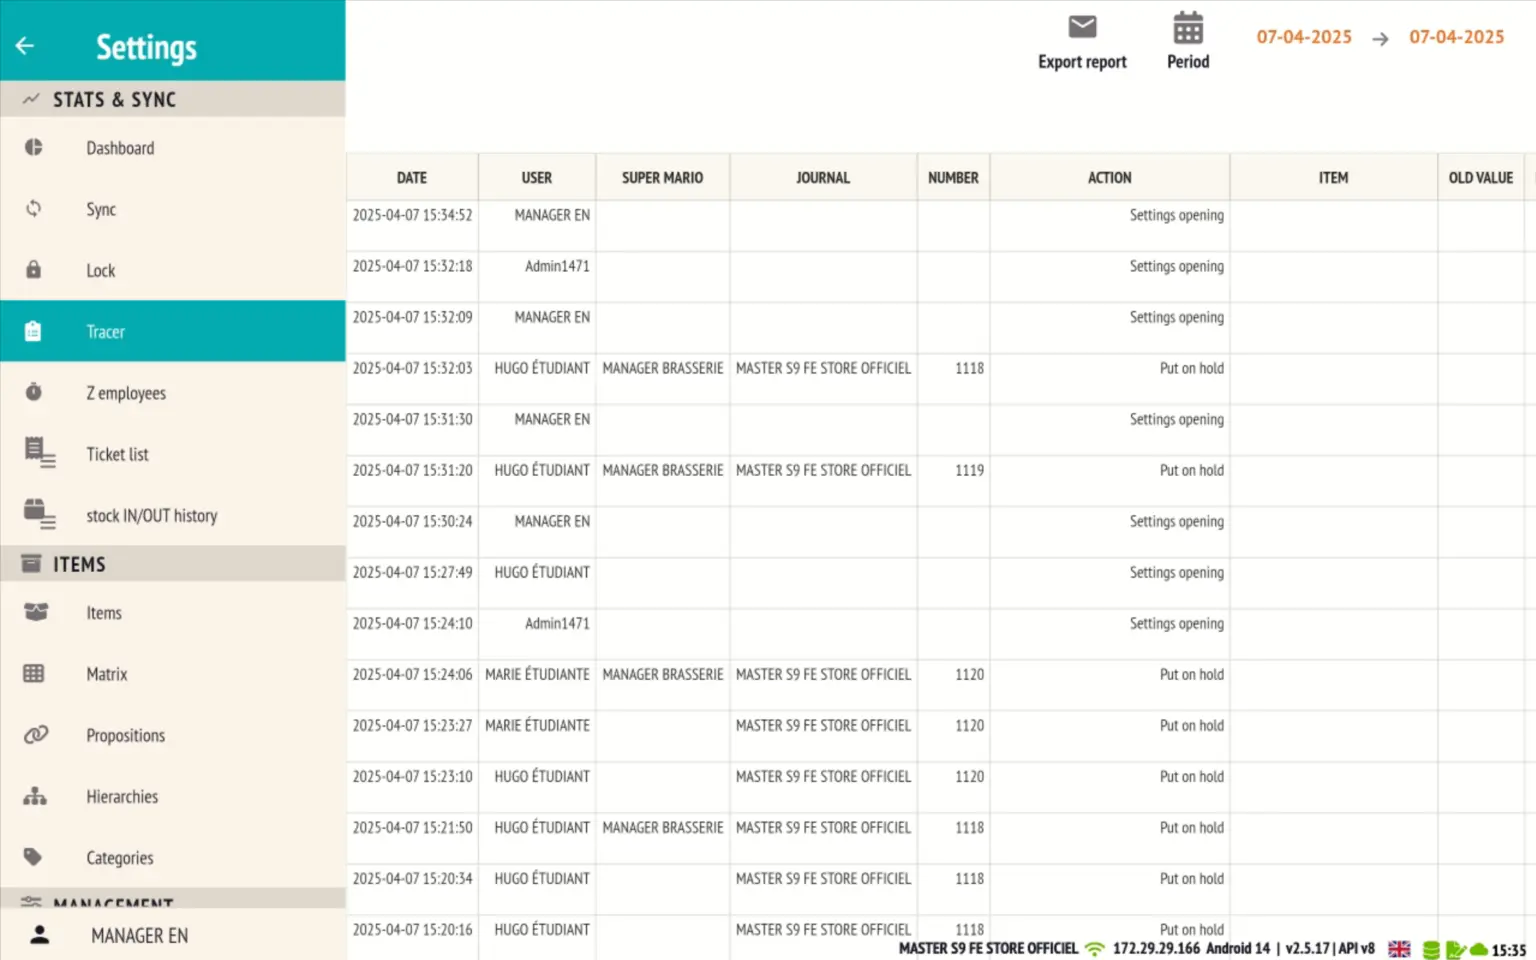
Integration of Sunmi V2 and V3 Mix printers
The printers integrated into the Sunmi V2 and Sunmi V3 Mix devices are now supported for printing receipts.
Configuration from the POS file
- Go to the POS file, ‘Ticket printer’ tab.
- The Sunmi V2 and Sunmi V3 Mix models are now available as printer options.
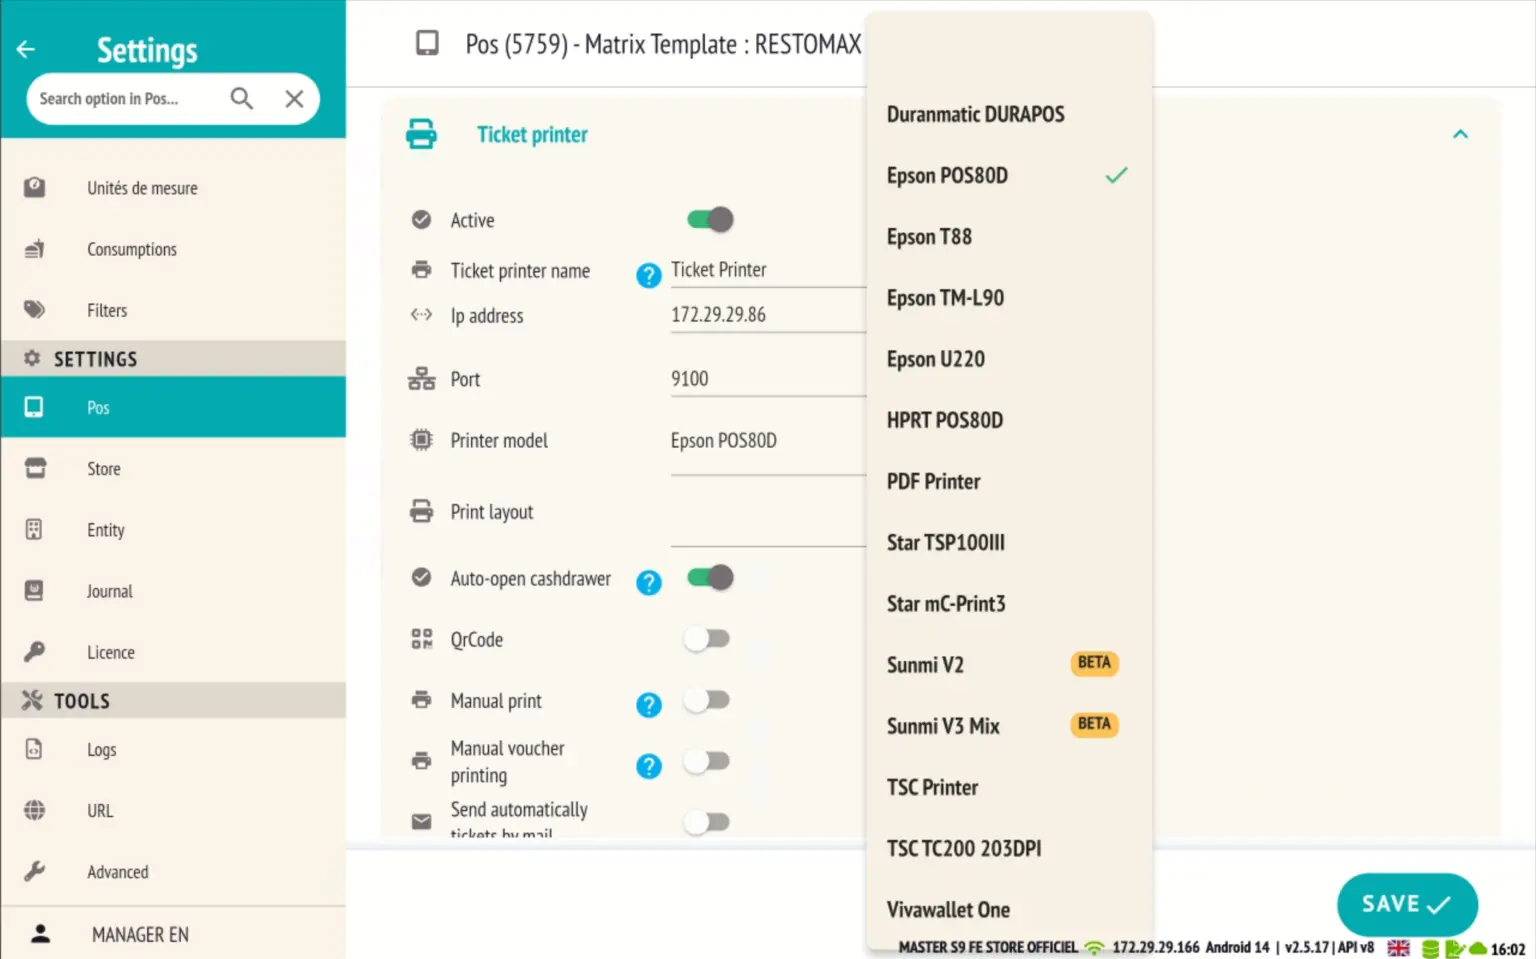
- When selecting one of these templates, you can choose the width of the paper used:
- 58 mm
- 80 mm
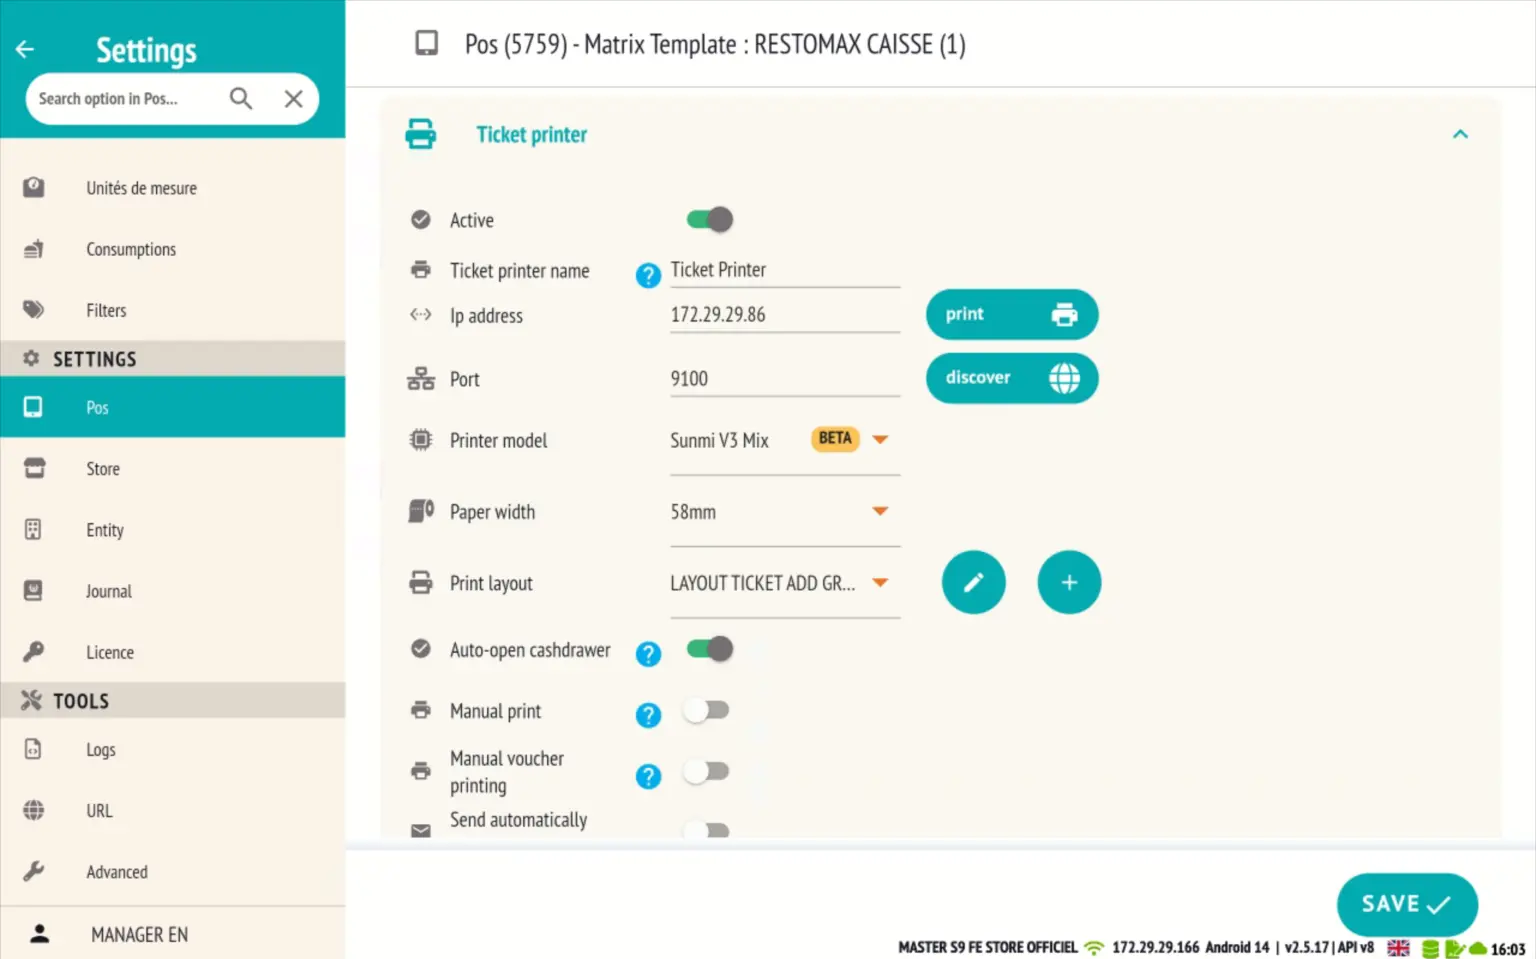
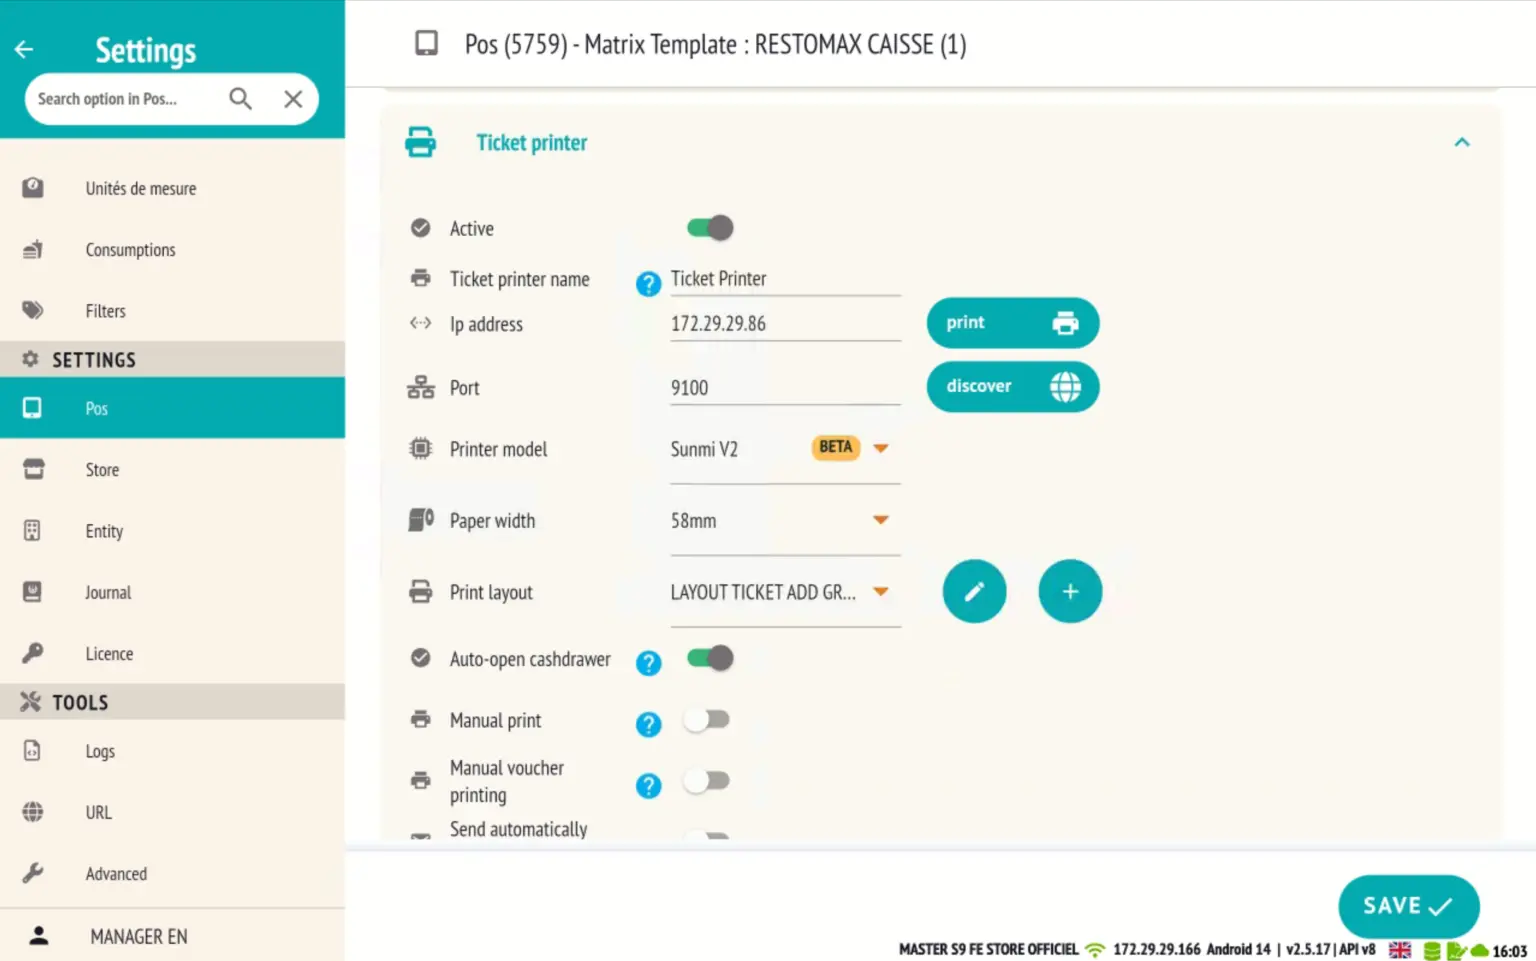
This allows for precise configuration according to the Sunmi model used and the roll format installed.
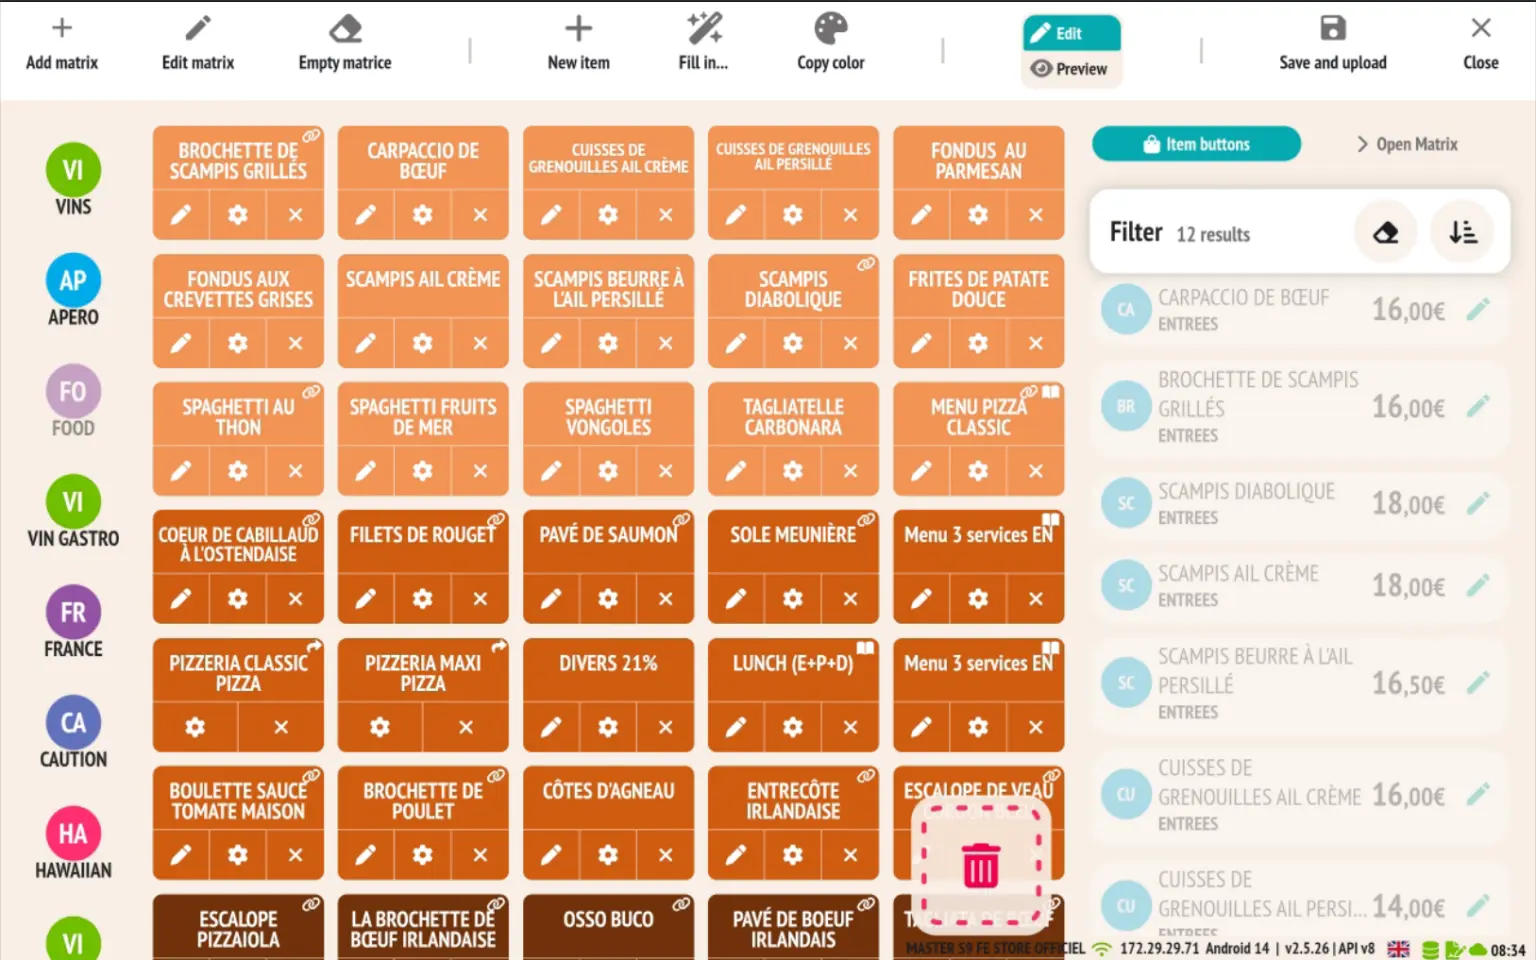
New colour copy-paste feature on matrix buttons
The master file has been given a new design that is more modern and user-friendly, accessible from the cash register settings.
It now includes a handy feature that allows you to change button colours more quickly.
How colour copy and paste works
- Click on the ‘Copy Colour’ button.
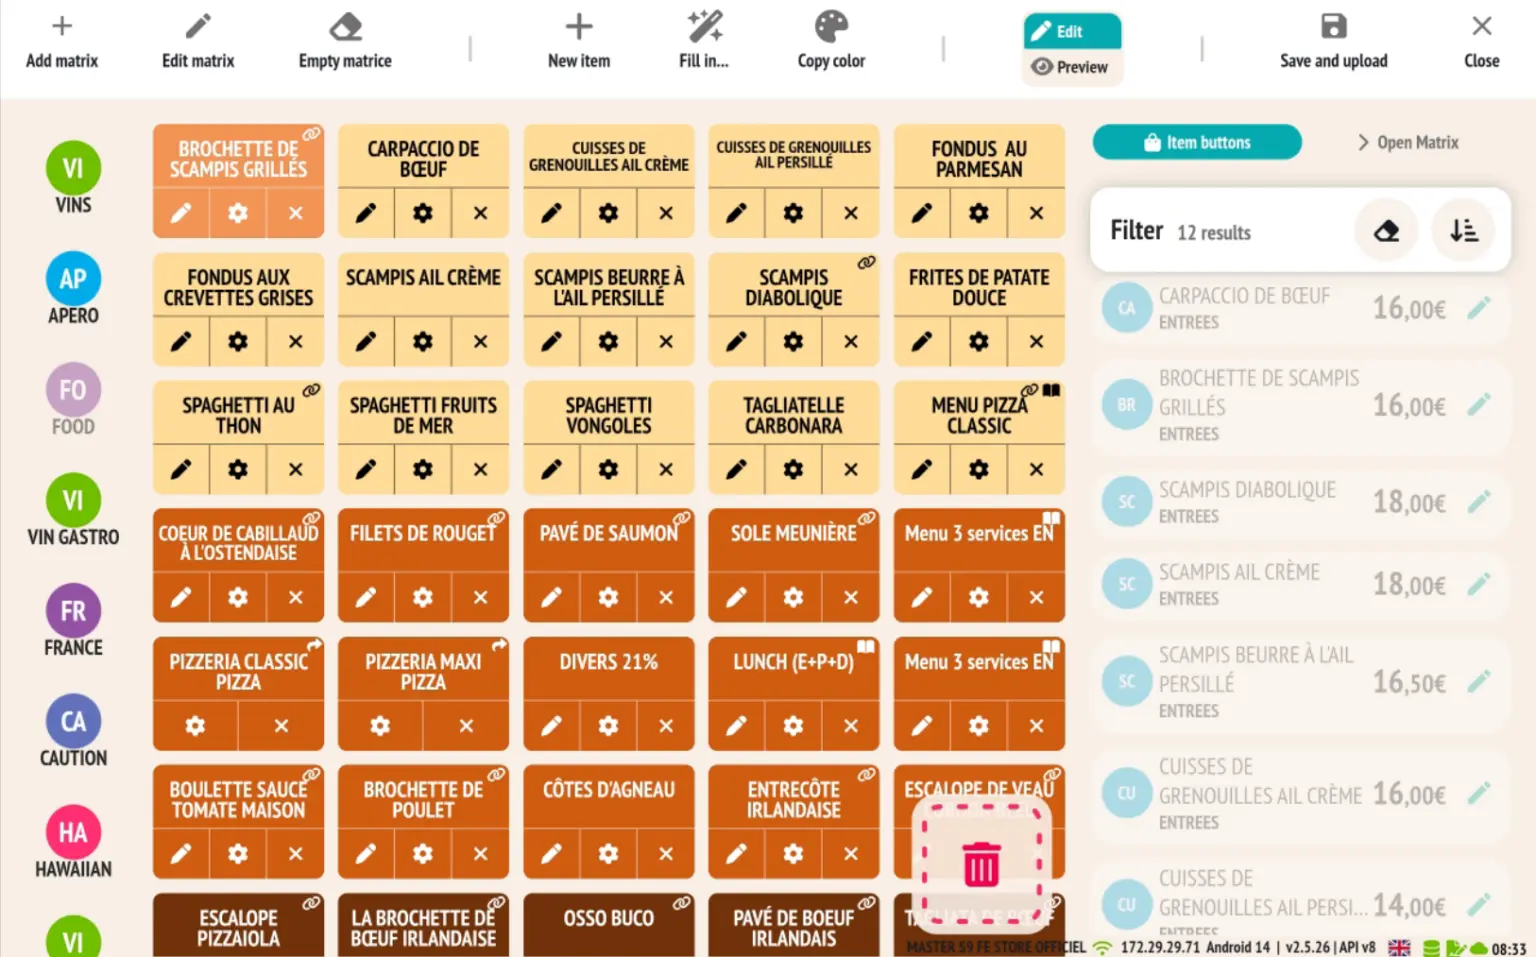
- Select a template button (the one whose colour will be copied).
- Then click on one or more target buttons to apply the same colour to them.
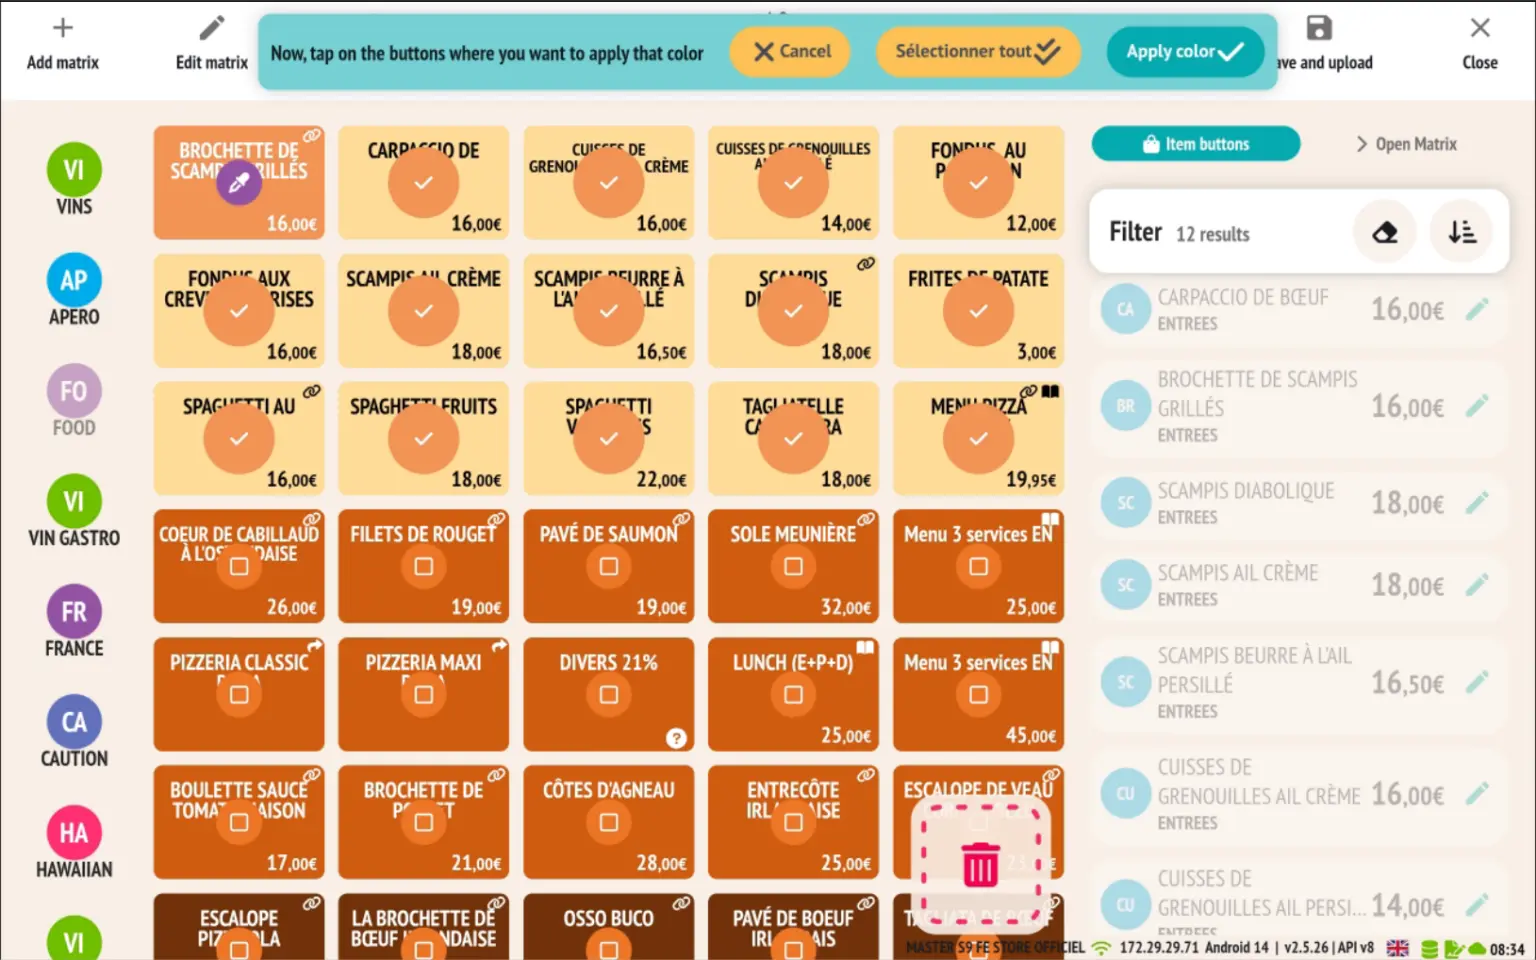
This feature saves time when customising your templates, while ensuring visual consistency.
Some additional features
- Automatic upload of PDF tickets to Azure Blob Storage
- RESTOMAX now allows you to automatically upload receipts in PDF format to an Azure Blob Storage container, providing centralised and secure storage of sales receipts.
- A future update to the Web Back Office will add the option to directly download PDF tickets associated with sales from the management interface.
This will facilitate monitoring, control and accounting export operations.
- Reservations: display of total, no-show and late cancellation counters in the customer file and on the modification page.
- Automatic opening of the Web Back Office with the current user.
- Now, when a user is logged into the application, the Web Back Office can open automatically with their login details, provided that they have a login and password configured for the back office.
- This feature allows smooth, re-entry-free access to the Back Office, while respecting each user's customised rights and access.
- Added the phone field to preparation slips for improved customer tracking.
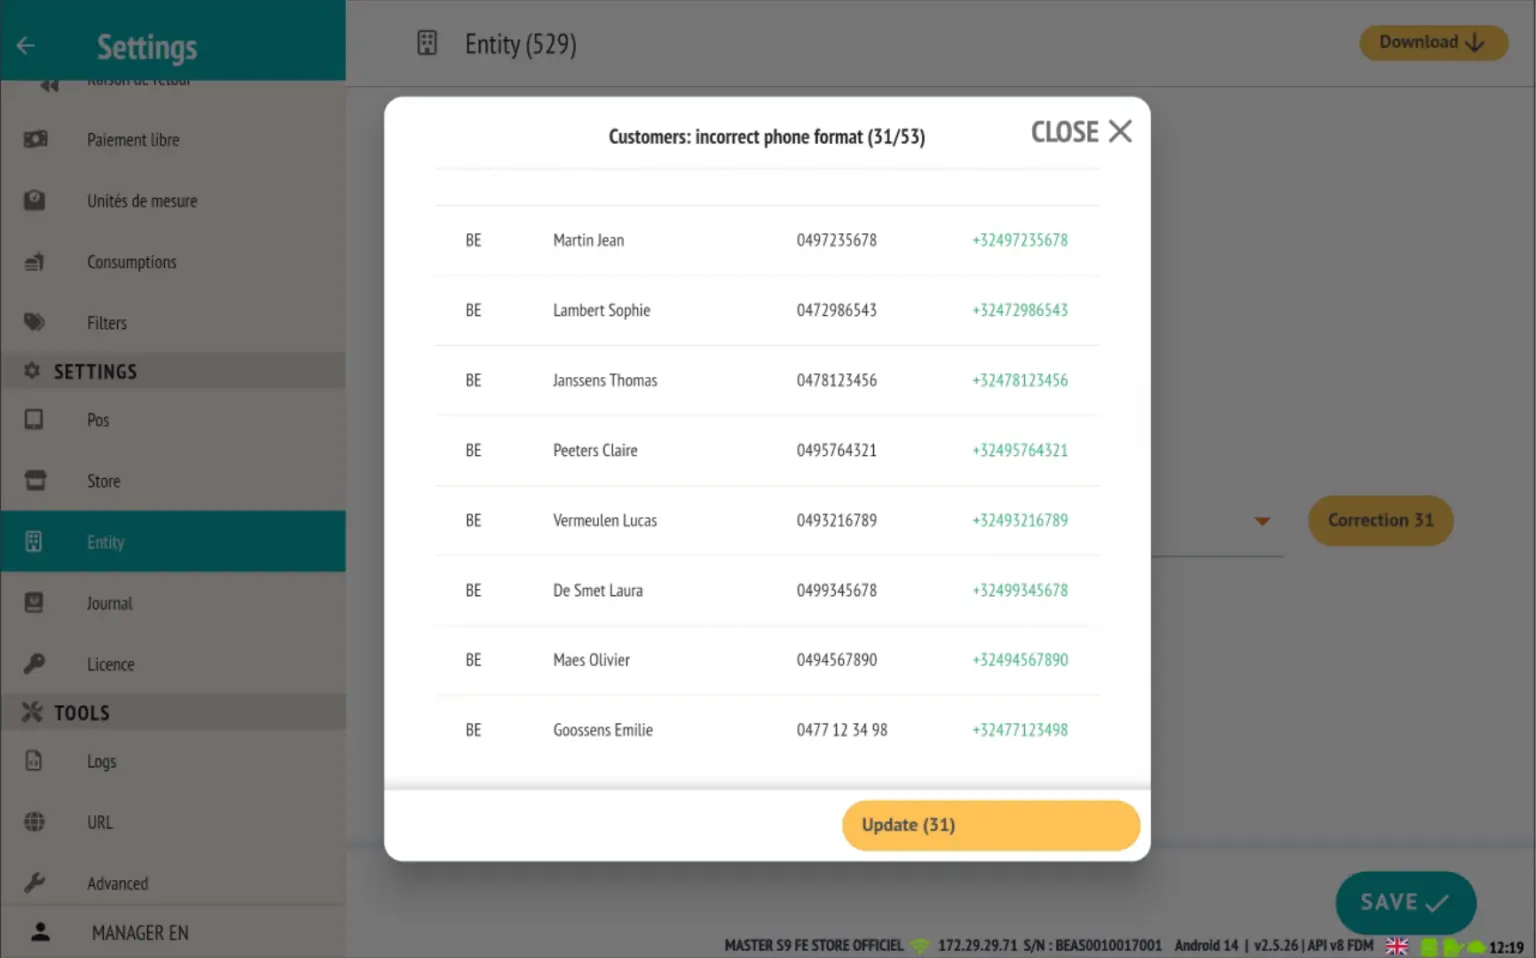
- Standardisation of telephone numbers in customer files.
A new option now allows you to automatically format phone numbers entered in customer records to ensure greater consistency and compatibility with booking tools.
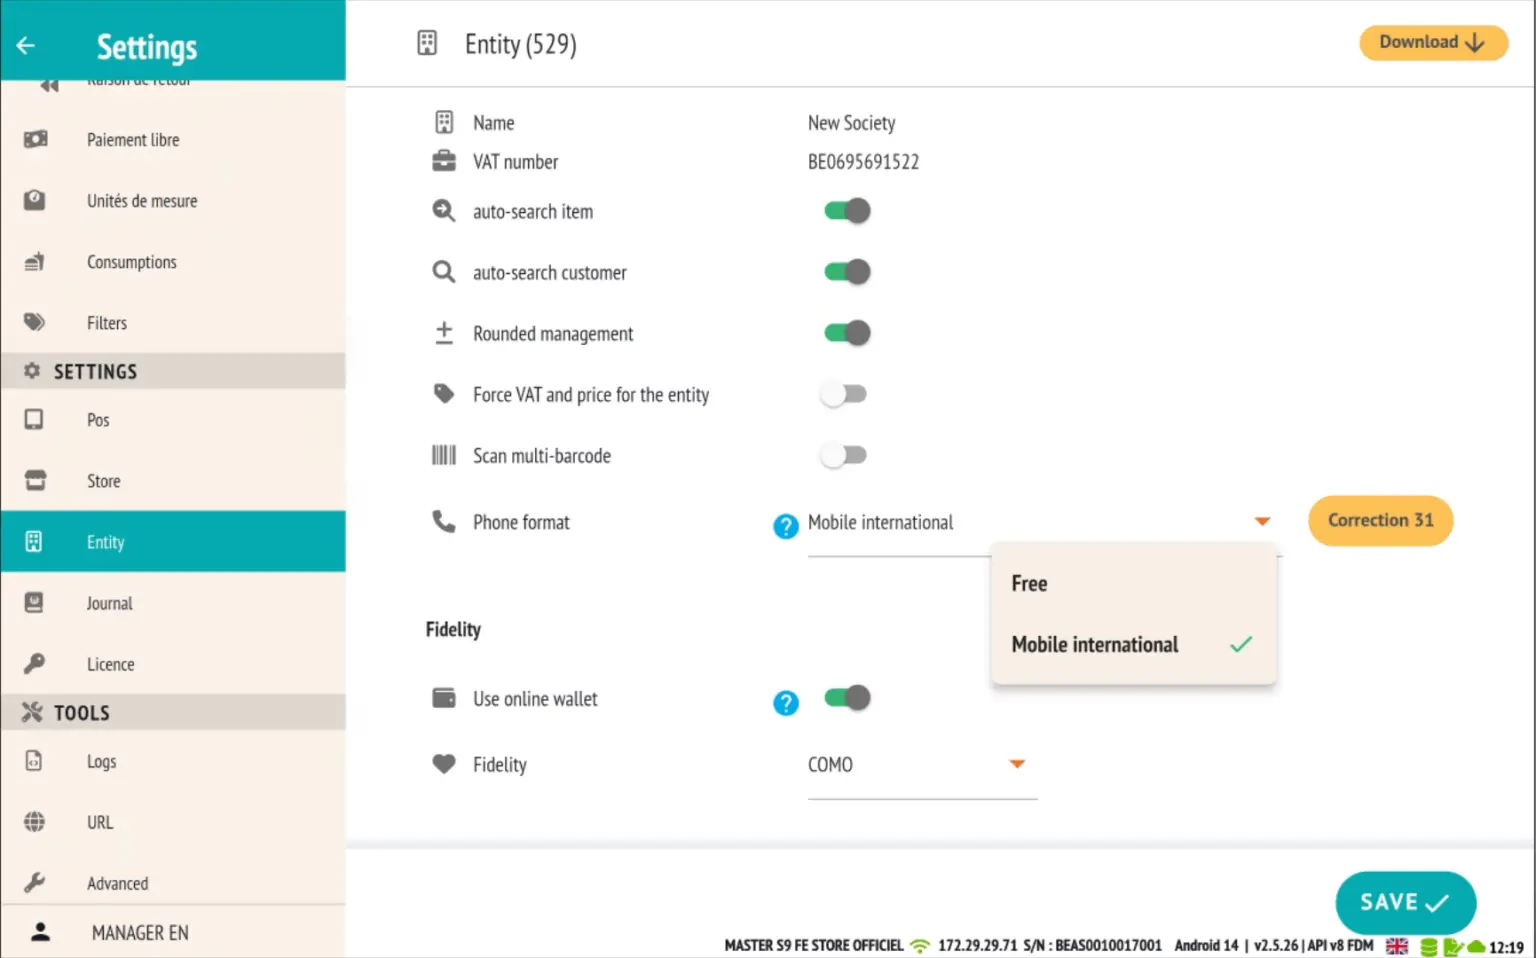
Two modes available:
- Free format
- The user can enter the number in any format they choose, without restriction.
- International mobile format (recommended)
- Numbers are automatically formatted according to international rules based on the customer's country (e.g. +33 for France, +32 for Belgium, etc.).
This setting improves restomax booking management, automatic customer recognition, and ensures data standardisation for export or integration with other services.
Automatic correction with one click
A dedicated button is available to automatically correct all non-compliant numbers already recorded and convert them to the selected international format.
This ensures a clean and immediately usable customer database for your booking or communication operations.