In this tutorial, we explain how to split a bill into several parts using different methods: by item, into equal parts, or by amount. This is particularly useful for large tables, allowing you to offer better customer service!
Settings
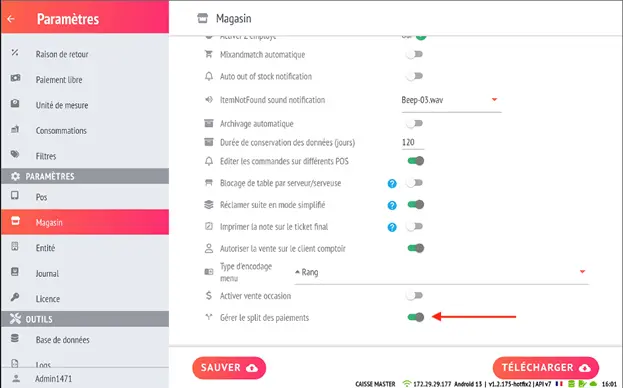
In order to use the split bill/separate bill option, you must enable split payment management in the settings in the store tab.
Using split bills
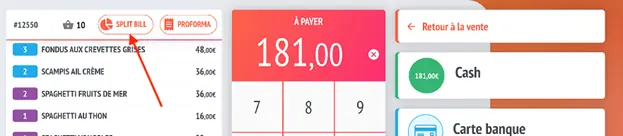
On your payment screen, when you press the SPLIT BILL button, the app will offer you three different options:
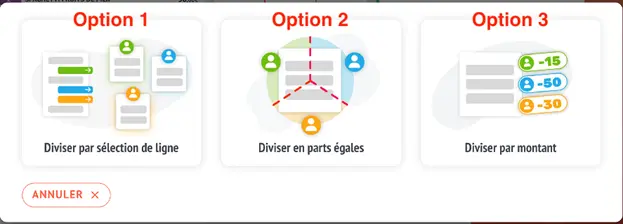
1. Division by line selection
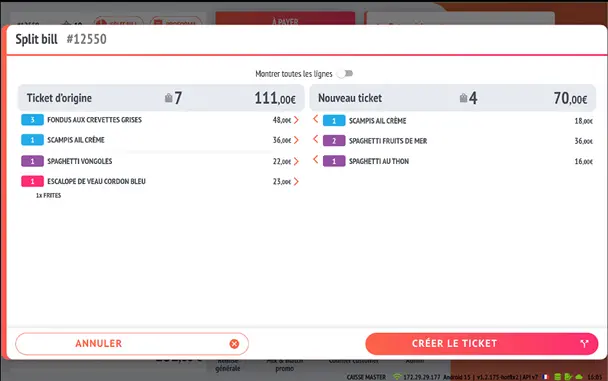
This option corresponds to the standard split bill with the choice of items on the original receipt to be transferred to the new receipt.
2. Division into equal shares
Select the division value according to the customer's request.
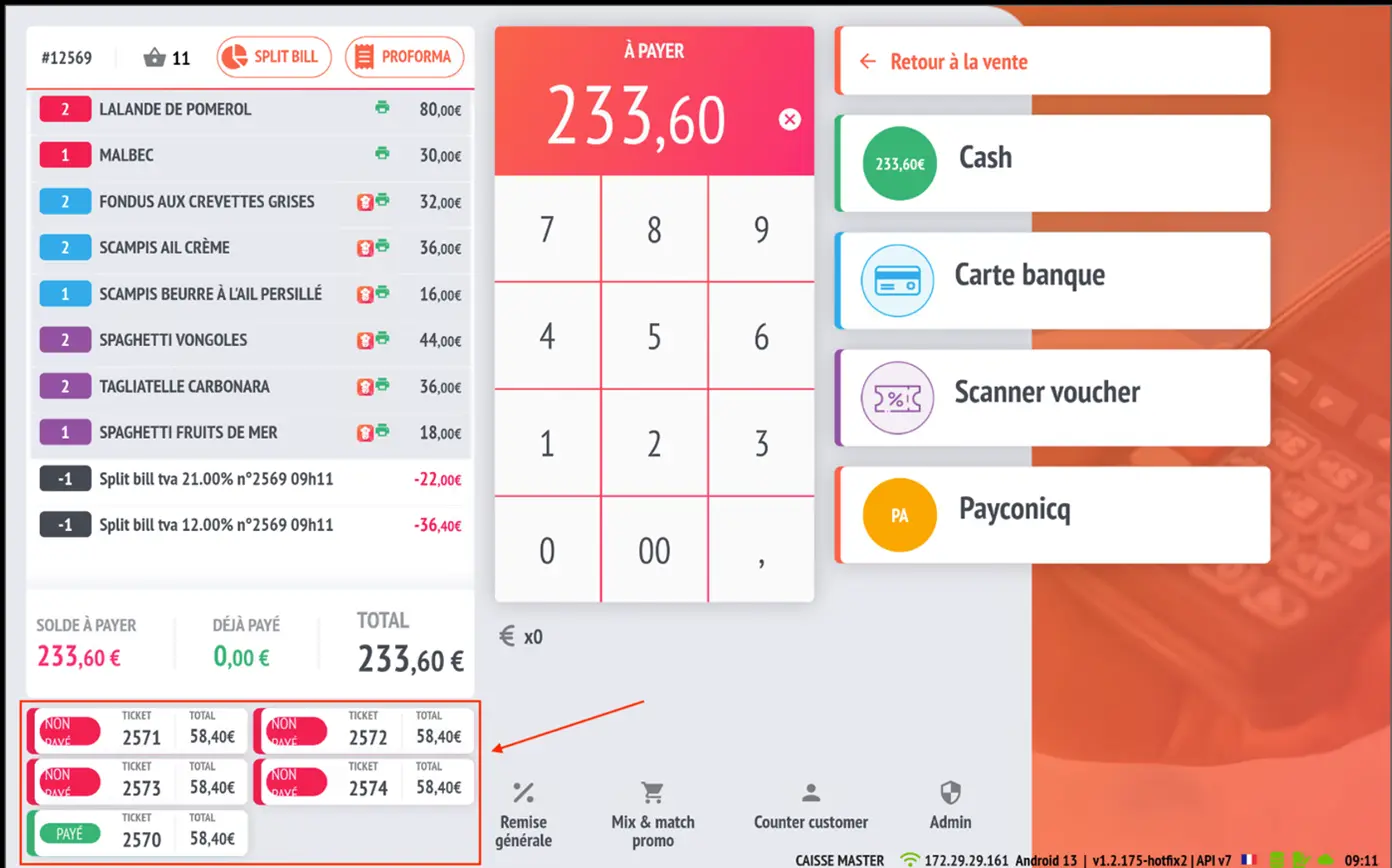
In the example below, the original ticket will be divided into 5 with a sales line ‘split bill VAT %’ for each VAT rate available on the original ticket.
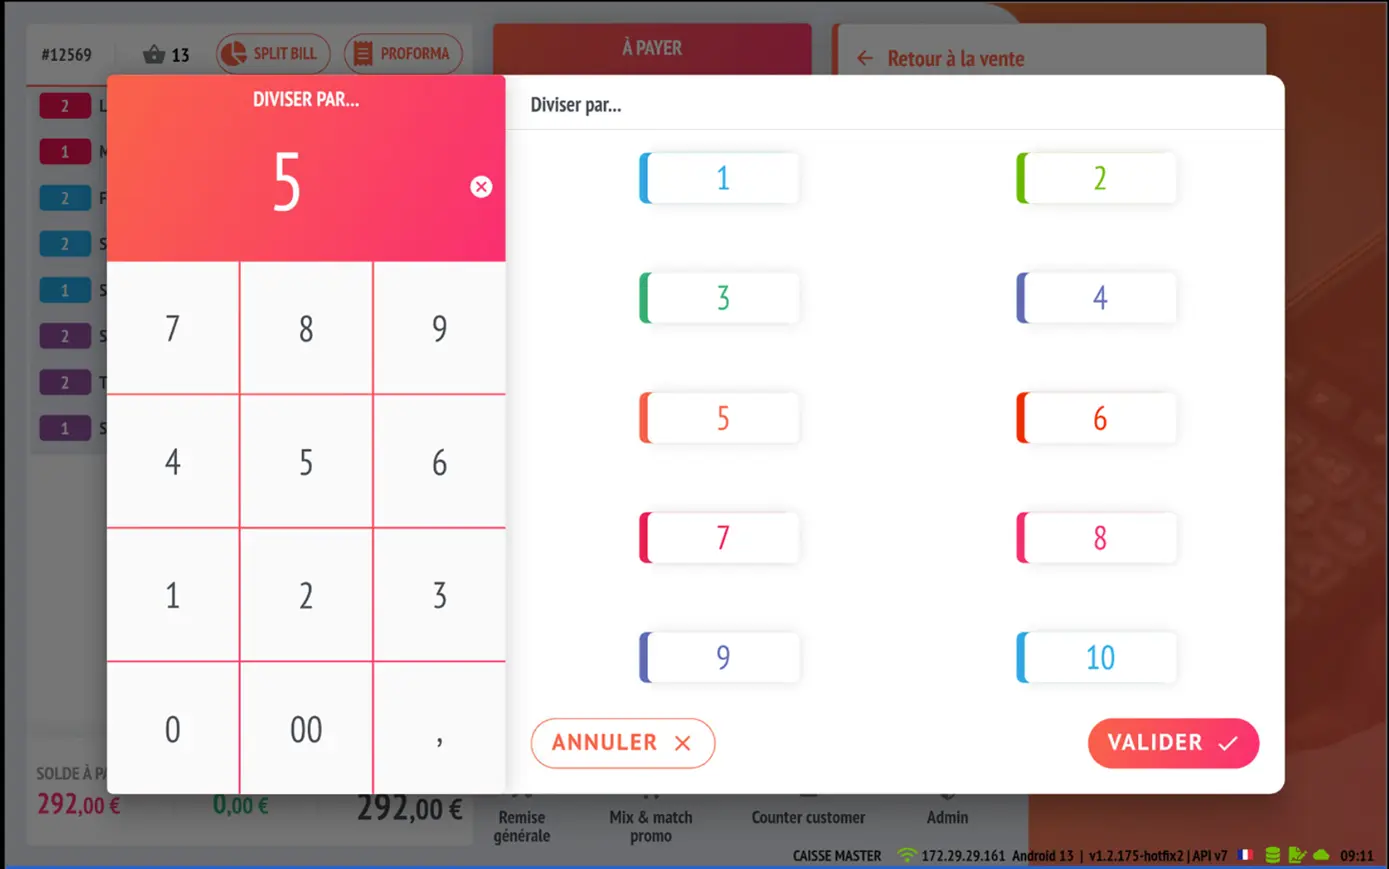
As shown in the example, we have two VAT rates on the original ticket. The first linked ticket will have a split bill line of 12% and a split bill line of 21%.
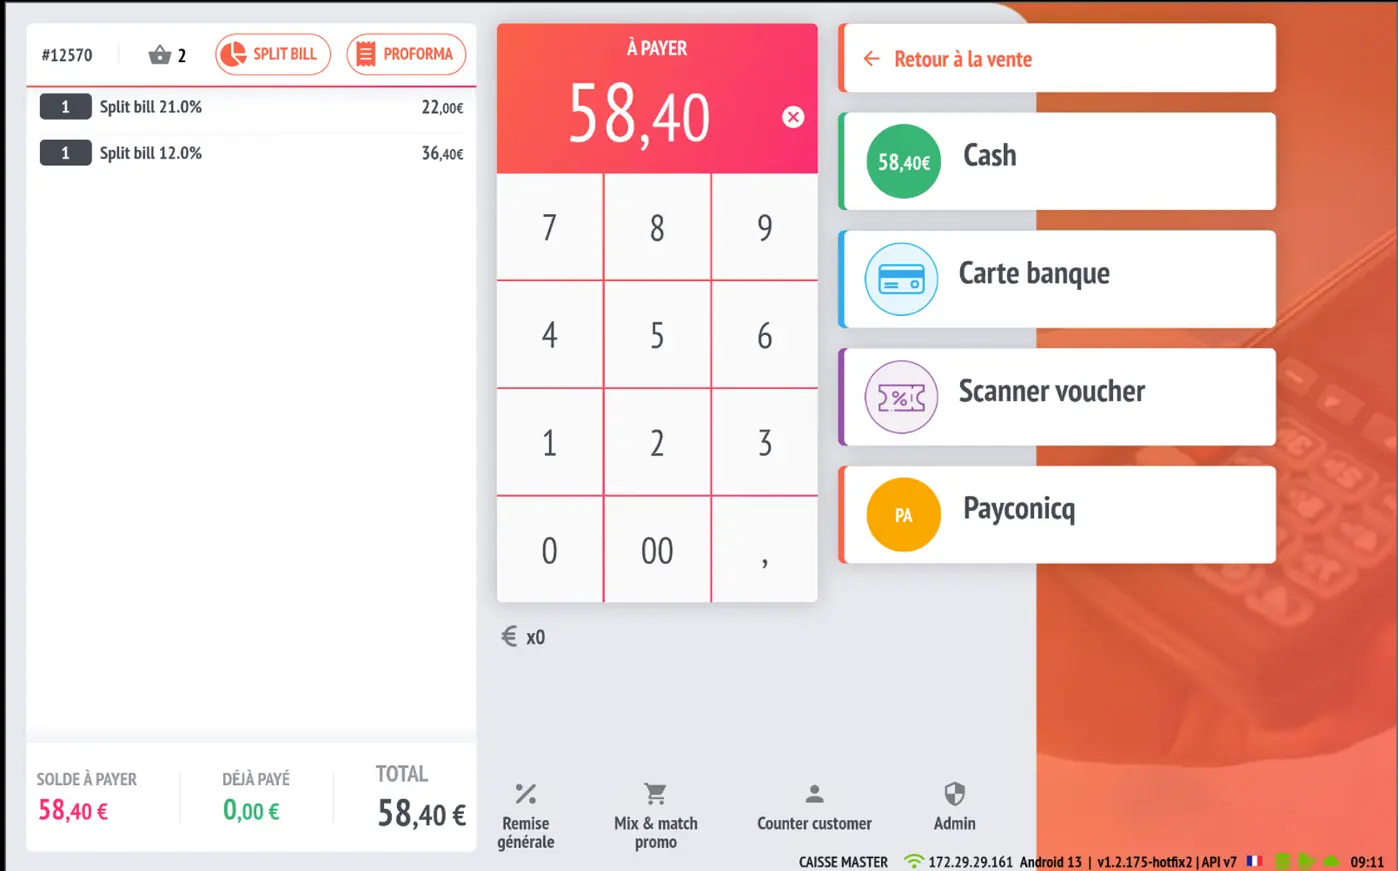
After each payment for the new ticket, the original ticket will be reopened with a summary of its linked tickets at the bottom left of the payment screen. It is possible to open a child ticket directly from the red tiles or by tapping on a payment method.
The app will offer to open the next outstanding ticket by tapping directly on a payment method.
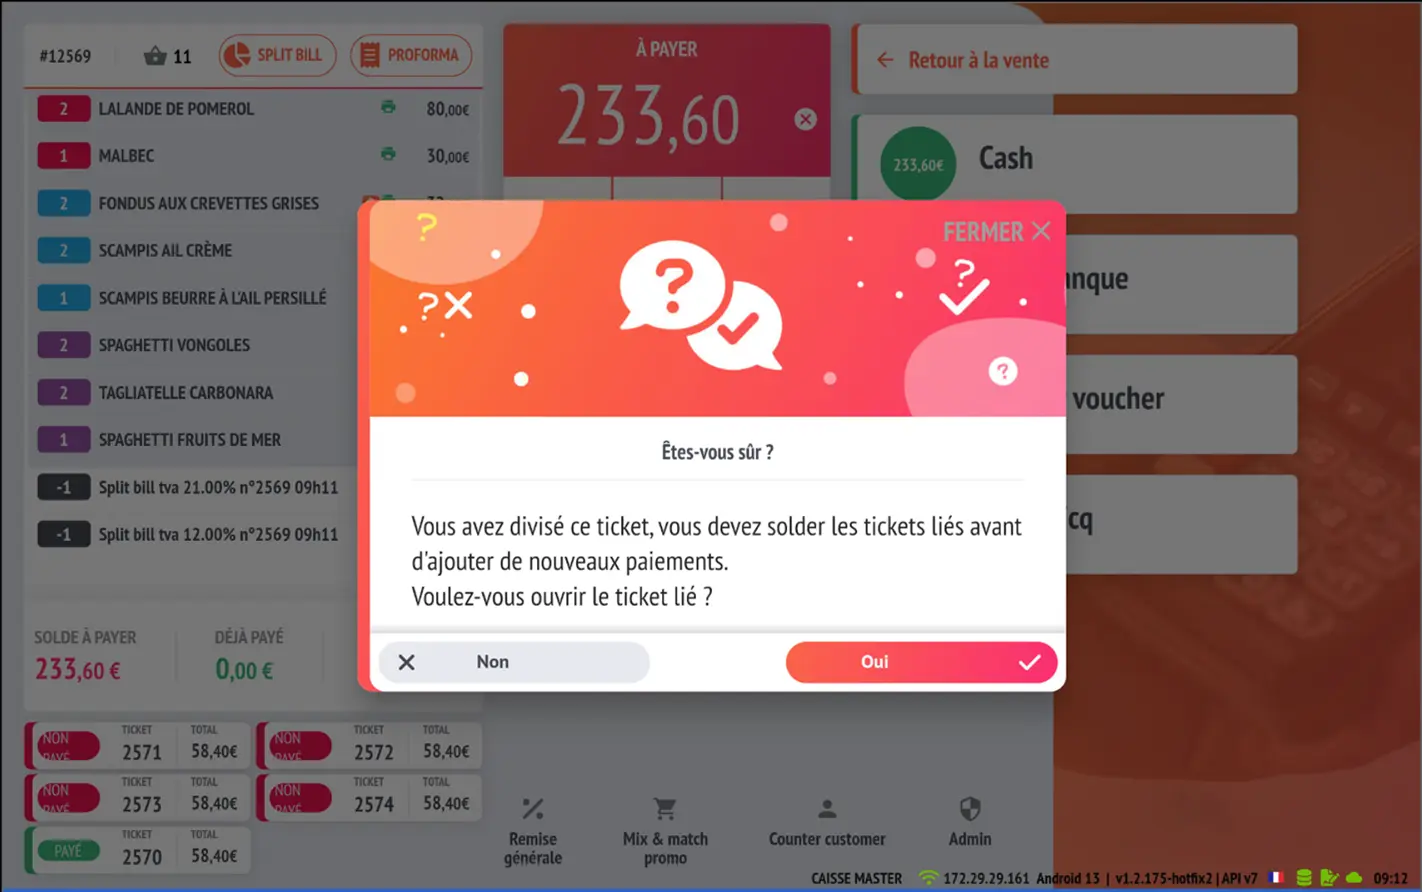
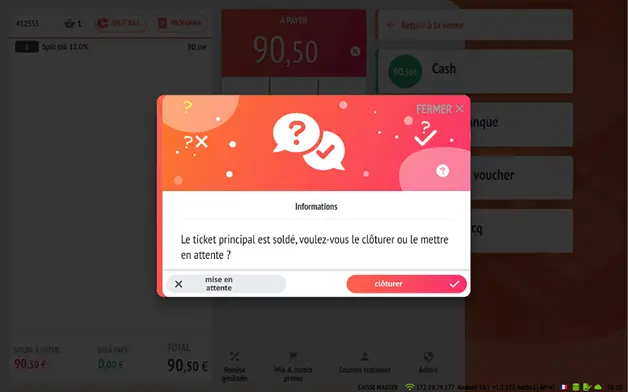
When you reach the last ticket, the application will ask you whether you want to close the original ticket.
If the user does not close all related tickets after the first split, it is possible to find the original ticket and its unclosed related tickets in the pending tickets. Related tickets will be identifiable by a small icon.
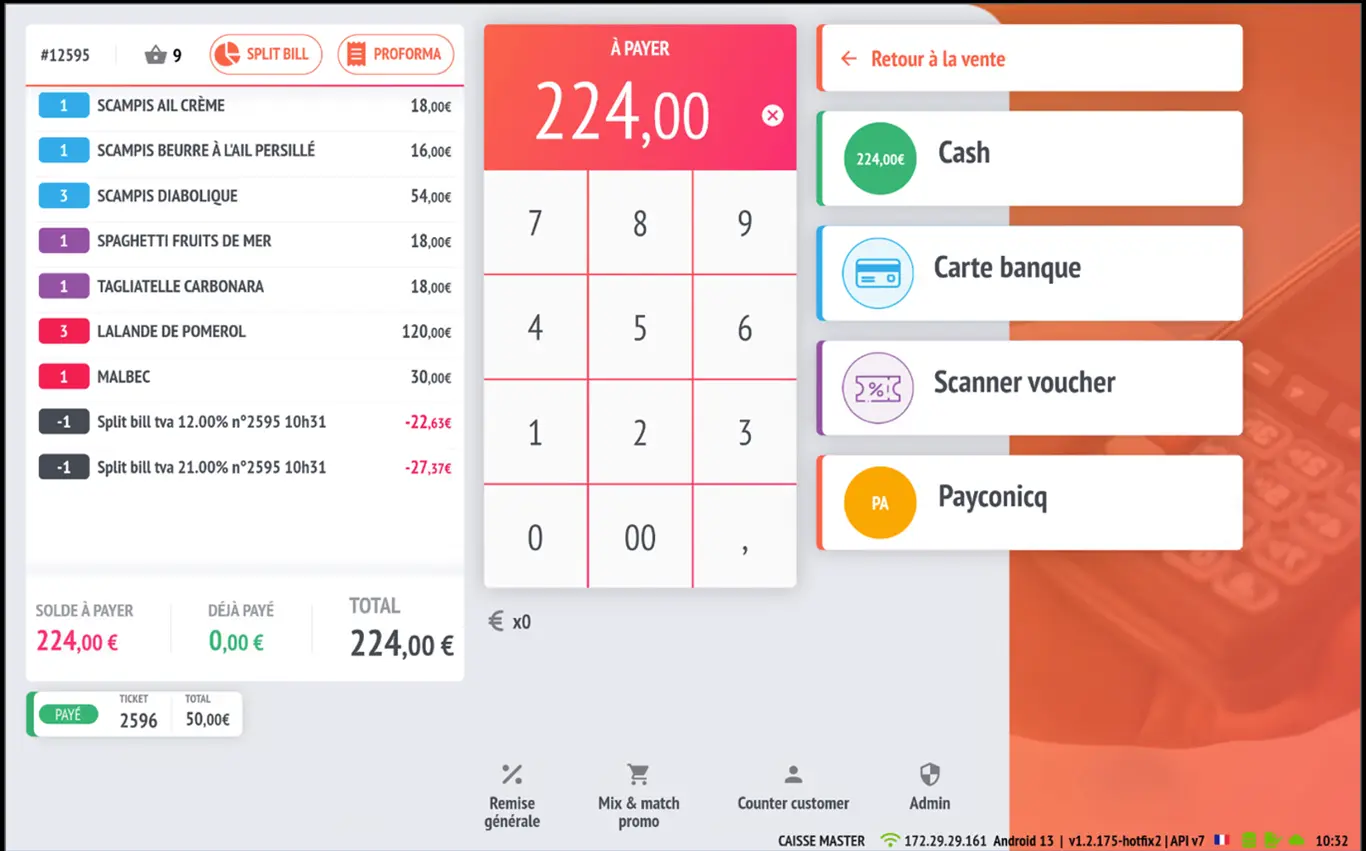
3. Division by amount
By selecting the ‘Split by amount’ option, the app will display a list of possible splits from 2 to 20 with the corresponding amounts on the right-hand side. You can either enter the exact amount you want to receive manually using the keypad on the left or select one of the pre-calculated results on the right.
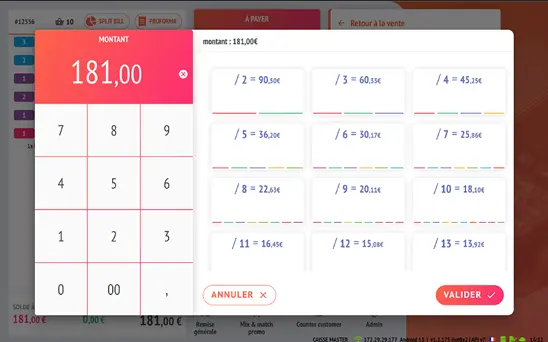
In the example below, a cash payment of €50 has been added (see the green ticket at the bottom left of the screen). The original ticket is still open with the remaining amount to be paid and the two split VAT lines corresponding to the previous action.
Manage Split Bills on your cash register
Hello, everyone!
Today, we will see how to split a bill into multiple payments using the Split Bill option available on your cash register.
The 3 available division modes
1. Division by line (selection of items)
Allows you to manually assign consumed items to each customer.
📝 Example :
- Customer 1: Four Seasons pizza + Schweppes
- Customer 2: Four cheese pizza + Ice Tea
→ Each selection generates a personalised ticket.
2. Division into equal shares
Allows you to divide the total bill into equal parts according to the number of guests.
📝 Example :
- Total : 100 €
- 4 people → 4 tickets worth €25 each, to be paid separately.
3. Division by amount
Each customer specifies the exact amount they wish to pay.
📝 Example :
- Client 1 : 50 €
- Client 2 : 25 €
- Client 3 : 25 €
- Client 4 : 0 € (invité)
→ Result: 3 tickets generated, one for each payment.
Configuration to enable (to unlock all modes)
By default, only division by line is active.
To activate the other two modes (equal parts and amount):
- Go to Settings → Stores
- Scroll down to the option Manage payment splits
- Activate it ✅
- Click Save
Result
- You can now offer 100% customised additions.
- Each division generates a separate ticket, visible at the bottom of the cash register screen.
- Once all splits have been paid, the system automatically closes the table.